Maintenance
CALIBRATION
installing the True RMS AC option, it may be necessary
only to perform Offset and Gain Calibration for the ac
functions, followed by High-Frequency
AC
Calibration.
But if the
A/D
Calibration is performed, it must be fol-
lowed by a complete Offset and Gain Calibration for all
functions and then by High-Frequency
AC
Calibration.
Some of the calibration calculations are complex and take
the
8840A
some time to execute. For example, when you
store the zero input during the Offset and Gain Calibration
for the
VDC function, it takes around
22
seconds before
the next prompt appears. (The
8840A
automatically uses
this input to calibrate the offset for all ranges.) While the
8840A
is executing
a
calibration step, it ignores all of the
front panel buttons and delays execution of dl remote
commands.
6-1
1.
INITIAL
PROCEDURE
Always begin the calibration procedure as follows:
Allow the
8840A
to stabilize in an environment with
ambient temperature of
18°C
to
28OC
and relative
humidity less than
75%.
Turn
the
8840A
on and allow it to warm up for at
least
1
hour.
Enable the calibration mode by pressing the
CAL
ENABLE switch with a small screw-driver or other
suitable instrument.
(The
CAL ENABLE switch is
located on the right side of the display and is normally
covered by a calibration seal.)
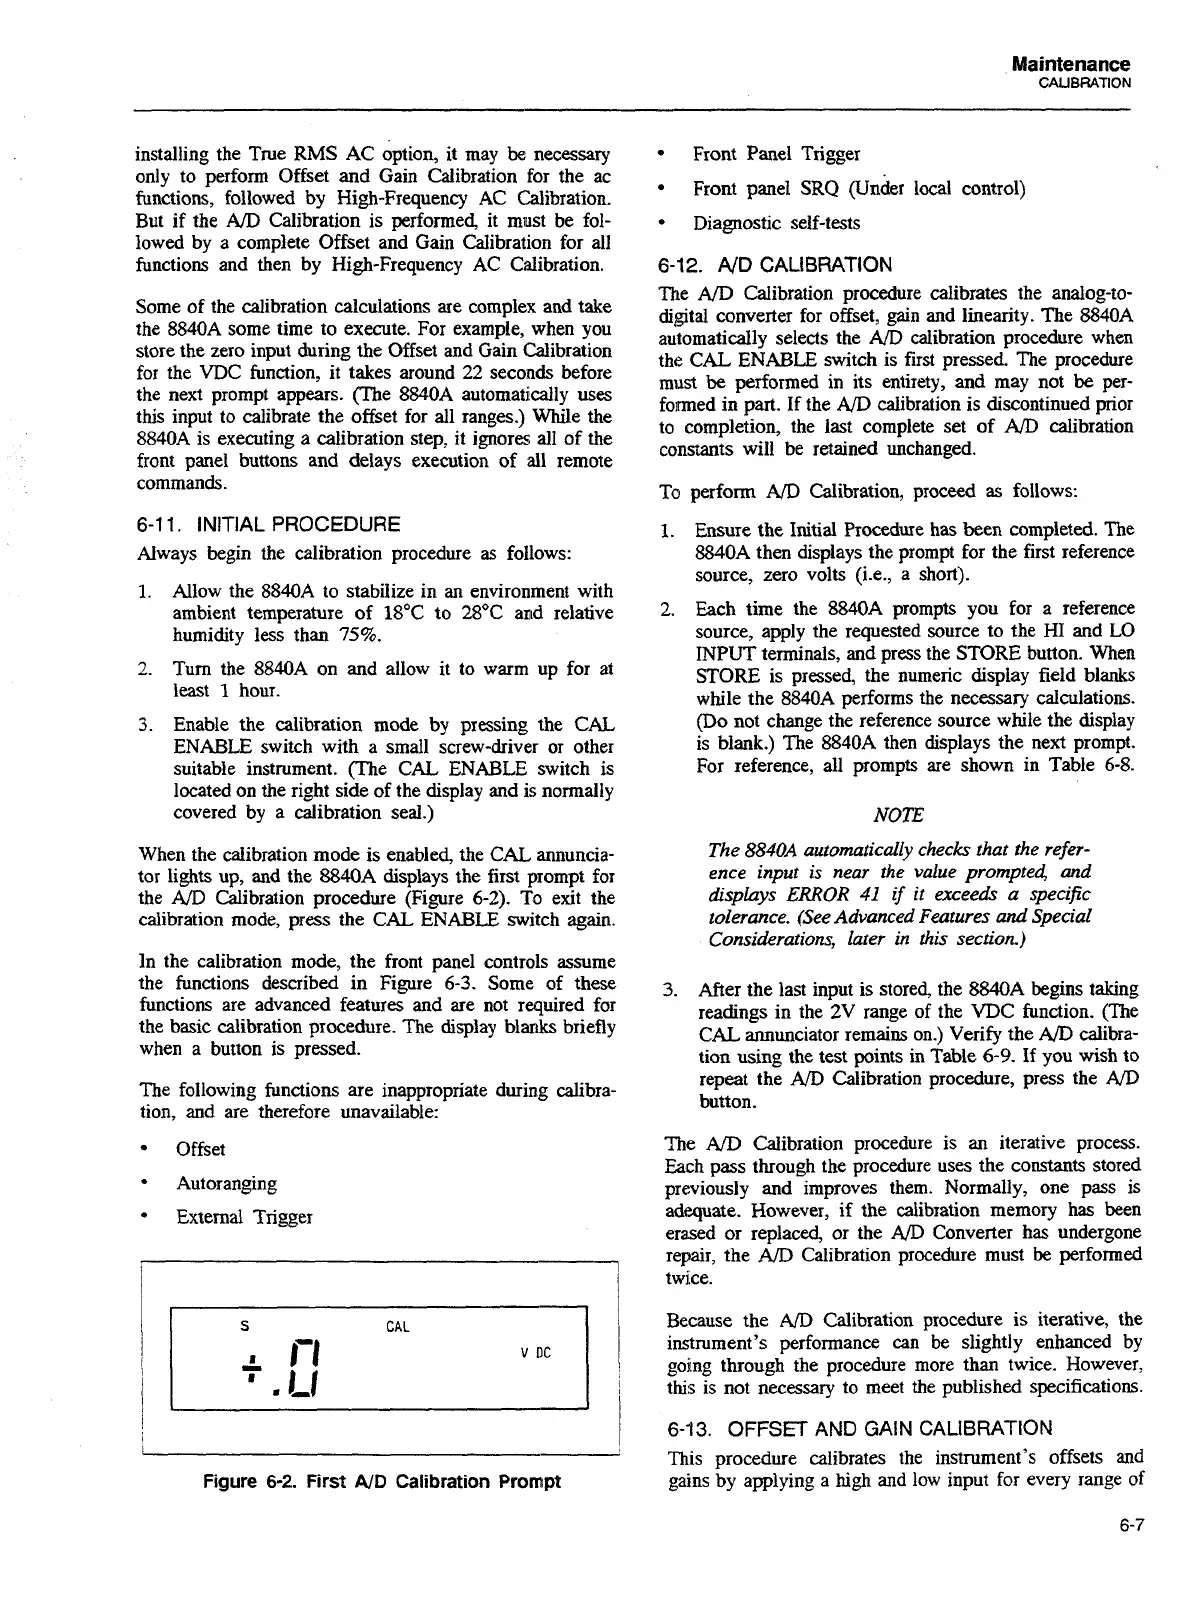
When the calibration mode is enabled, the
CAL
annuncia-
tor lights up, and the
8840A
displays the first prompt for
the
A/D
Calibration procedure (Figure
6-2).
To exit the
calibration mode, press the
CAL
ENABLE switch again.
In the calibration mode, the front panel controls assume
the functions described in Figure
6-3.
Some of these
functions are advanced features and are not required for
the basic calibration procedure. The display blanks briefly
when a button
is
pressed.
The following functions are inappropriate during calibra-
tion, and are therefore unavailable:
Offset
-
Autoranging
External Trigger
-
--
--
Figure
6-2.
First
ND
Calibration
Prompt
Front Panel Trigger
Front panel
SRQ
(under local control)
Diagnostic self-tests
6-12.
A/D
CALIBRATION
The
A/D
Calibration procedure calibrates the analog-to-
digital converter for offset, gain and linearity. The
8840A
automatically selects the
A/D
calibration procedure when
the CAL
ENABLE
switch is first pressed. The procedure
must
be
performed in its entirety, and may not
be
per-
formed in part. If the
AID
calibration is discontinued prior
to completion, the last complete set of
AD
calibration
constants will be retained unchanged.
perform
AD
Calibration, proceed
as
follows:
Ensure the Initial Procedure has been completed. The
8840A then displays the prompt for the first reference
source, zero volts (i-e., a short).
Each time the
8840A prompts you for a reference
source, apply the requested source to the HI
and
LO
INPUT
terminals, and press the STORE button. When
STORE is pressed, the numeric display field blanks
while the
8840A
performs the necessary calculations.
(Do not change the reference source while the display
is blank.) The
8840A
then displays the next prompt.
For reference, all prompts are shown in Table
6-8.
NOTE
The
8840A
automatically checks that the refer-
ence input
is
near
the
value prompted,
and
displays
ERROR
41
if
it exceeds
a
specific
tolerance. (See Advanced Features
and
Special
Considerations, later in
this
section.)
After the last input is stored, the 8840A begins taking
readings in the
2V
range of the VDC function. (The
CAL annunciator remains on.) Verify the
A/D
calibra-
tion using the test points in Table
6-9.
If you wish to
repeat the
AID
Calibration procedure, press the AID
button.
The
A/D
Calibration procedure is an iterative process.
Each pass through the procedure uses the constants stored
previously and improves them. Normally, one pass is
adexpate. However, if the calibration memory
has
been
erased or replaced, or the
AD
Converter has undergone
repair, the
AID
Calibration procedure must
be
performed
tw~ce.
Because the
A/D
Calibration procedure is iterative, the
instrument's performance can be slightly enhanced by
going through the procedure more than twice. However,
this is not necessary to meet the published specifications.
6-13.
OFFSET
AND
GAIN
CALIBRATION
This procedure calibrates the instrument's offsets and
gains by applying
a
high
and low input for every range of
Artisan Technology Group - Quality Instrumentation ... Guaranteed | (888) 88-SOURCE | www.artisantg.com
 Loading...