---------------SECTION
B
10 HOUR/DAILY SERVICE (continued)
l1
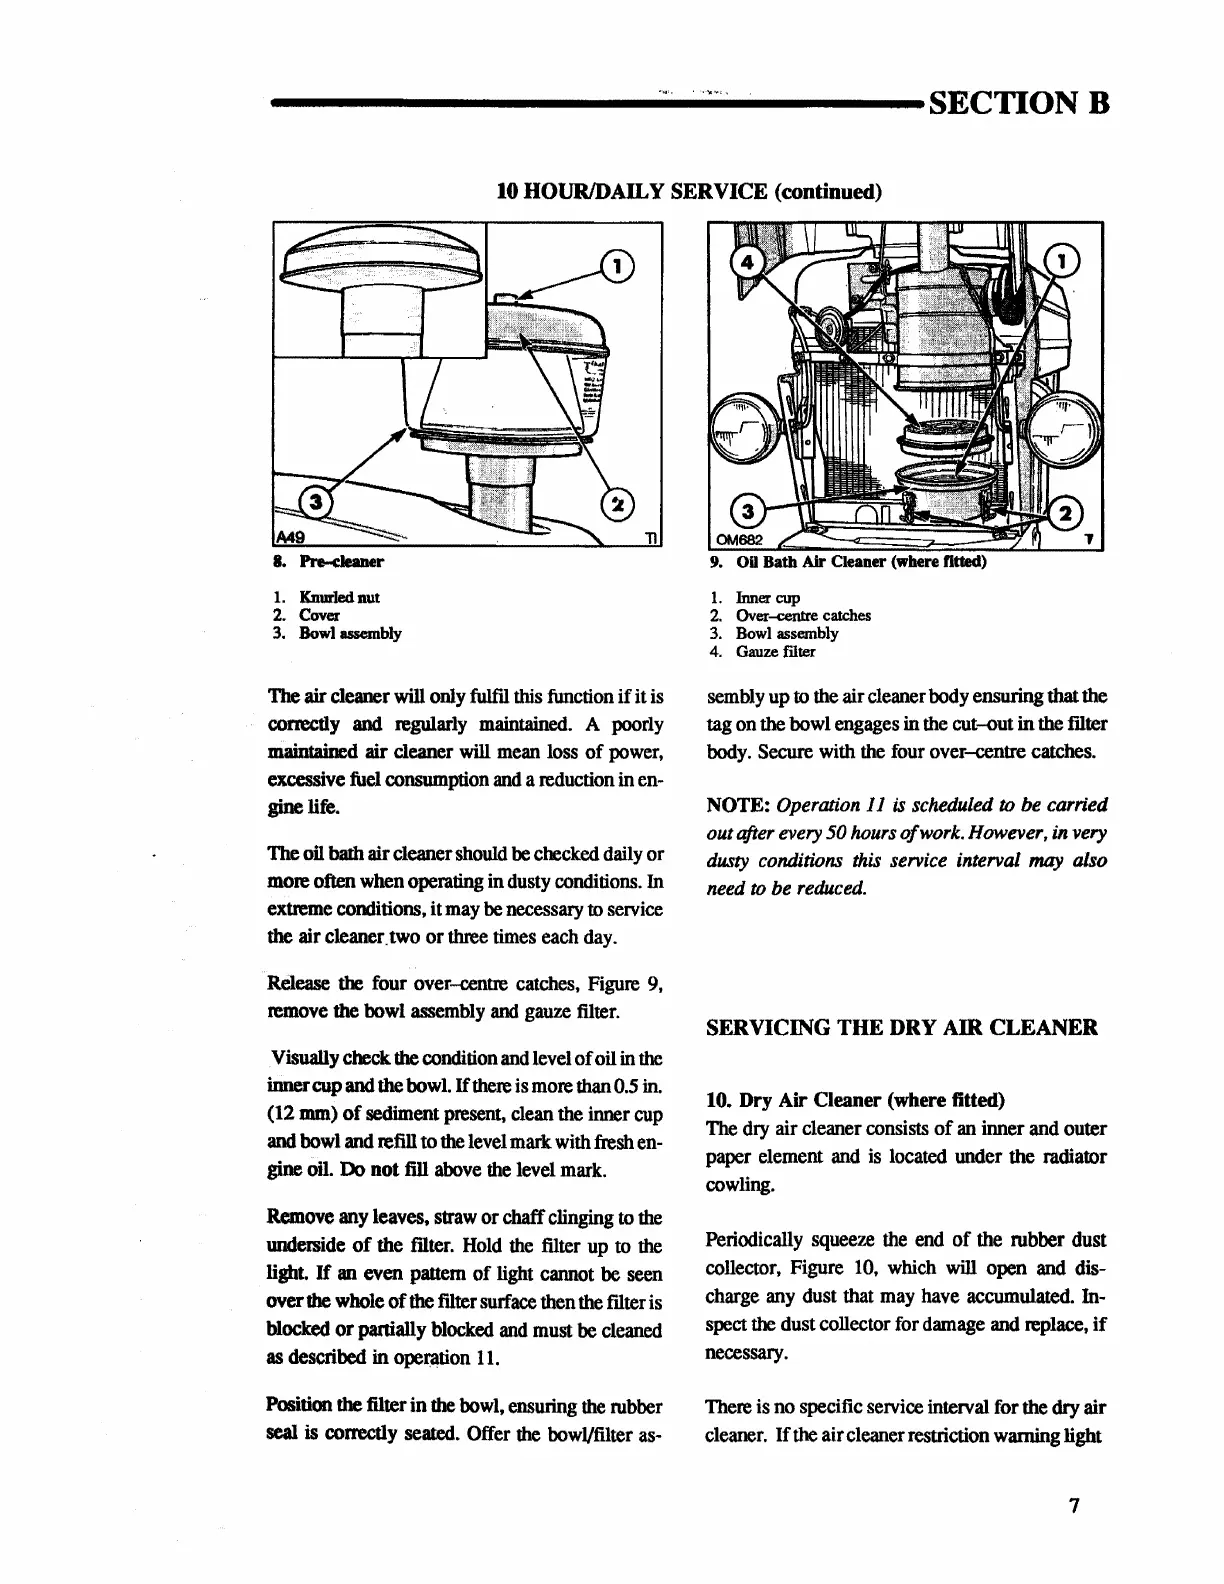
Pre-cleaner
1.
Knmled
nut
2. Cover
3. Bowl assembly
The
air
cleaner will
only
fulfil
this
function
if it
is
cormcdy
and
regularly
maintained.
A
poorly
maintained air cleaner
will
mean
loss
of
power,
excessive
fuel
consumption
and
a
reduction
in
en-
gine life.
The
oil bath air cleaner
should
be
checked
daily
or
more
often
when
operating
in
dusty
conditions.
In
extreme
conditions, it
may
be
necessary
to seivice
the
air cleaner.two or
three
times
each
day.
Release the four over-centre
catches,
Figure
9,
remove
the
bowl
assembly
and
gauze
filter.
Visually check the
condition
and
level
of oil in the
inner cup
and
the
bowl.
If
there
is
more
than
0.5
in.
(12
mm)
of
sediment
present,
clean
the
inner
cup
and
bowl
and
refill
to
the
level
mark
with
fresh
en-
gine
oil. Do
not
fill
above
the
level
mark.
Remove
any
leaves,
straw
or chaff
clinging
to
the
underside
of
the
filter.
Hold
the
filter
up
to
the
light. If
an
even pattern of light cannot
be
seen
over
the
whole
of the
filter
surface
then
the
filter
is
blocked
or partially
blocked
and
must
be
cleaned
as
described
in
opeJ'.8tiOn
11.
Position the filter in the
bowl,
ensuring
the
rubber
seal is correctly seated.
Offer
the
bowVfilter
as-
OU
Bath Air Cleaner (where fitted)
1.
Inner
cup
2.
Over-centre catches
3. Bowl assembly
4. Gauze filter
sembly
up
to
the
air cleaner
body
ensuring that the
tag
on
the
bowl
engages
in
the
cut-out
in
the ftlter
body.
Secure
with
the
four
over-centte catches.
NOTE:
Operation
11
is
scheduled
to
be carried
out
after
every
50
hours
of
work.
However,
in
very
dusty
conditions
this
service
interval
may
also
need
to
be
reduced.
SERVICING
THE
DRY AIR CLEANER
10. Dry Air Cleaner (where titted)
The
dcy
air cleaner
consists
of
an
inner
and
outer
paper element
and
is
located
under the radiator
cowling.
Periodically
squeeze
the
end
of the rubber dust
collector, Figure
10,
which
will open
and
dis-
charge
any
dust
that
may
have
accumulated.
In-
spect
the dust collector
for
damage
and
replace,
if
necessacy.
There
is
no
specific seivice inteival for the dry air
cleaner.
H
the
air cleaner restriction warning light
7
 Loading...