LUBRICATION AND
MAINTENAN·c·E'~._
___
_
GENERAL MAINTENANCE
The
following
pictures
and
text
detail
service or
adjustment procedures that
are
not
required
to
be
carried out on a routine
basis.
72. Engine
Coolant
In
the
event of a loss of
coolant,
for.
example
a
leaking
hose
or gasket, it
is
important
to
firstly,
correct
the
leak
and
secondly,
top
up
with
a pre-
mixed
solution of
water,
antifreeze
and
inhibitor
of
the
correct proportions.
Ford
New
Holland
recommends
that
a solution of
50%
clean water and
50%
antifreeze,
no
matter
what
degree
of
freeze
protection is
required,
be
pre-mixed with
5%
inhibitor
and
used
as
a top-up
solution. The inhibitor
is
available
from
Ford
New
Holland dealers under
the
part
number
FW-15.
It
is supplied in 16 fl.
oz.
(473
ml)
bottles
and
when
this
amount
is
mixed
with
2.4 U.S.
Gals.
(2.0
Imp.
Gals - 9.0
litres)
of water/antifreeze
solution it
will
provide
the
correct inhibitor
charge.
Always
keep
this pre-mixed
solution
in
a specially
marked container for
top-up
purposes
and
always
investigate
the
cause
of
leakage
and
repair
prop-
erly. Do not
use
anti-leak
additives.
A WARNING: Inhibitor
solution
is
irri-
tating to
eyes
and
skin.
It
contains
buff-
ered potassium hydroxide.
• Avoid contact with
eyes
or prolonged and
re-
peated skin contact.
•
Wear
protective eyewear
when
using.
•
In
case
of
contact with
eyes,
flush
with
water
for
15
minutes and obtain
medical
attention.
•
Wash
skin with
soap
and water after
use.
•
Keep
out
of
reach
of
children.
30
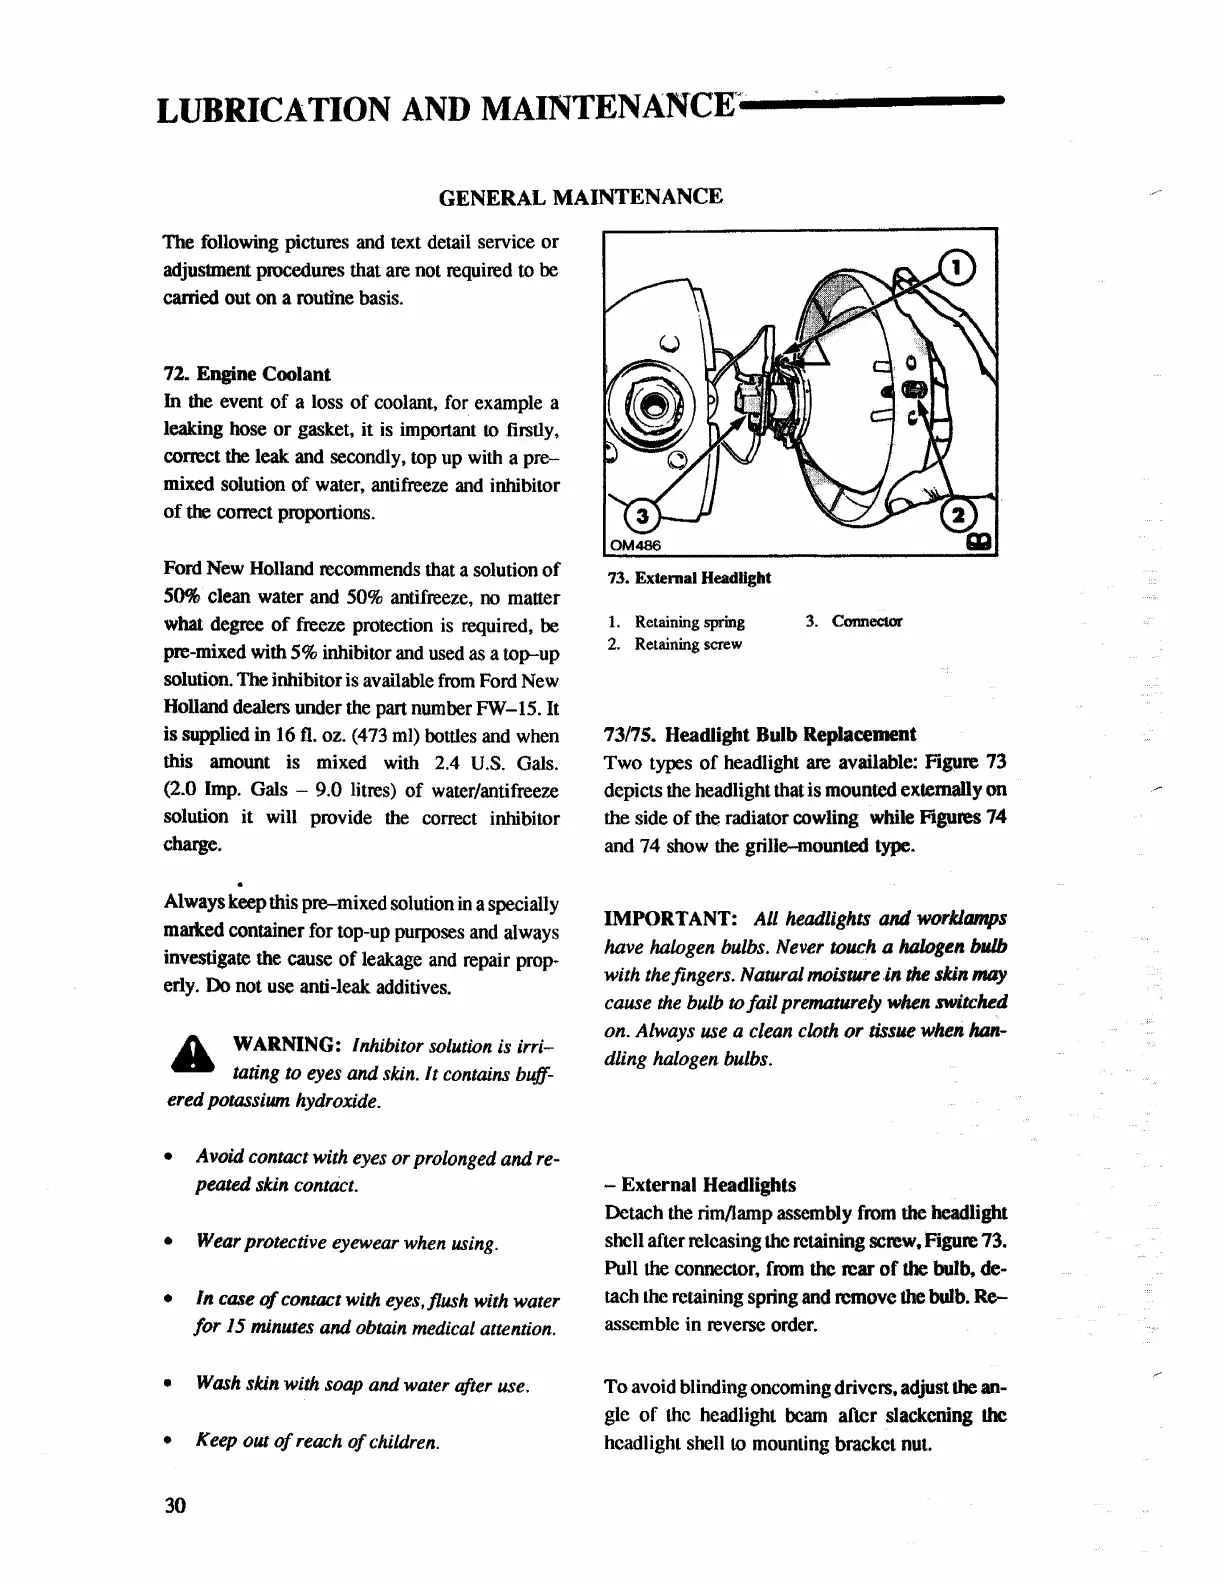
73. External Headlight
1.
Retaining spring
3.
Cmmector
2.
Retaining screw
73/75. Headlight Bulb Replacement
Two
types
of
headlight
are
available: Fipare
73
depicts
the
headlight that
is
mounted externally on
the side
of
the
radiator cowling while
Figures
74
and
74
show
the
grille-mounted
type.
IMPORTANT: All headlights
and
worklamps
have halogen bulbs.
Never
touch a halogen bulb
with the fingers. Natural moisture
.in
the
skin
may
cause
the
bulb to fail prematurely when switched
on. Always
use
a
clean
cloth
or
tissue
when han-
dling halogen bulbs.
- External Headlights
Detach
the
rim/lamp assembly
from
the
headlight
shell after releasing the
retaining
screw,
Figure
73.
Pull
the
connector,
from
the rear
of
the
bulb, de-
tach
the
retaining spring
and
remove
the
bulb.
Re-
assemble in reverse
order.
To
avoid
blinding oncoming drivers, adjust the an-
gle
of
the headlight beam after slackening lhc
headlight shell to
mounting
bracket
nut.
 Loading...