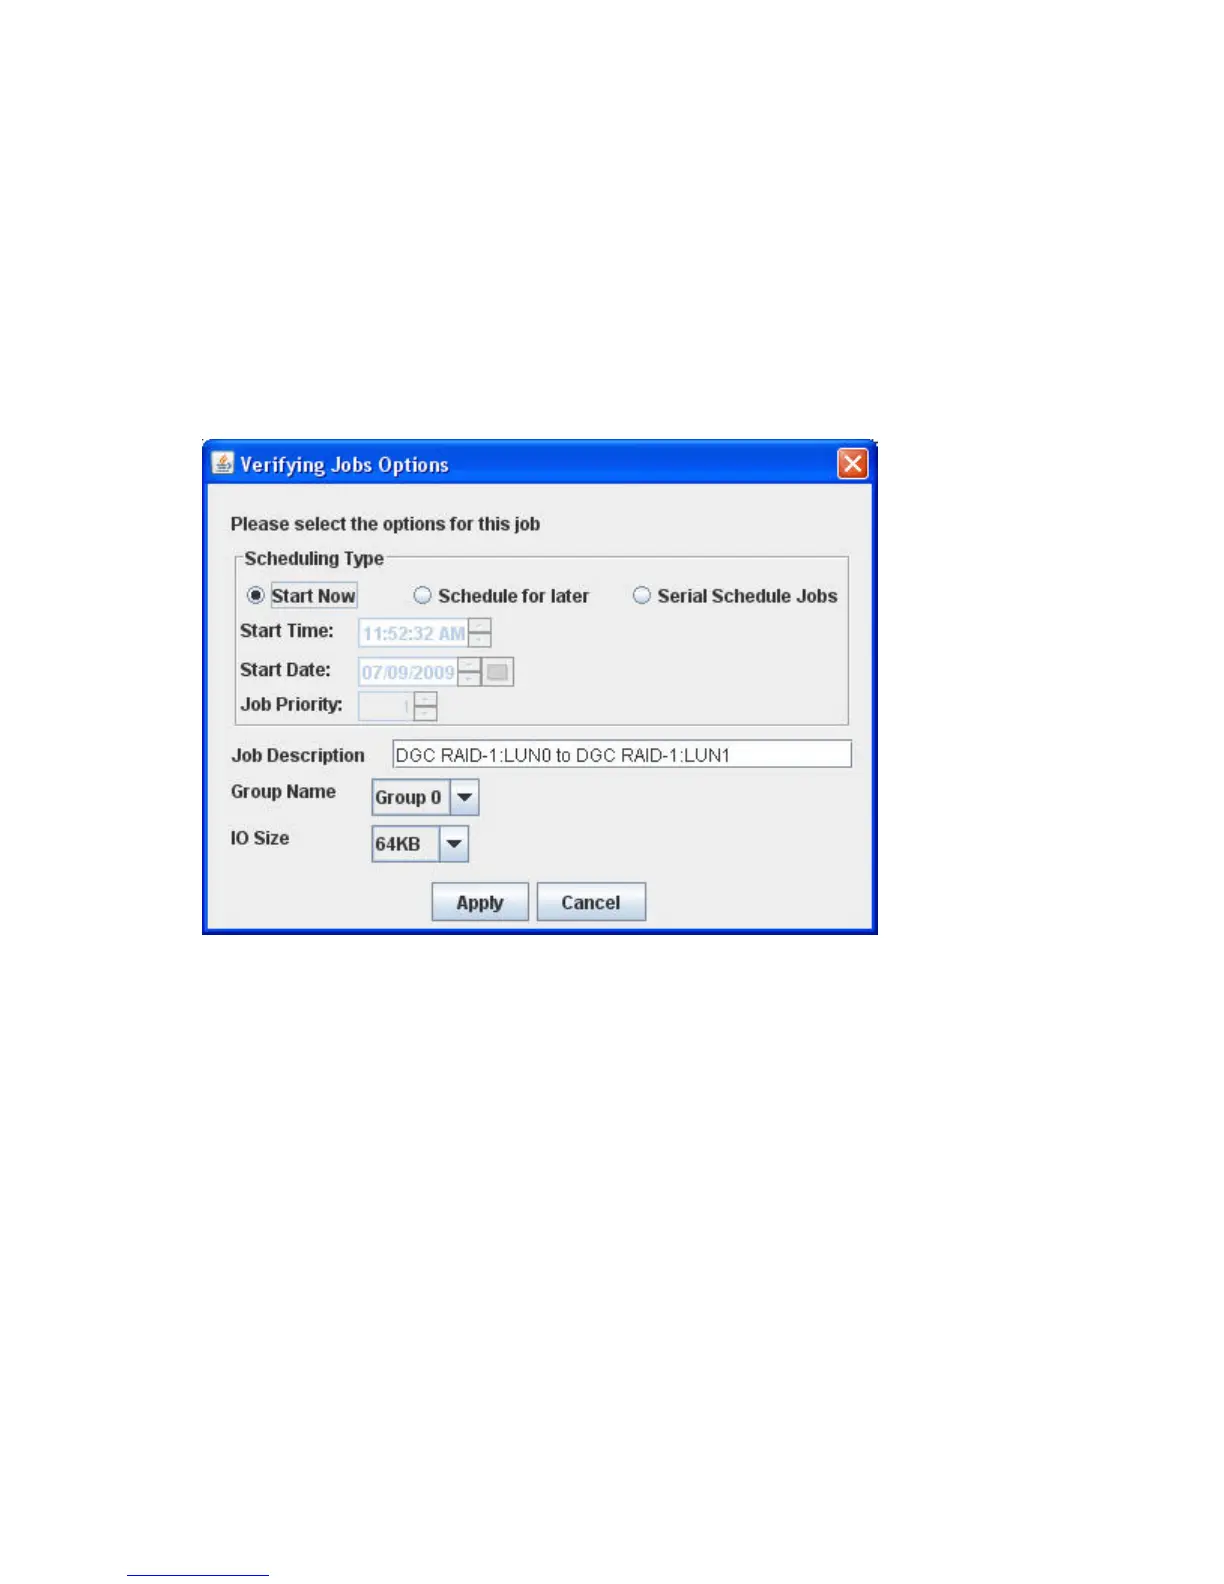
5. In the Data Migration Jobs Options dialog box (see Figure 96), specify the job attributes as
follows:
1. Under Scheduling Type, select one of the following:
• Click Start Now to start the job immediately.
• Click Schedule for Later, and then enter a Start Time and Start Date.
• Click Serial Schedule Jobs, and then assign a priority (1–256) in the Job Priority box,
where a lower value indicates that the job is scheduled earlier than jobs configured with
higher values. For details on Serial Schedule Jobs, see “Starting serial scheduled
jobs” on page 271.
2. In the Group Name box, select a job group name from the list. The group name makes it
easier to view the job status on a group basis.
3. In the IO Size box, either select one of the default I/O sizes, or enter a custom value.
Figure 96 Data migration jobs: individual
.
6. To save the data migration job options, click Apply or, to abandon changes to this data migration
job, click Cancel.
Scheduling an individual data migration job in the CLI
Follow these steps to schedule an individual data migration job in the CLI. (To perform this operation
in the mpx Manager instead, see “Scheduling an individual data migration job in the CLI” on page 266.)
1. Log in to the MPX200 as guest and enter the password.
2. Open a miguser session using the following command (the default password for misguser is
migration):
miguser start -p migration
3. To create a migration job, enter the following command:
migration add
Offline Data Migration266
 Loading...