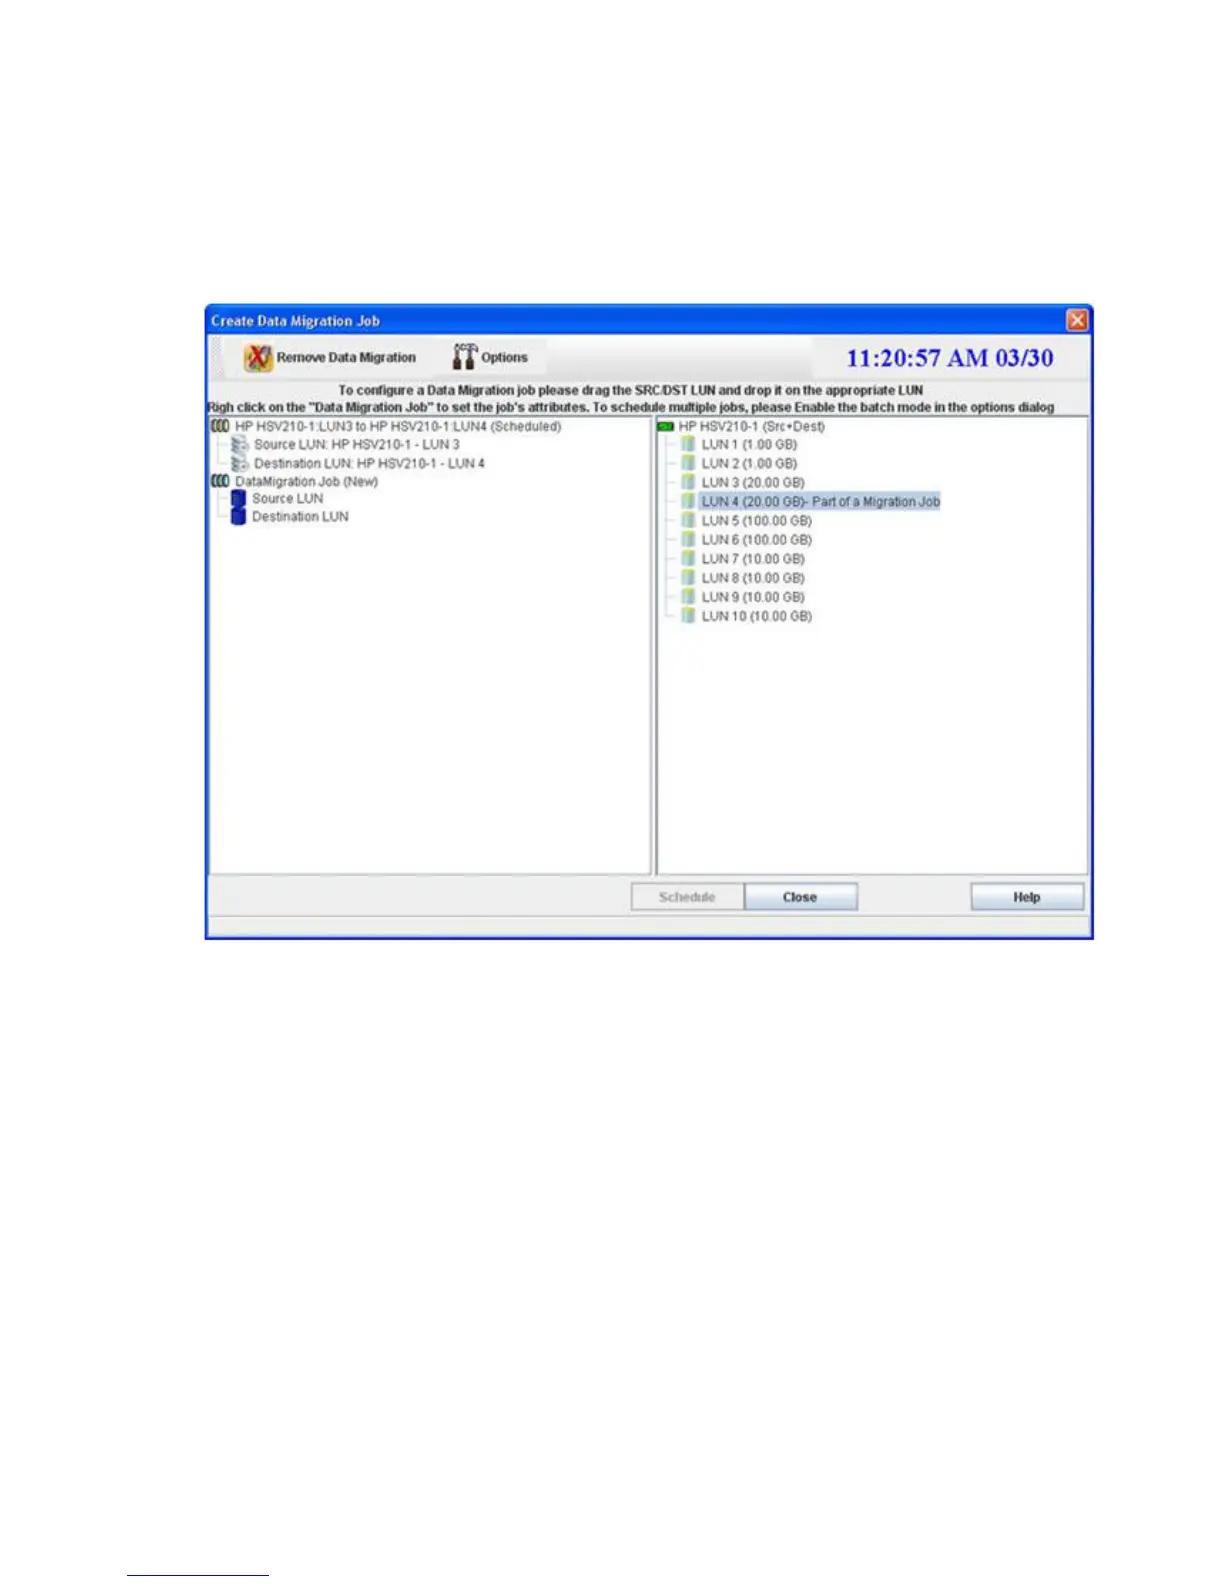
3. Choose the appropriate source and destination LUN for the migration job by dragging and
dropping the LUNs from the right pane onto the Source LUN or Destination LUN under
DataMigration Job (New) in the left pane.
The mpx Manager populates the Source LUN and Destination LUN attributes and creates a new
DataMigration Job
n
(New) object below the first one. The default job name is created by using
the source and destination array names.
4. Repeat the preceding steps to create migration jobs for all source LUNs to be migrated in a batch,
as shown in Figure 98.
Figure 98 Create Data Migration Job: batch
.
5. To save your migration job and assign job attributes, click Schedule or, to abandon your changes,
click Close.
Offline Data Migration270
 Loading...