Diaphragm meter mechanical and wiring installation
instructions
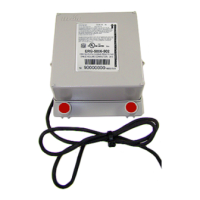
Caution: The 100G remote ERT module encoder must be installed at temperatures
between 40° and 95° F to ensure proper adhesion.
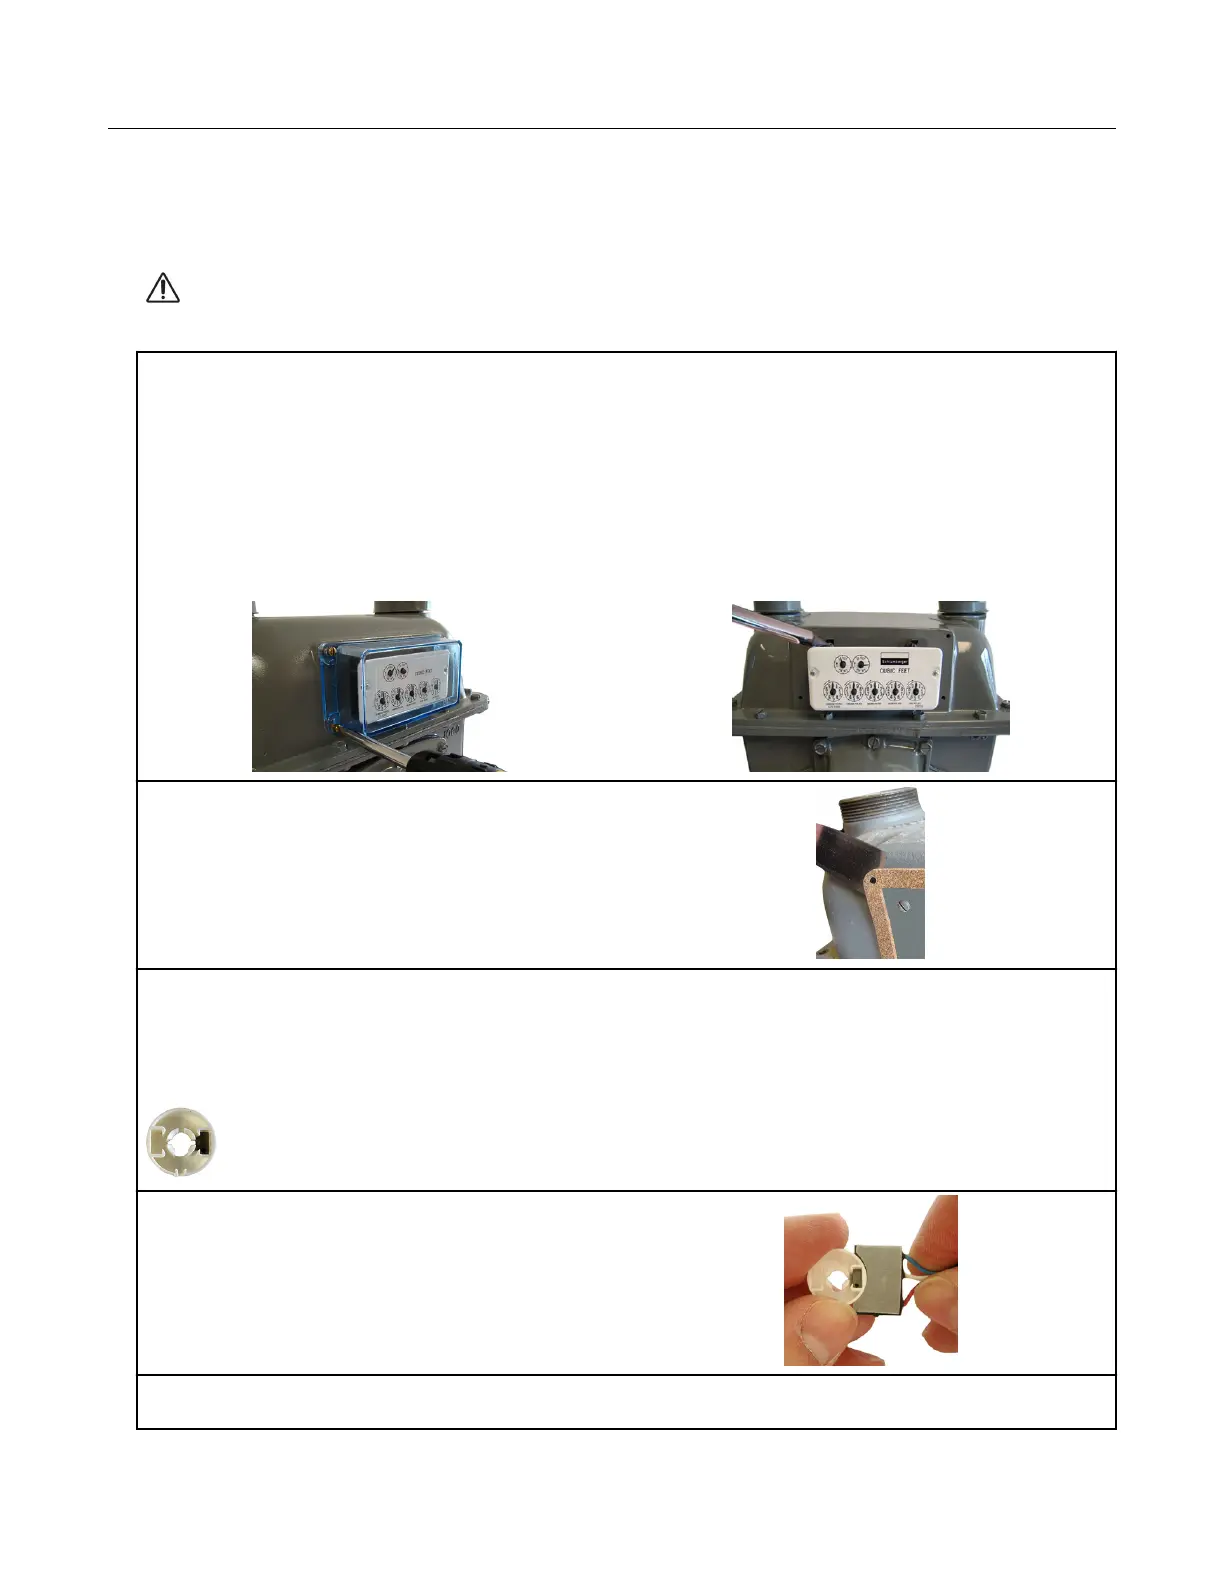
1. Remove the diaphragm meter index cover and index. Use care to hold the index cover and index
while loosening the screws to protect them from damage if they are dropped.
1. Remove the index cover screws in an alternating pattern. Hold the index cover while the screws
are removed to protect it from damage due to being dropped.
2. Remove the index cover and set aside.
3. Remove the screws holding the index to the meter. Hold the index to protect it from damage due
to being dropped.
4. Set the index aside.
2. Remove the old gasket and any gasket
residue from the meter and index cover.
3. Remove the magnet hub from the encoder installation kit (Itron part number CFG-0081-001).
Verify there is only one magnet in the hub.
Note: If there is no magnet or if there are two magnets in the magnet hub, discard the hub. Encoder
installation requires a magnet hub with one magnet.
4. Briefly place the magnet side of the magnet
hub into the curved indentation in the encoder as
shown in the illustration.
Remove the magnet hub from the encoder and
set it at least one inch away from the encoder.
5. Use an ERT module programming device to read the remote module. If this reading is higher
than the reading taken after the index was removed, the remote is counting and working properly.
Diaphragm Meter Installation
100G Series Gas ERT Module Installation Guide, Remote Mount TDC-0824-017 67
Proprietary and Confidential
 Loading...