Home
Konica Minolta
All in One Printer
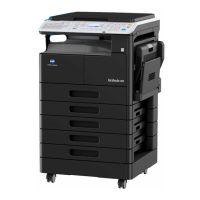
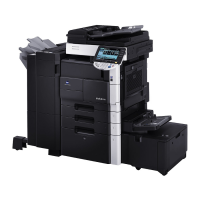
bizhub 361
Konica Minolta bizhub 361 User Manual
5
of 1
of 1 rating
604 pages
Give review
Manual
Specs
To Next Page
To Next Page
To Previous Page
To Previous Page
Loading...
5
Troubleshooting
5-42
bizhub 501/421/36
1 (Version 2)
5.2.18
Clearing a paper misfeed in mailbin kit MT-502
1
Open the finisher front door.
2
Turn dial FN5 or FN6 to feed out the paper.
3
While pressing down lever
FN7, remove any paper.
4
Pull handle FN8 to open
the mailbin side door.
251
253
Table of Contents
Default Chapter
3
Table of Contents
3
1 Introduction
11
Available Features
13
Explanation of Manual Conventions
19
Descriptions of Originals and Paper
20
User Manuals
21
Printed Manual
21
User Manual DVD Manuals
21
2 Before Making Copies
23
Machine Configuration
25
Options
25
External
27
Internal
31
Paper Feed Cabinet PC-206/PC-407/Desk DK-506
32
Large Capacity Unit LU-203
34
Finisher FS-522/Output Tray OT-602/Punch Unit PU-501
35
Saddle Stitcher SD-507/Mailbin Kit MT-502
37
Finisher FS-523/Relay Unit RU-507
39
Control Panel
42
Basic Settings Screens
44
Icons that Appear in the Screen
46
Adjusting the Angle of the Control Panel
47
Turning on the Main Power and the Sub Power
49
Turning on the Machine
49
Scanning During Warm-Up
51
Turning off the Machine
52
Automatically Clearing Settings (Automatic Panel Reset)
53
Automatically Canceling the Mode Screen (System Auto Reset)
53
Automatically Conserving Energy (Low Power Mode)
54
Automatically Conserving Energy (Sleep Mode)
55
Manually Conserving Energy
55
Automatically Turning the Machine On/Off (Weekly Timer)
56
Controlling each User's Use of this Machine (User Authentication)
58
Controlling each Account's Use of this Machine (Account Track)
62
Controlling Use of this Machine with Authentication Unit (Biometric Type)
65
Controlling Use of this Machine with the Authentication Unit (IC Card Type)
68
Loading Paper into Tray 1/2/3/4
71
Loading Paper into Tray 3
71
Loading Paper into LCT
77
Loading Paper into the Bypass Tray
79
3 Basic Copy Operations
85
General Copy Operation
87
Operations that Cannot be Combined
89
Operations Where the Setting Specified Last Is Given Priority
89
Operations Where the Setting Specified First Is Given Priority
91
Feeding the Original
92
Loading the Original into the ADF
92
Placing the Original on the Original Glass
93
Scanning the Original in Separate Batches ("Separate Scan" Setting)
95
Scanning a Multi-Page Original from the Original Glass
99
Specifying Original Settings
103
Specifying the Original Size (Original Size Settings)
103
Copying Originals of Mixed Sizes ("Mixed Original" Setting)
105
Loading Folded (Z-Folded) Originals
107
Selecting the Original Orientation (Original Direction Settings)
109
To Select an Original Direction Setting
110
Selecting the Position of the Binding Margin (Binding Position Settings)
112
To Select a Binding Position Setting
113
Changing Scan Settings for each Original
115
Selecting a Paper Setting
119
Automatically Selecting the Paper Size ("Auto" Paper Setting)
119
Manually Selecting the Desired Paper Size
121
Specifying a Zoom Setting
122
Automatically Selecting the Zoom Ratio ("Auto" Zoom Setting)
122
Specifying the Zoom Ratio of the Original ("Full Size" Setting)
123
Typing in the Zoom Ratio (XY Zoom Setting)
124
Slightly Reducing the Copy ("Minimal" Setting)
126
Selecting a Preset Zoom Ratio (Enlarge and Reduce Settings)
127
Typing in Separate X and y Zoom Ratios (Individual Zoom Settings)
128
Selecting a Stored Zoom Ratio
130
Storing the Desired Zoom Ratio
131
Selecting an Original > Copy Setting
133
Selecting Single-Sided Copies
134
Selecting Double-Sided Copies
136
Selecting a Combined Copy Setting
138
Copying Multiple Original Pages Onto a Single Page (Combined Copy Settings)
140
Selecting the Quality of the Original
142
Loading Originals with Small Print or Photos (Original Type Settings)
142
To Select an Original Type Setting
143
Selecting the Density Settings
144
Adjusting the Print Density (Density Settings)
144
Adjusting the Background Density (Background Removal Settings)
146
Selecting Finishing Settings
147
Separating Copies by Sets ("Sort" Setting)
150
Separating Copies by Pages ("Group" Setting)
151
Selecting the Output Tray
152
Stapling Copies (Staple Settings)
153
Punching Holes in Copies (Punch Settings)
156
Selecting a Folding Setting
159
Folding Copies in Half ("Half-Fold" Setting)
159
Binding Copies at the Center ("Center Staple & Fold" Setting)
161
Selecting Not to Rotate the Image
163
Scanning the Next Original to be Copied While a Copy Job Is Being Printed (Next Job Reservation)
164
Temporarily Stopping Scanning/Printing
165
Deleting a Paused Job
166
4 Additional Copy Operations
167
Checking the Copy Settings (Check Job)
169
To Check the Settings
169
To Change the Settings
172
Printing a Proof to Check the Settings (Proof Copy)
173
Checking the Print Image as a Preview Image (Advanced Preview)
176
Preview Screen
176
Checking the Advanced Preview
180
Interrupting a Copy Job (Interrupt Mode)
182
Registering Copy Programs (Mode Memory)
183
Copying with Programmed Copy Settings (Mode Memory)
187
Displaying Function Descriptions (Help)
189
Overview of Help Screens
189
Displaying Main Help Screens
192
Specifying Control Panel Settings (Accessibility Mode)
194
Displaying the Accessibility Setting Screen
194
Setting the "Touch Panel Adjustment" Function
194
Setting the "Key Repeat Start/Interval Time" Functions
196
Setting the "System Auto Reset Confirmation" Function
198
Setting the "Auto Reset Confirmation" Function
200
Setting the "Enlarge Display Mode Confirmation" Function
202
Setting the "Message Display Time" Function
204
Setting the "Sound Setting" Functions
206
5 Troubleshooting
211
When an Error Code Appears
213
When the Message "Misfeed Detected." Appears
215
Location of Paper Misfeed and Illustration
215
Paper Misfeed Indications
217
Clearing a Paper Misfeed in Tray 1
220
Clearing a Paper Misfeed in Tray 2
222
Clearing a Paper Misfeed in Tray 3/4 (Paper Feed Cabinet PC-206)
223
Clearing a Paper Misfeed in Tray 3 (Paper Feed Cabinet PC-407)
224
Clearing a Paper Misfeed in the Bypass Tray
225
Clearing a Paper Misfeed in the Fusing Drum Unit
226
Clearing a Paper Misfeed in the Fusing Area and Turnover Section
229
Clearing a Paper Misfeed in the Automatic Duplex Unit
231
Clearing a Paper Misfeed in the Paper Transport Section of Finisher FS-522
233
Clearing a Paper Misfeed in the Paper Transport Section of Finisher FS-523
236
Clearing a Paper Misfeed in Finisher FS-522
239
Clearing a Paper Misfeed in Finisher FS-523
242
Clearing a Paper Misfeed in the ADF
246
Clearing a Paper Misfeed in the LCT (Large Capacity Unit LU-203)
248
Clearing a Paper Misfeed in Saddle Stitcher SD-507
250
Clearing a Paper Misfeed in Mailbin Kit MT-502
252
Simple Troubleshooting
254
Main Messages and Their Remedies
257
6 Specifications
259
Specifications
259
Main Unit
261
Automatic Document Feeder DF-613
262
Option Specifications
263
Paper Feed Cabinet PC-206
271
Paper Feed Cabinet PC-407
271
Finisher FS-522
271
Punch Unit PU-501
271
Saddle Stitcher SD-507
271
Mailbin Kit MT-502
271
Finisher FS-523
271
Output Tray OT-504
271
Job Separator JS-502
271
7 Copy Paper/Originals
271
Paper Weight
272
Paper Tray/ Output Tray Capacity
273
Paper Capacity in Finisher FS-522 Output Trays
274
Paper Size
276
Special Paper
277
Precautions for Paper
278
Paper Storage
278
Auto Tray Switch Function
278
Selecting the Paper Settings for Bypass Tray
279
Automatically Detecting the Paper Size ("Auto Detect" Setting)
279
Specifying a Non-Standard Paper Size (Custom Size Settings)
281
Storing a Non-Standard Paper Size (Custom Size Settings)
283
Specifying a Paper Type for Bypass Tray
286
Paper Type Setting for a Tray
288
Originals
290
Originals that Can be Loaded into the ADF
290
Precautions for Loading Originals into the ADF
291
Originals that Can be Loaded on the Original Glass
291
8 Application Functions
293
Inserting Paper between OHP Transparencies ("OHP Interleave" Function)
295
Adding Cover Pages ("Cover Sheet" Function)
298
Inserting Different Paper into Copies ("Insert Sheet" Function)
301
Inserting Copies of a Different Original for a Specified Page ("Insert Image" Function)
305
Specifying Pages to be Printed on the Front Side ("Chapters" Function)
308
Scanning Originals with Different Settings and Printing Copies All Together ("Program Jobs" Function)
312
Reversing Black-And-White Gradation of the Original
317
Producing Separate Copies of each Page in a Page Spread ("Book Copy" Function)
318
Tiling Copy Images ("Image Repeat" Function)
323
Dividing Spread Image into Right and Left Pages Using ADF ("Page Separation" Function)
327
Adding a Binding Margin to Copies ("Page Margin" Function)
330
Adjusting the Image to Fit the Paper ("Image Adjust" Settings)
333
Copying with the Page Layout of a Booklet ("Booklet" Function)
335
Erasing Specified Area of Copies (Erase)
338
Erasing Black Marks Along Borders ("Erase" Function)
339
Erasing Black Marks Along Center Fold ("Center Erase" Function)
341
Erasing Outside Areas of the Original ("Non-Image Area Erase" Function)
343
Printing the Date/Time or Page Number on Copies (Stamp/Composition Functions)
344
Printing the Date/Time ("Date/Time" Function)
345
Printing the Page Number ("Page Number" Function)
348
Printing Previously Registered Stamps ("Stamp" Function)
352
Printing Copy Protection Text ("Copy Protect" Function)
355
Printing Repeating Stamps ("Stamp Repeat" Function)
361
Printing the Image Scanned First Overlapped by the Remaining Original Pages ("Overlay" Function)
367
Saving a Scanned Image as a Registered Overlay ("Registered Overlay" Function)
369
Using a Registered Overlay ("Registered Overlay" Function)
373
Printing a Header/Footer ("Header/Footer" Function)
375
Printing the Distribution Control Number ("Distribution Control Number" Function)
377
Printing the Watermark Onto Copies ("Watermark" Function)
379
Saving the Scanned Original in a User Box ("Save in User Box" Function)
381
9 Replacing Toner Cartridges and Staple Cartridges and Emptying Punch Scrap Box
385
Replacing the Toner Cartridge
387
Replacing the Staple Cartridge
392
To Replace the Staple Cartridge for Finisher FS-523
392
To Replace the Staple Cartridge for Finisher FS-522
393
To Replace the Staple Cartridge for Saddle Stitcher SD-507
401
Emptying Punch Scrap Boxes
403
To Empty the Punch Scrap Box of PU-501
404
To Empty the Punch Scrap Box of PU-501
406
10 Care of the Machine
407
Cleaning
409
Cleaning the Left Partition Glass
409
Cleaning the Original Glass
409
Cleaning the Document Pad
409
Cleaning the Paper Take-Up Roller
410
Cleaning the Writing Unit Glass and the Electrode Wires
410
Cleaning the Main Unit
411
Cleaning the Control Panel
411
Viewing Counters (Meter Count)
412
When the Message "It Is Time for the Scheduled Inspection of the Device." Appears
413
11 Managing Jobs
415
Overview of Job List Screen
417
Multi-Job Feature
417
Job List Screens
418
Left Panel Job List
421
Performing Operations on Jobs
422
Deleting a Job
422
Checking Job Settings
424
Checking Job Details
425
Displaying the Current Jobs List (Stored Jobs and Active Jobs)
427
Displaying the Job History List
428
Printing a Proof Copy of a Stored Job
429
Printing a Stored Job
430
Increasing Printing Priority
432
12 Utility Mode
433
Overview of Utility Mode Parameters
435
Registering a Destination
440
Create One-Touch Destination
440
Create User Box
440
Limiting Access to Destinations
441
Displaying the Destination Registration Screen
448
Specifying User Settings
450
System Settings
450
Custom Display Settings
453
Copier Settings
455
Scan/Fax Settings
458
Printer Settings
458
Change Password
458
Change E-Mail Address
458
Change Icon
458
Displaying the User Settings Screen
459
Specifying Administrator Settings
460
System Settings
460
Administrator/Machine Settings
465
One-Touch/User Box Registration
465
User Authentication/Account Track
465
Network Settings
468
Copier Setting
468
Printer Settings
469
Fax Settings
469
System Connection
469
Security Settings
470
License Settings
473
Displaying the Administrator Settings Screen
474
Overview of Weekly Timer Settings
476
Finisher Adjustment
477
Half-Fold Position
477
Center Staple Position Adjustment
479
Punch Horizontal Position Adjustment
481
Punch Regist Loop Size Adjustment
483
Header/Footer Settings
485
Specifying Headers/Footers
485
Editing Headers/Footers
487
Authentication Method
488
User Authentication and Account Track
488
When User Authentication and Account Track Are Synchronized
489
When User Authentication and Account Track Are Used Separately
490
Selecting an Authentication Method
491
User Authentication Setting
494
Administrative Settings - List
494
Default Function Permission
495
Public User Access
496
User Registration
497
User Counter
500
Viewing User Counters
501
Account Track Setting
502
Account Track Registration
502
Account Track Counter
505
Viewing Account Counters
506
Password Rules
507
Enhanced Security Mode
509
13 Authentication Unit (Biometric Type AU-101)
511
Safety Information
513
Product Features
515
Device Description
515
Multifunctional Product Settings
516
Using Authentication Unit (Biometric Type) AU-101
516
Registering Users
520
Logging on to a Multifunctional Product
533
ID & Print Function
535
Care of Authentication Unit (Biometric Type) AU-101
546
Specifications
547
Troubleshooting
548
14 Authentication Unit (IC Card Type AU-201)
551
Safety Information
553
Product Features
555
Device Description
555
Multifunctional Product Settings
556
Registering Users
561
Logging on to a Multifunctional Product
574
ID & Print Function
576
Specifications
587
Troubleshooting
588
15 Appendix
589
Entering Text
591
Enlarging the Keyboard
593
To Type Text
594
Glossary
595
16 Index
599
Other manuals for Konica Minolta bizhub 361
Service Manual
764 pages
Network Operating Instructions
364 pages
User Guide
516 pages
Specification & Installation Guide
17 pages
Short Guide
3 pages
5
Based on 1 rating
Ask a question
Give review
Questions and Answers:
Need help?
Do you have a question about the Konica Minolta bizhub 361 and is the answer not in the manual?
Ask a question
Konica Minolta bizhub 361 Specifications
General
Brand
Konica Minolta
Model
bizhub 361
Category
All in One Printer
Language
English
Related product manuals
Konica Minolta bizhub 36
284 pages
Konica Minolta bizhub 360
794 pages
Konica Minolta Bizhub 362
450 pages
Konica Minolta bizhub 367
246 pages
Konica Minolta bizhub 363
286 pages
Konica Minolta BIZHUB 368
54 pages
Konica Minolta bizhub 364e
256 pages
Konica Minolta bizhub 3622
202 pages
Konica Minolta bizhub 3602P
129 pages
Konica Minolta bizhub 306
186 pages
Konica Minolta Bizhub 3320
296 pages
Konica Minolta bizhub 306/266
110 pages
 Loading...