1
2
3
4
5
6
7
8
9
10
11
12
29
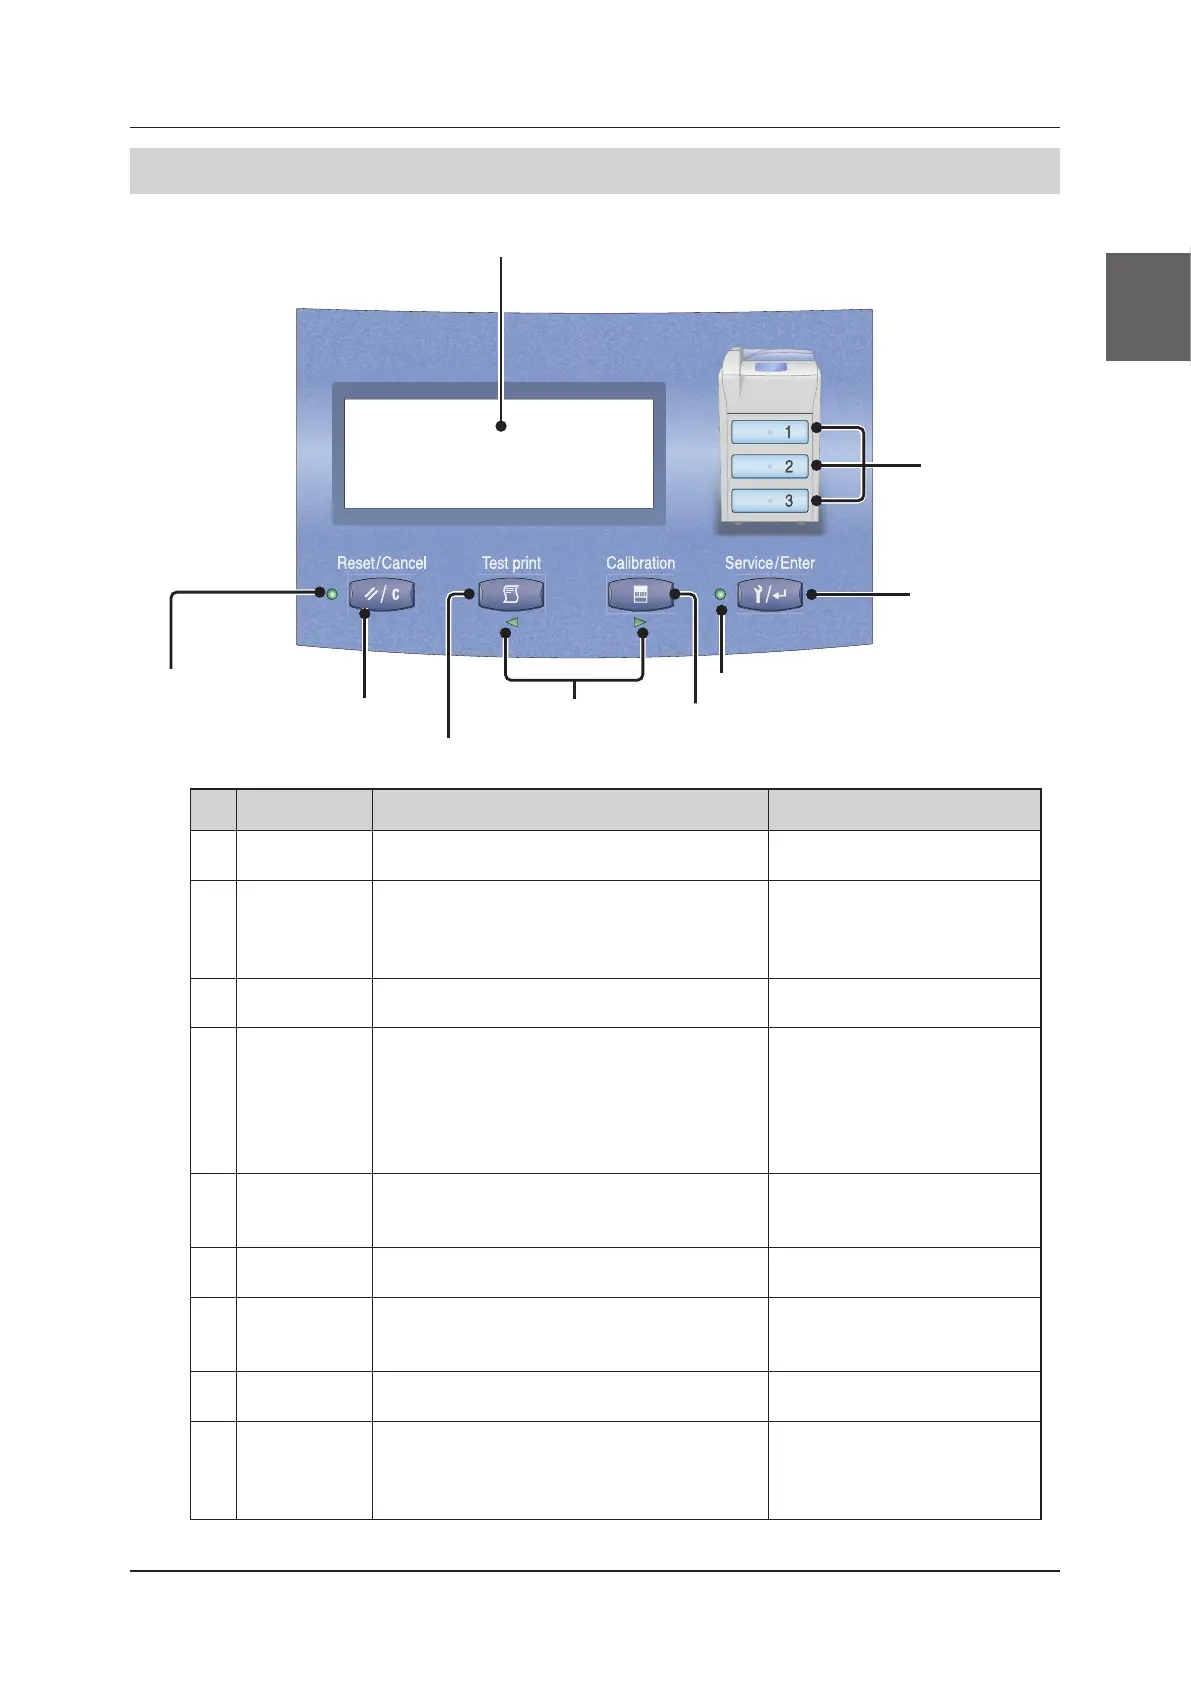
Names of Parts
2�2�3
Operation Panel
(1) Display window
(7) Calibration button
(9) Service/Enter
button
(8) Service/Enter indicator
(2) Tray buttons
(6) Cursor indicators
(5) Test print button
(4) Reset/Cancel button
(3) Reset/Cancel indicator
Num-
ber
Name Function Refer to
(1) Display window Shows the status of DRYPRO 873. 3.2.1 Current Status Display (page
40)
(2) Tray buttons Press a button to select a tray. The buttons of
the available trays light up and flash.
3.4 Calibration (page 50)
3.3 Loading Films (page 44)
5.2.2 How to Print QC Patterns
(page 104)
(3)
Reset/Cancel
indicator
Lights up when the Reset/Cancel button is enabled.
―
(4)
Reset/Cancel
button
Press this button to resolve errors or cancel operations.
3.4 Calibration (page 50)
3.6 Maintenance Mode (page 54)
4.4.1 Reset from Operation Panel
(page 82)
5.2.2 How to Print QC Patterns
(page 104)
(5) Test print button Press this button to print QC patterns. Use this but-
ton to move the cursor in Maintenance mode and on
the operation screen.
5.2.2 How to Print QC Patterns
(page 104)
(6) Cursor indica-
tors
Lights up when the Service/Enter button is enabled.
3.6 Maintenance Mode (page 54)
(7) Calibration
button
Press this button to print the calibration sheet. Use
this button to move the cursor in Maintenance mode
and on the operation screen.
3.4 Calibration (page 50)
(8) Service/Enter
indicator
Lights up when the Service/Enter button is enabled
. ―
(9) Service/Enter
button
Press this button to enter the Maintenance mode to
display detailed information about the main unit or
change the settings. Use this button in Maintenance
mode to select and set items.
3.6 Maintenance Mode (page 54)

 Loading...


