Guide to the Printer
2
1
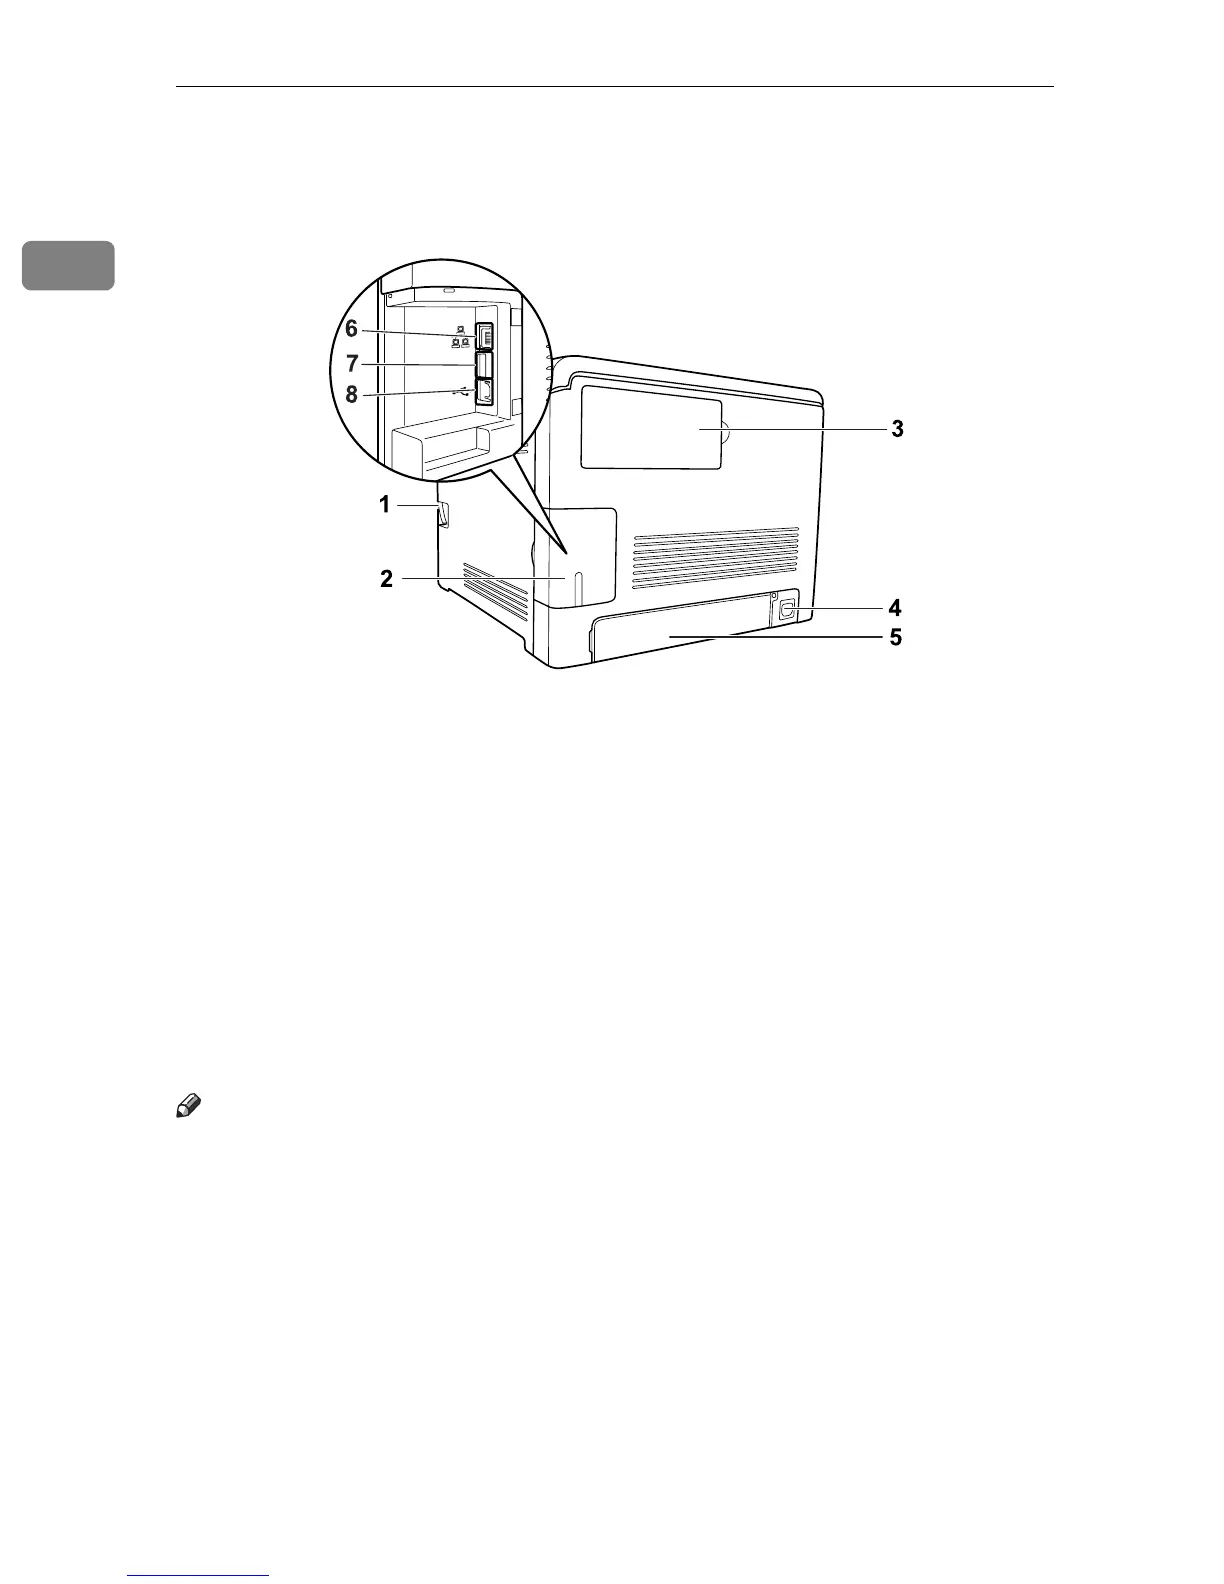
Exterior: Rear View
1. Front Cover Open Lever
2. Cable cover
3. Memory cover
Remove this cover to install the addition-
al memory unit (optional).
4. Power socket
5. Rear cover
Remove this cover when you load paper
larger than A4 in the paper tray.
6. Ethernet Port
Use a network interface cable to connect
the printer to the network.
7. USB Host Interface
Use a USB cable to connect the digital
camera to the printer. You can print im-
ages directly from a digital camera, with-
out having to connect to a computer.
8. USB Port
Use a USB cable to connect the printer to
the host computer.
Note
❒ Make sure the digital camera you connect to the printer for PictBridge and di-
rect printing supports PictBridge.
❒ USB Host Interface is installed only for the SP C232DN model printer.
ASH023S
 Loading...