7-6
764333-675
7.5 ADAPTER TRAY LEAK CHECK
PROCEDURE
Procedure:
1. Determine if leak is actually from adapter tray:
a. Check header block for leaks.
1) Place a dry paper towel between drip pan
and lid directly under header block.
2) Run liquid chemical sterilant processing
cycle.
3) Remove towel before releasing seal. Towel
should be dry.
4) If not dry, locate leak in header block area
and, if leaking, replace lid assembly.
b. Check anti-siphon check valve (CK10) for leaks:
1) Disconnect outlet of CK10 and place end of
tubing into small container to catch water.
2) Run liquid chemical sterilization cycle (this
must be a complete cycle with two rinses).
3) Check for water leaking from tubing.
4) If there is a leak, then replace CK10.
c. Check for leaks around lid seal:
1) Dry off edges of adapter tray and drip pan.
2) Close lid.
3) Slip paper towels between lid and drip pan
until they touch inflatable seal. Do this all
the way around lid.
4) Run complete liquid chemical sterilization
cycle.
5) Remove towels and check for moisture. Do
this before releasing inflatable seal. If
moisture is present, lid seal is leaking.
d. Verify adapter tray leak:
1) Remove water from drip pan and dry with
towel.
2) Run complete liquid chemical sterilant
processing cycle.
3) After cycle, remove tray and measure
quantity of water; allowable is 50-100 cc.
4) Repeat using other container trays.
2. Locate leaks in adapter tray:
a. All types of adapter tray leaks.
1) Check for loose hoses.
2) Check for loose drogue fittings.
3) Check for adapter tray binding when
installing or removing.
4) Check QD post.
b. Check for leaks caused by bad glue joints or
cracks:
1) Visually inspect bottom of tray for cracks in
casting and cup cutter base. Pay special
attention to the area around the cup cutter
base.
2) To locate bad glue joints or cracks that are
not visible:
a) Run liquid chemical sterilant processing
cycle.
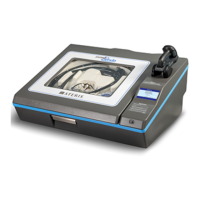
b) When SYSTEM 1E Liquid Chemical
Sterilant Processing System is draining,
cover air inlet hole on air filter.
c) Watch for air bubbles entering chamber.
This indicates source of leak.
d) Once leak source has been found,
uncover air inlet hole and allow
SYSTEM 1E Processor to drain.
c. Check H. P. tubing on adapter tray. The tubing
may have a small tear at the 90 degree tubing
connector on H. P. drogue.
7.6 LID SEAL SANDING PROCEDURE
General
If upper seal sticks to the adapter tray after completion
of an operating cycle for SYSTEM 1E Liquid Chemical
Sterilant Processing System (Diagnostic or liquid
chemical sterilant processing), check for sticking CK1
or clogged sterile air filter. Otherwise, implement this
procedure.
Equipment, Fixtures, Special Tools:
Medium (100 - 150 grit) or similar grade sandpaper.
Procedure:
1. If upper seal is sticking to adapter tray, sand top
face at rear splice area lightly to roughen finish.
2. If sticking persists, lightly sand entire face surface.
3. During retest, check for water leaks between upper
seal and adapter tray.
4. If after sanding entire face surface sticking persists,
troubleshoot unit for another possible problem.
This may include the replacement of the sticking
upper seal.
 Loading...
