1J-12 Charging System:
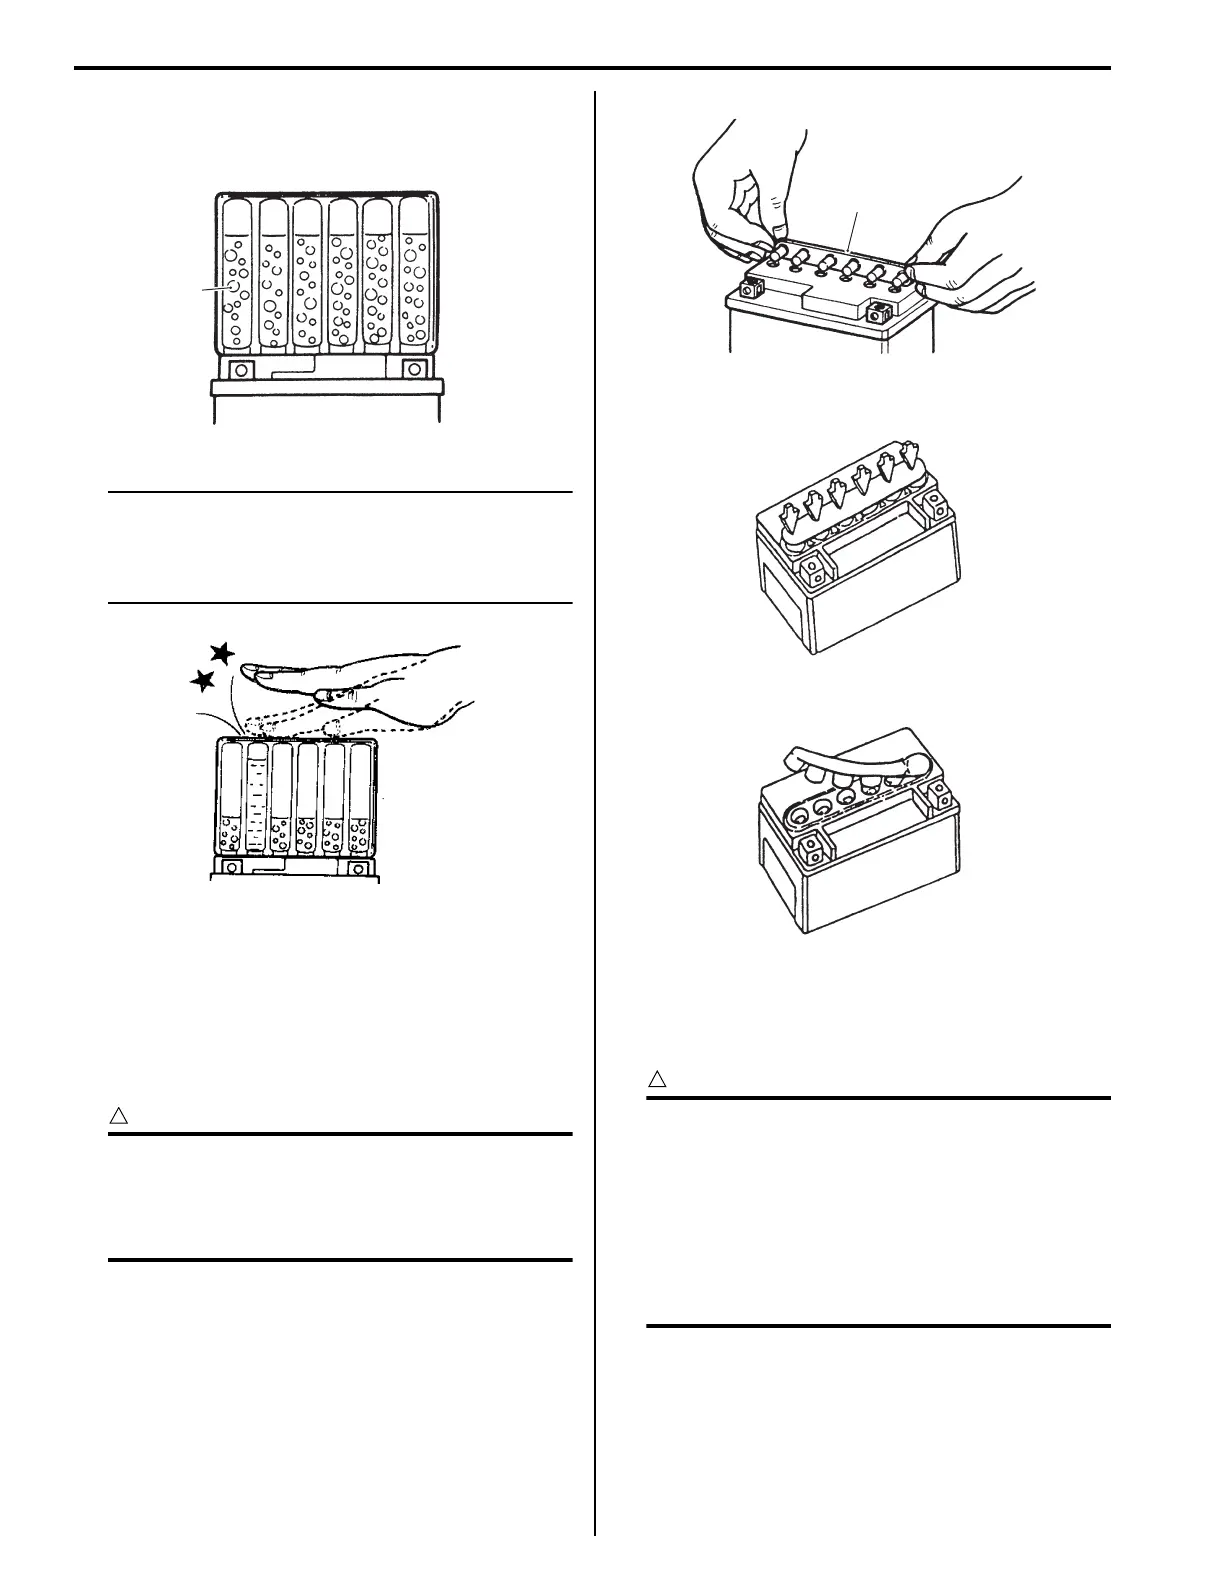
5) Make sure that air bubbles (4) rise to the top of each
electrolyte container, and leave in this position for
about more than 20 minutes.
NOTE
If no air bubbles come out from a filler port,
tap the bottom of the electrolyte container
two or three times.
Never remove the container from the battery.
6) After confirming that the electrolyte has entered the
battery completely, remove the electrolyte containers
from the battery.
7) Wait for about 20 minutes.
8) Insert the caps (2) into the filler holes, pressing in
firmly so that the top of the caps do not protrude
above the upper surface of the battery’s top cover.
CAUTION
!
• Once the caps are installed to the battery,
do not remove the caps.
• Do not tap the caps with a hammer when
installing them.
Charging
For initial charging, use the charger specially designed
for MF battery.
CAUTION
!
• For charging the battery, make sure to use
the charger specially designed for MF
battery. Otherwise, the battery may be
overcharged resulting in shortened service
life.
• Do not remove the cap during charging.
• Position the battery with the cap facing
upward during charging.
4
I649G11A0042-03
I310G11A0024-01
2
I718H11A0027-01
Correct
Incorrect
I649G11A0047-02
 Loading...


