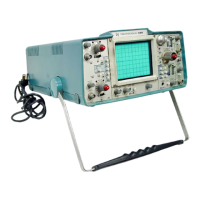
Performance Check—455/A2/B2
PRELIMINARY PROCEDURE
Perform following steps to place 455/A2/B2 into a basic
operating mode before continuing with the Performance
Check.
1. Check that Line Voltage Selector switch (on rear panel)
is set for correct line voltage. Unless otherwise specified,
the instrument is shipped from factory with this switch set
at 116 V. If Line Voltage Selector switch is changed to
232 V, fuse should be changed to 0.5 A, fast blow.
2. Connect the 455/A2/B2 to the correct line-voltage source
and pull POWER switch on.
NOTE
Allow approximately 20 minutes warmup time
before starting Performance Check procedure.
For best overall accuracy, check perform
ance in an ambient temperature range o f
+20° C to +30° C.
3. Set 455/A2/B2 controls as follows:
VERTICAL
(both channels if applicable)
POSITION
midrange
VOLTS/DIV
5 mV
VAR detent
CH 1 AC-GND-DC DC
CH 2 AC-GND-DC GND
VERT MODE CH 1
INVERT button out
(normal)
SWEEP
HORIZ DISPLAY
A
A and B TIME/DIV
.2 ms
VAR TIM E/DIV
fully clockwise
(detent)
DELAY TIME POS fully counterclock
wise
SWEEP (cont)
X10 MAG
out (off)
A TRIGGER HOLDOFF
NORM (detent)
TRIGGERING
(both A and B if applicable)
LEVEL 0
SLOPE
OUT: +
COUPLING
AC
SOURCE NORM
TRIG MODE AUTO
4. The scale-factor light above the CH 1 VOLTS/DIV knob
should be lit, indicating that the instrument is on. A base
line trace should be displayed within graticule area. Adjust
the INTENSITY, FOCUS and ASTIG controls for a low
intensity, well defined trace.
5. Adjust the TRACE ROTATION control so that trace is
parallel with the horizontal graticule lines.
This completes the Preliminary portion of the Performance
Check procedure.
PERFORMANCE CHECK PROCEDURE
1. CH 1 AND CH 2 DEFLECTION ACCURACY
a. Connect amplitude calibrator as shown in Fig. 3-1.
b. CHECK—Deflection accuracy for CH 1 according to
Table 3-2.
c. Set: CH 1 AC-GND-DC
GND
CH 2 AC-GND-DC DC
VERT MODE CH 2
d. CHECK—Deflection accuracy for CH 2 according to
Table 3-2. Adjust FOCUS and ASTIG as desired.
3-2
REV. B, NOV. 1977

 Loading...