To use.
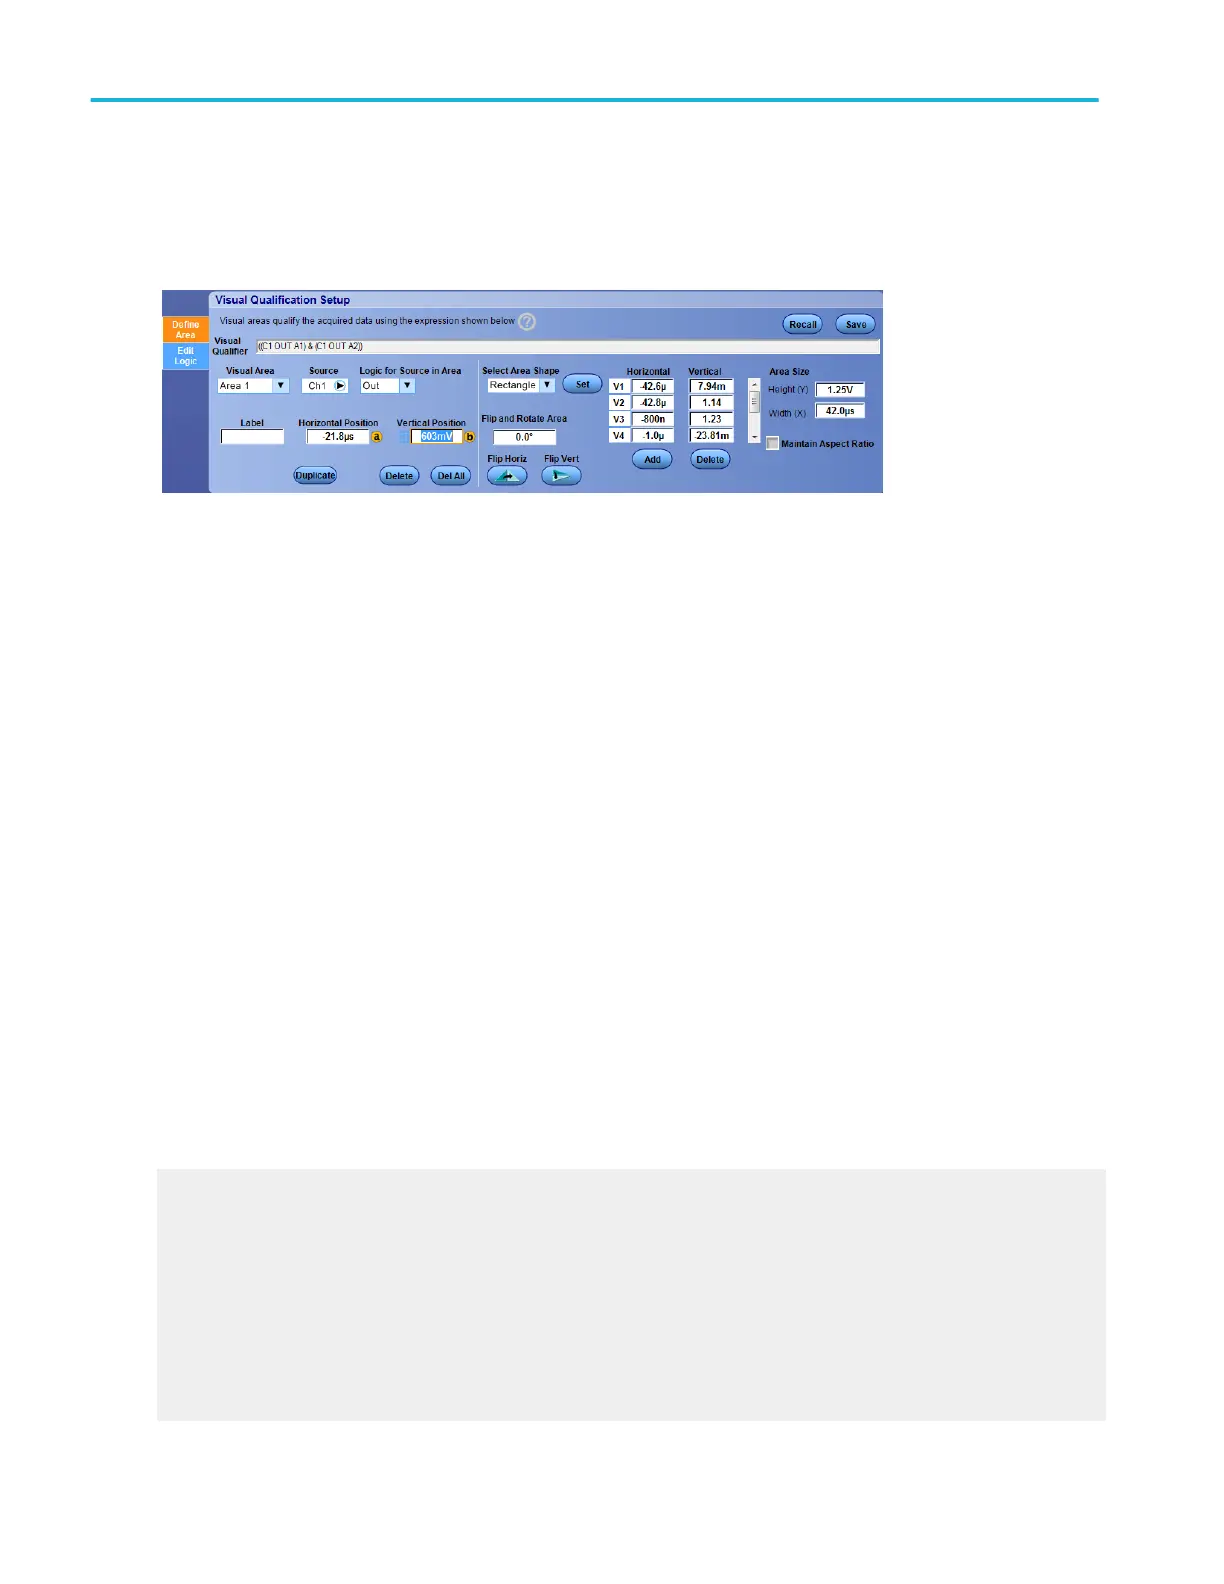
Change the settings of a visual qualification area.
■
Select the Visual Area to set up
■
Select the Source that will either be included in or out of the visual trigger area
■
Select the Logic for Source in Area, either In or Out
■
Enter a Label for the visual trigger area using either a keyboard or the virtual keyboard
■
Set the position of the area by entering a Horizontal and Vertical Position
■
Create a new visual trigger area by pressing the Add or Duplicate buttons
■
To delete an area or all visual trigger areas, press the Delete or Del All buttons.
■
If you want to change the default shape of your visual trigger area, select a shape from the Select Area Shape drop down
list
■
To apply settings you have made, press the Set button
■
To specify the number of degrees to flip or rotate the area, enter the number of degrees in the Flip and Rotate Area text
box.
■
To flip the area 180°, press the Flip Horiz or Flip Vert buttons
■
To move the active vertex, enter a Horizontal or Vertical position using a keyboard or the virtual keyboard
■
To add or delete a vertex, press the Add or Delete buttons
■
To change the vertical or horizontal size of the visual trigger area, enter a new size in the Area Size Height (Y) or Width (X)
text boxes. To maintain the aspect ratio of the area while you change the width or height, click the Maintain Aspect Ratio
check box
What do you want to do next?
Learn about Visual Trigger Qualification
Learn about visual trigger setup.
Learn about creating a visual trigger area.
Learn about controlling visual triggering.
Learn about saving a visual trigger setup.
Learn about recalling a visual trigger setup.
Learn about editing a visual trigger area.
Trigger setups
468 DPO70000SX, MSO/DPO70000DX, MSO/DPO70000C, DPO7000C, and MSO/DPO5000B Series
 Loading...