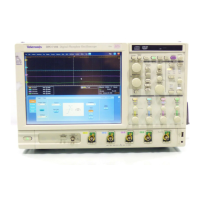
8. Select one of the slower channels.
9. Adjust the deskew time for the slower channel so that its signal aligns with that of the fastest channel. The deskew
adjustment range is ±75 ns.
10. Repeat steps 8 and 9 for each additional channel you want to deskew.
11. Remove the connections from the probe compensation terminals.
For information on how to deskew probes when using the Probe Setup Control Window, click here.
NOTE. To compensate for timing differences between voltage probes and between voltage and current probes, order the
following Probe Calibration and Deskew Fixtures. These fixtures may require a user-supplied pulse generator.
For DPO7000C and MSO/DPO5000B Series oscilloscopes, order Tektronix part number 067-0405-XX.
For DPO70000C and DPO7000C Series oscilloscopes, order Tektronix part number 067-1586-XX.
For MSO70000C/DX Series instruments: Tektronix part number 067-2083-XX to deskew the logic probe trigger path. This fixture
is a standard accessory.
Acquiring analog signals
Setting up analog channels
Use the following procedure to set the scale and position parameters for analog signal acquisition.
1. Set the acquisition system to Run continuously.
2. Connect the probe to the input signal source using proper probing/connecting techniques.
3. Click here for details on setting up the Vertical input controls.
NOTE. Some probes automatically set their termination and other values.
4. Push a front panel channel button (Ch <1– 4>) to select the input signal channel. A channel button lights when its channel is
on.
5. Open the Vertical Setup control window by clicking Vert on the toolbar or selecting the Vertical Setup command from the
Vertical menu. To change the input coupling, select the appropriate Termination button.
■
Select DC to couple both the AC and DC components of an input signal.
■
Select AC to couple only the AC components of an input signal.
■
Select GND to disconnect the input signal from the acquisition system.
6. Use the Vertical knobs to scale and position the waveform on the screen. Dragging the waveform handle also positions the
waveform.
7. Use the Vertical Setup controls to change the offset. Click in the Offset entry box, and then use the multipurpose knob to
adjust the offset.
8. Use the Horizontal knobs to scale and position the waveform on the screen and to set the record length. Dragging the
reference icon also positions the waveform.
9. Use the Resolution knob to set the record length and sample interval.
10. If you need to stabilize the display, push the trigger Level control to set the trigger level to 50%.
How to ?
DPO70000SX, MSO/DPO70000DX, MSO/DPO70000C, DPO7000C, and MSO/DPO5000B Series 577

 Loading...


