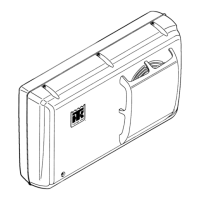
MP-3000 Controller
103
NOTE: If a controller from another unit has
been installed, see “Controller Software
Selection” in this chapter to set software
selection dial correctly.
Automatic Configuration of Spare
Parts Controller
An automatic configuration feature detects the
unit options installed on a unit when a spare parts
controller is installed. When the controller is
powered up for the first time, the controller turns
the Auto Configuration feature on. After the
initial unit power up, the controller turns the Auto
Configuration feature off.
The Auto Configuration feature detects the
following options and sets the correct value in
Configuration menu:
• Number of Supply Air Sensors (1 or 2):
Controller detects left hand and right supply
air sensors.
• Horsepower and Condenser Fan (1/2 hp or
3/4 hp).
• Number of Evaporator Fans (2 or 3)
• Dehumidify (On or Off): If controller detects a
humidity sensor, it then checks for current
draw on a dehumidify valve.
• Humidification (On or Off): If controller
detects a humidity sensor, it then checks for
current draw on an air compressor.
NOTE: Automatic configuration will not
detect NTC type USDA sensors. See “USDA
Type” under Configuration Menu on 95.
Controller Software Selection
If a replacement controller was removed from
another unit, check the small dial located on the
back of the controller for the correct software
selection. Current active software settings for dial
positions are:
• Position 0: All TNE 508 units with Moduload
compressor
• Position 1: All CRR-40/TNE 508 units with
KVQ valve
• Position 2: All CSR20 PS, CSR40SL PS and
CSR40 PS units with a stepper motor valve
• Position 3: All CRR40 DF units
• Position 4: All CSR40 Magnum units
• Position 7: Unit testing and service only.
Changing Software Selection Dial Position:
1. Turn U
NIT ON/OFF switch OFF.
2. Set dial indicator to correct position.
3. Turn UNIT ON/OFF switch ON. New software
selection is loaded during controller start-up.
Flash Loading Controller
Software
Controller software must be flash loaded when
software has been revised. To flash load software:
1. Turn the U
NIT ON/OFF switch OFF.
2. Plug cable from a portable computer with
controller software into the data retrieval
connector on the control box.
3. Press one of the special functions keys to
activate controller LCD display on battery
power; or turn the U
NIT ON/OFF switch ON.
4. Press and hold the 7 key and F1 key at the
same time. LCD display will show
“FLASHLOAD”.
NOTE: If the communications cable is
defective or not connected to the download
port, the controller will start in Emergency
mode and LCD display will show
“EMERGENCY MODE”. Secure cable
connection to proceed with flash loading of
software.
5. Start flash load program on portable computer.
6. Flash loading of new software is complete
when “FLASH LOADING” clears from the
LCD display.
 Loading...
