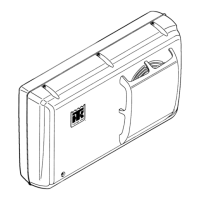
MP-3000 Controller
98
USDA temperature recording requirements.
Calibrate the sensors in an ice bath. CSR units
equipped for NTC style USDA sensors require
USDA sensor P/N (refer to Tool Catalog). CSR
units equipped for PT100 style USDA sensors
require USDA sensor P/N (refer to Tool Catalog).
Ice Bath Preparation
1. The ice bath should consists of an insulated
container full of ice made from distilled water
with enough distilled water added to cover the
top of the ice during the test. A properly filled
ice bath should be completely filled with ice
all the way to the bottom of the container.
2. Stir the ice bath briskly for one minute before
proceeding.
3. Insert the USDA sensors in the ice bath. Wait
5 minutes to allow the sensor temperatures to
stabilize at 0 C (32 F).
4. Stir the ice bath frequently while testing and
verify ice bath temperature with a fluke 50
series meter or equivalent. Stirring 10 seconds
every 3 minutes during the test procedure is
adequate.
Calibrating the USDA Sensors
1. Insert all USDA sensors in an ice bath (see
“Ice Bath Preparation” above).
NOTE: The sensors must be completely
immersed in the ice bath without contacting
the walls of the ice bath container for 5
minutes.
2. Press F3 key to enter the Main menu.
3. Press F3 key to scroll through menu list until
“DATALOGGER” appears in LCD display.
4. Press F4 key to access the Datalogger menu.
“INSPECT TEMP LOG” appears in the LCD
display.
5. Press F3 key to scroll through submenu until
“CALIBRATE USDA PROBE” appears in
LCD display.
6. Press F4 key to enter Calibrate function. The
display shows the “ACTUAL” and “NEW
CORR” temperature off-sets for each sensor
in two rows.
• The controller displays “OOR” in place of
a temperature offset until the sensor comes
within 0.3 C (0.5 F) above or below 0 C
(32 F).
• The controller displays the actual
temperature offset when the sensor
temperature is within 0.3 C (0.5 F) above
or below 0 C (32 F).
NOTE: The sensors should be in the ice bath
a total of 15 minutes or more to assure the
sensor temperature has bottomed out.
7. Press the F3 key to release the current actual
temperature offsets from the controller
memory. Observe the sensor temperatures in
the “NEW CORR” row.
8. When all sensor offsets read between + 0.3 C
(+0.5 F) and - 0.3 C (-0.5) and have been
stable for 5 minutes, press the F4 key to
accept the new temperature offsets. The
controller display will show the new offsets in
the “ACTUAL” row too.
9. Press ESC key to exit the Calibrate menu.
Set a Trip Start
With the UNIT ON/OFF switch ON and the LCD
display showing the standard display (setpoint):
1. Press F3 key to enter the Main menu.
2. Press F3 key to scroll through menu list until
“DATALOGGER” appears in LCD display.
3. Press F4 key to access the Datalogger menu.
“INSPECT TEMP LOG” appears in the LCD
display.
4. Press F2 or F3 key to scroll through submenu
until “ACTIVATE TRIPSTART” appears in
LCD display.
5. Press F4 key to enter Tripstart function. The
date and time of the last trip start appears in
the screen.
6. Press F4 key again to enter a new start of trip
date and time in the log.
NOTE: When a PTI test is completed, the
controller automatically enters a Tripstart in
the log.
7. Press ESC key to exit the Datalogger menu.
 Loading...
