Phaser 6000/6010 and WC 6015 MFP Xerox Internal Use Only 8-49
Service Parts Disassembly
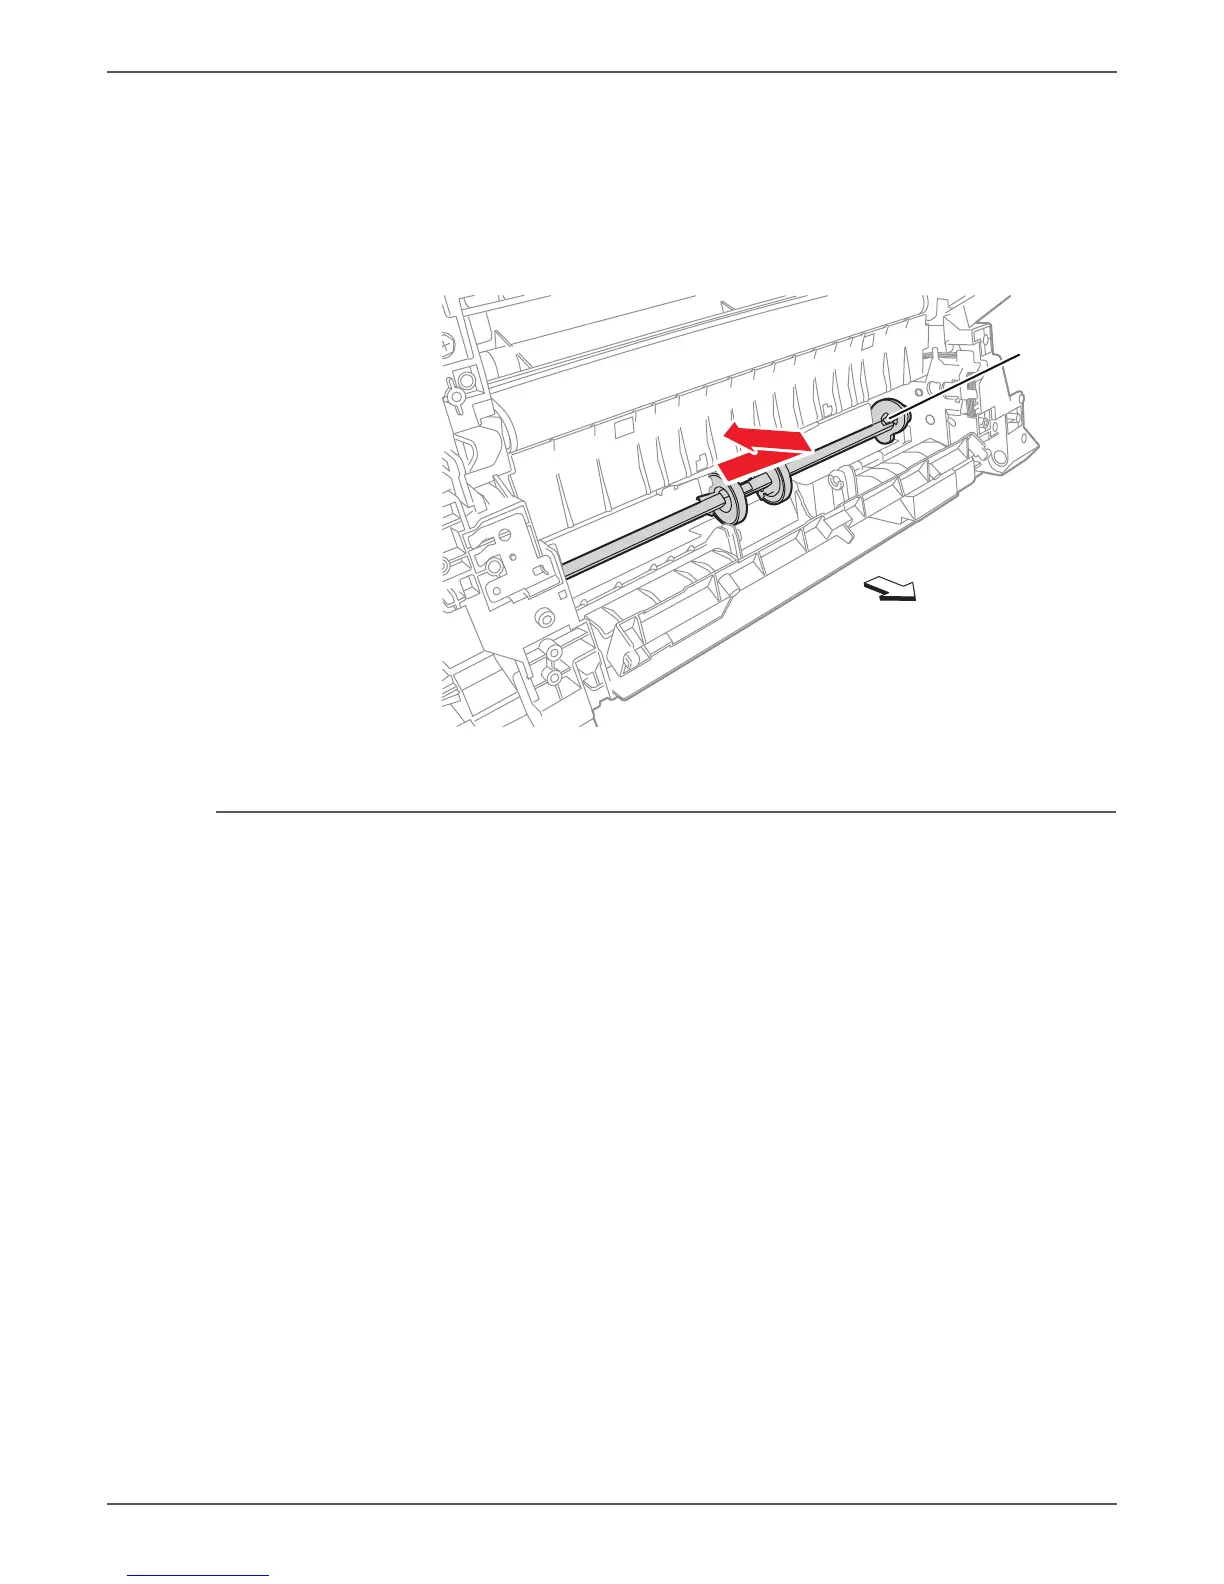
24. Feed Shaft removal:
a. Release the Left Feed Roller Cam latch, and move the Feed Shaft to the
left side of the printer.
b. Release the Right Feed Roller Cam latch, and remove the Right Feed Roller
Cam from the Feed Shaft.
c. Remove the Feed Shaft from the printer, and remove the Left Feed Roller
Cam from the Feed Shaft.
Separator Pad Assembly and Spring
PL2.2.11~12
1. Remove the Main Paper Tray Cover (Phaser 6000/6010 page 8-7; WorkCentre
6015 MFP page 8-29).
2. Remove the Front Cover (Phaser 6000/6010 page 8-8; WorkCentre 6015 MFP
page 8-34).
3. Open the Rear Door.
4. Remove the Left Side Cover (Phaser 6000/6010 page 8-10; WorkCentre 6015
MFP page 8-29).
5. If present, remove the Wi-Fi Assembly (page 8-103).
6. Remove the Top Cover (Phaser 6000/6010 page 8-11; WorkCentre 6015 MFP
page 8-22).
7. Remove the Rear Cover (Phaser 6000/6010 page 8-15; WorkCentre 6015 MFP
page 8-24).
8. Remove the Toner Door (Phaser 6000/6010 page 8-19; WorkCentre 6015 MFP
page 8-27).
9. Remove the Cleaner Assembly (page 8-79).
s6000-214
Latch
s6000-214
Rear
 Loading...