8-66 Xerox Internal Use Only Phaser 6000/6010 and WC 6015 MFP
Service Parts Disassembly
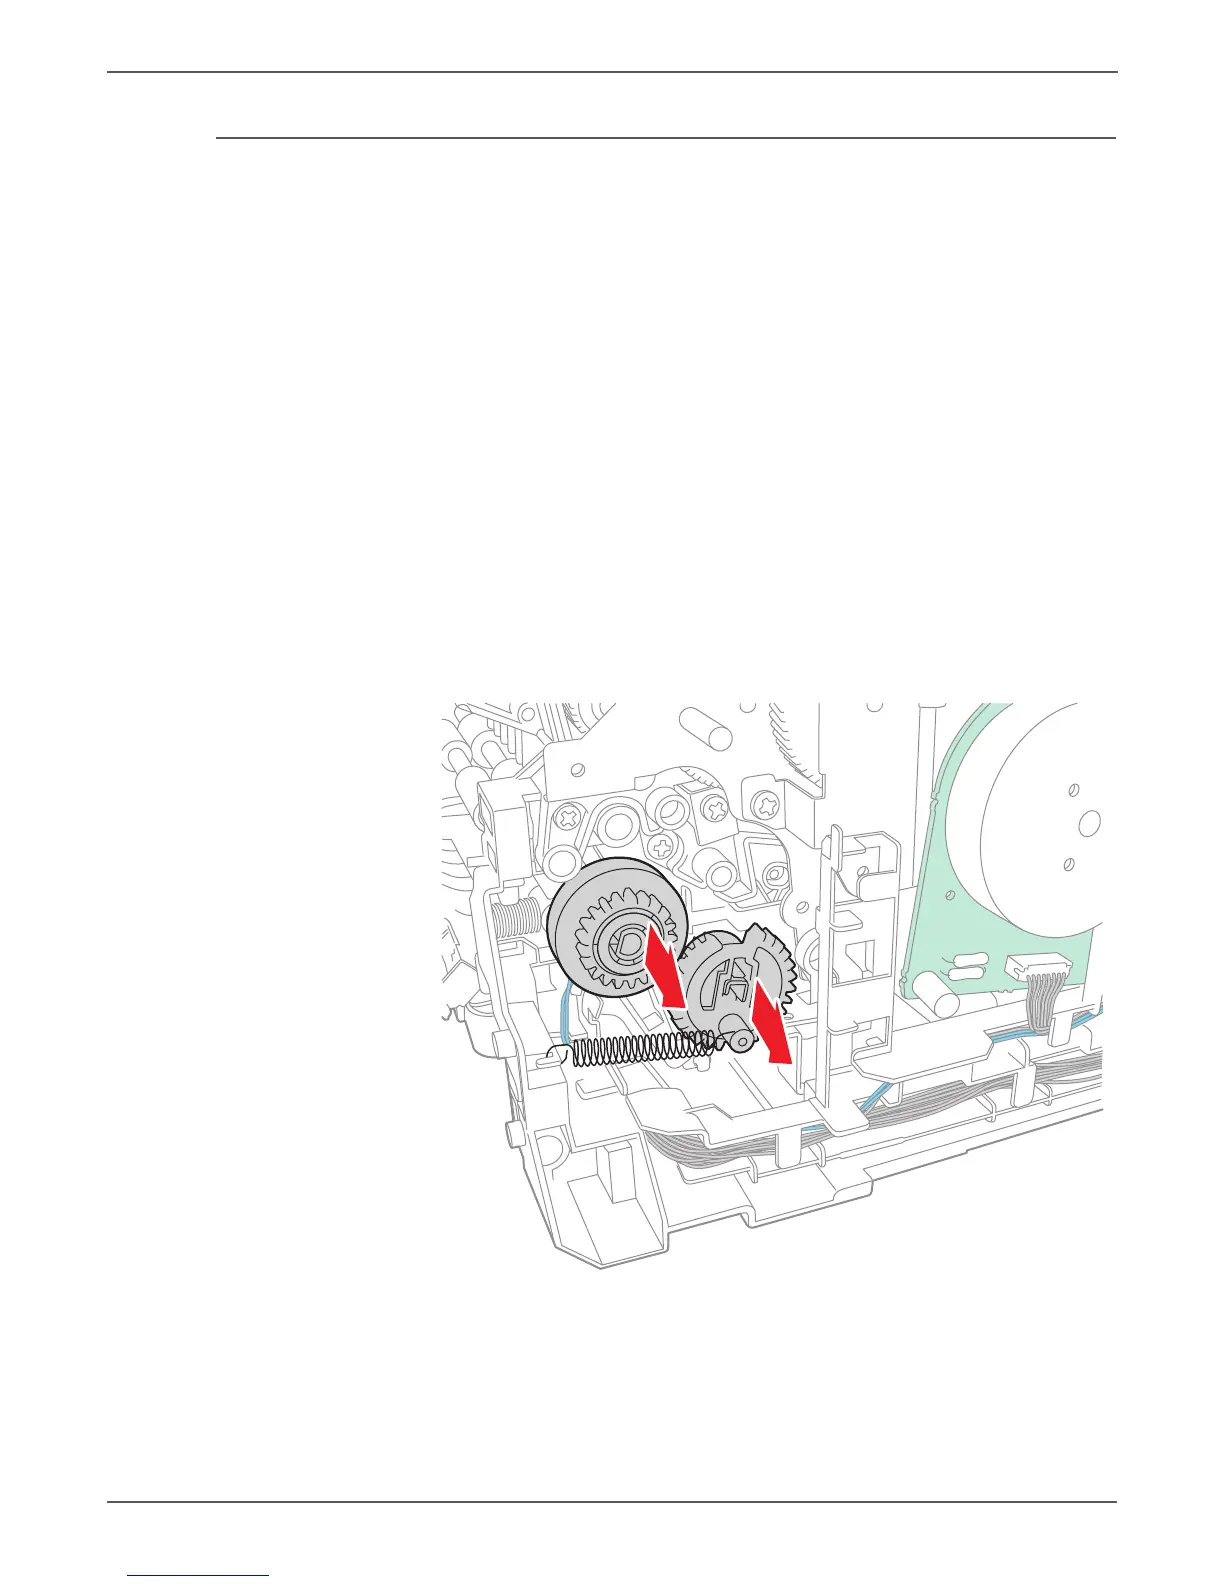
Registration Clutch
PL2.3.7
1. Remove the Main Paper Tray Cover (Phaser 6000/6010 page 8-7; WorkCentre
6015 MFP page 8-29).
2. Remove the Front Cover (Phaser 6000/6010 page 8-8; WorkCentre 6015 MFP
page 8-34).
3. Open the Rear Door.
4. Remove the Left Side Cover (Phaser 6000/6010 page 8-10; WorkCentre 6015
MFP page 8-29).
5. If present, remove the Wi-Fi Assembly (page 8-103).
6. Remove the Top Cover (Phaser 6000/6010 page 8-11; WorkCentre 6015 MFP
page 8-22).
7. Remove the Fan (page 8-106).
8. Remove the Image Processor Board (page 8-114).
9. Remove the PH3 Gear (page 8-87).
10. Remove the Feed Drive Assembly (page 8-91).
11. Remove the spring. Release the hook, and remove the gear.
12. Disconnect P/J25 on the MCU Board and unthread the harness.
13. Remove the Registration Clutch.
 Loading...