176 / 184
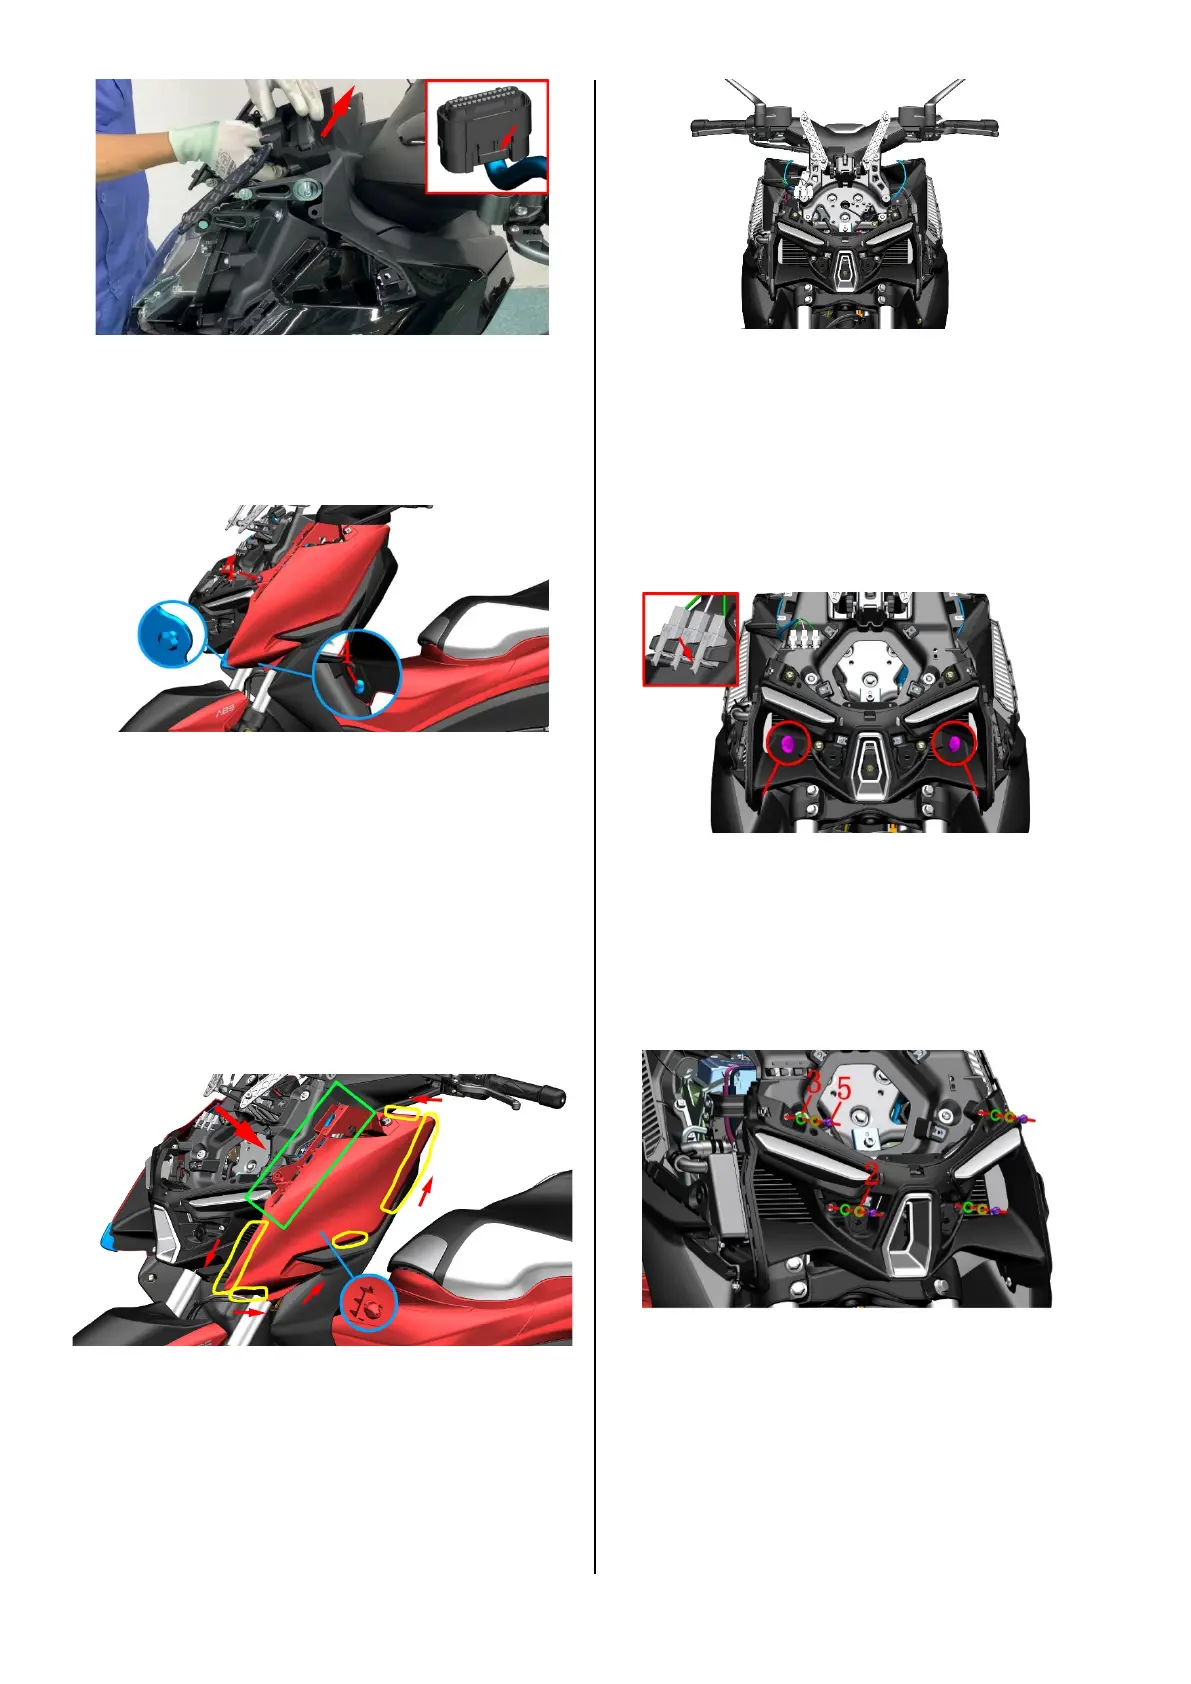
Removal of the front left and right
panels
a. Use 4# inner hexagon to remove two M6×12 bolts
⑵ on the front left panel, and then pull out the
decorative glue of the front left panel by hand.
b. Grasp the mark on the front left panel (green
rectangle) with both hands, and carefully pull out in the
direction of the big arrow. When pulling out, you need to
follow the order of the small arrow pointing to separate
11 buckles (Yellow area; 4 front vents, 1 decorative
cover on the left panel of the front storage box + 1
mushroom button, 6 front storage box panels), and 1
mushroom buckle (Blue area) on the connection of the
front left panel and the front vent, the front storage box
left panel decorative cover, the front storage box front
panel, remove the front left panel.
c. Use the same method to remove the front right
panel.
Removal of the front part of vent
Use 4# inner hexagon to remove the 2 expansion
nails on the inside of the front part of vent. Then unplug
the 3 connectors () on the upper left side of the front
vent. Caution: When unplugging the connector, you
need to press down the lower tip of the connector before
pulling it out, otherwise the connector buckle will be
damaged.
Use 5# inner hexagon to remove 4 non-standard
M6×16 bolts⑴ on the front vent, and take out the
bushing⑵ and cushion rubber⑶. Remove the front
vents and the position lights installed on the vents and
other parts. Caution: When removing the last bolt, you
must hold the front vent with your hand to prevent the
front vent from falling directly and scratching the paint.
Removal of the left and right
decorative covers of the front
storage box
a. Use 4# inner hexagon to remove one M6×16 bolt⑴
connecting the left decorative cover of the front storage
box panel and the surrounding middle part, take out the
bushing ⑵and cushion rubber⑶; use 5# inner hexagon
to remove 1 non-standard M6×16 bolt⑸ on the left
 Loading...