15. Maintenance procedures
15.1 Check the dust filters
Necessary tools
7mm fl at screwdriver.
How to check the dus t filters?
1. Remove the front cover. See "Remov al of the front cover", page 120.
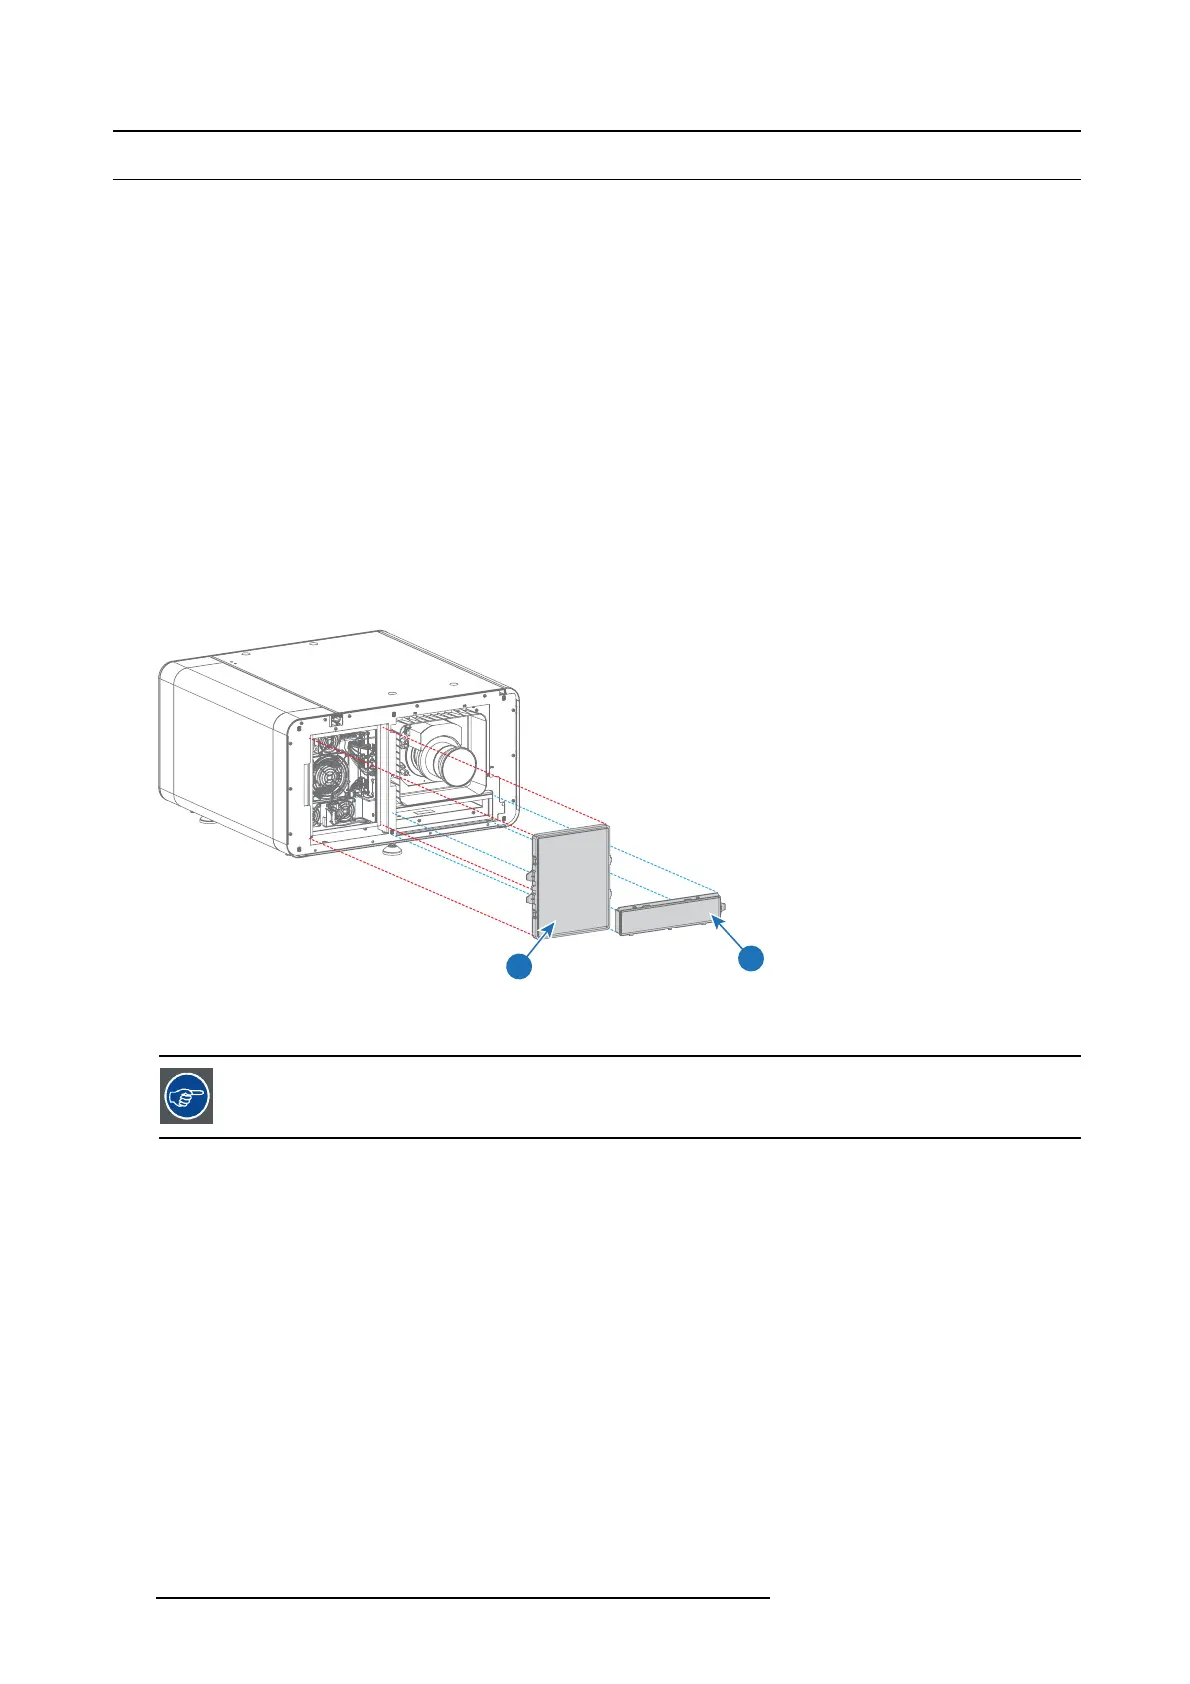
2. Take out the big (1) & sm all (2) dust filter a ssembly from the projector.
3. Check the “air in” side of the dust filters for dust and/or grease.
In case the filter is contam inated with grease wash and dry the dust filter. S ee cleaning procedure "Washing and drying the dust
filters", page 114.
In case the filter contains dust but doesn’t feel greasy then vacuum clean the dust filter. Se e procedure "Vacuum cleaning of the
dust filters", page 113.
Note: Grease on the filter can build up after several months in an environment contaminated with greasy air. Note that areas
where popcorn is c onsumed are subject to greasy air.
Tip: Tak e into account that the time ne eded to dry the dust filters may be 24 h ours or more. F or that, it’s recommended to
have a second s et of dust filters which can be used while cleaning the first se t .
4. Insert the big (1) & small (2) dust filter assembly in the front cover.
Caution: UNDER NO CIRCUMSTANCES SHOULD WET FILTERS BE INSTALLED BACK INTO THE PROJECTOR. THIS
CAN HAVE SERIOUS SAFETY CONSEQUENCES AS WELL AS JEOPARDIZE THE INTERNAL OPTICS OF THE
SYSTEM.
2
1
Image 15-1
5. Install the front cover. See "Removal of the front
cover", page 120.
The dust filter is cleanab le. See cleaning p roce dure for correct clean ing and drying instructions.
112 R5906693 DP2K-E SERIES 19/06/2015
 Loading...


