6. Lenses & Lens selection
6.3 Lens installation
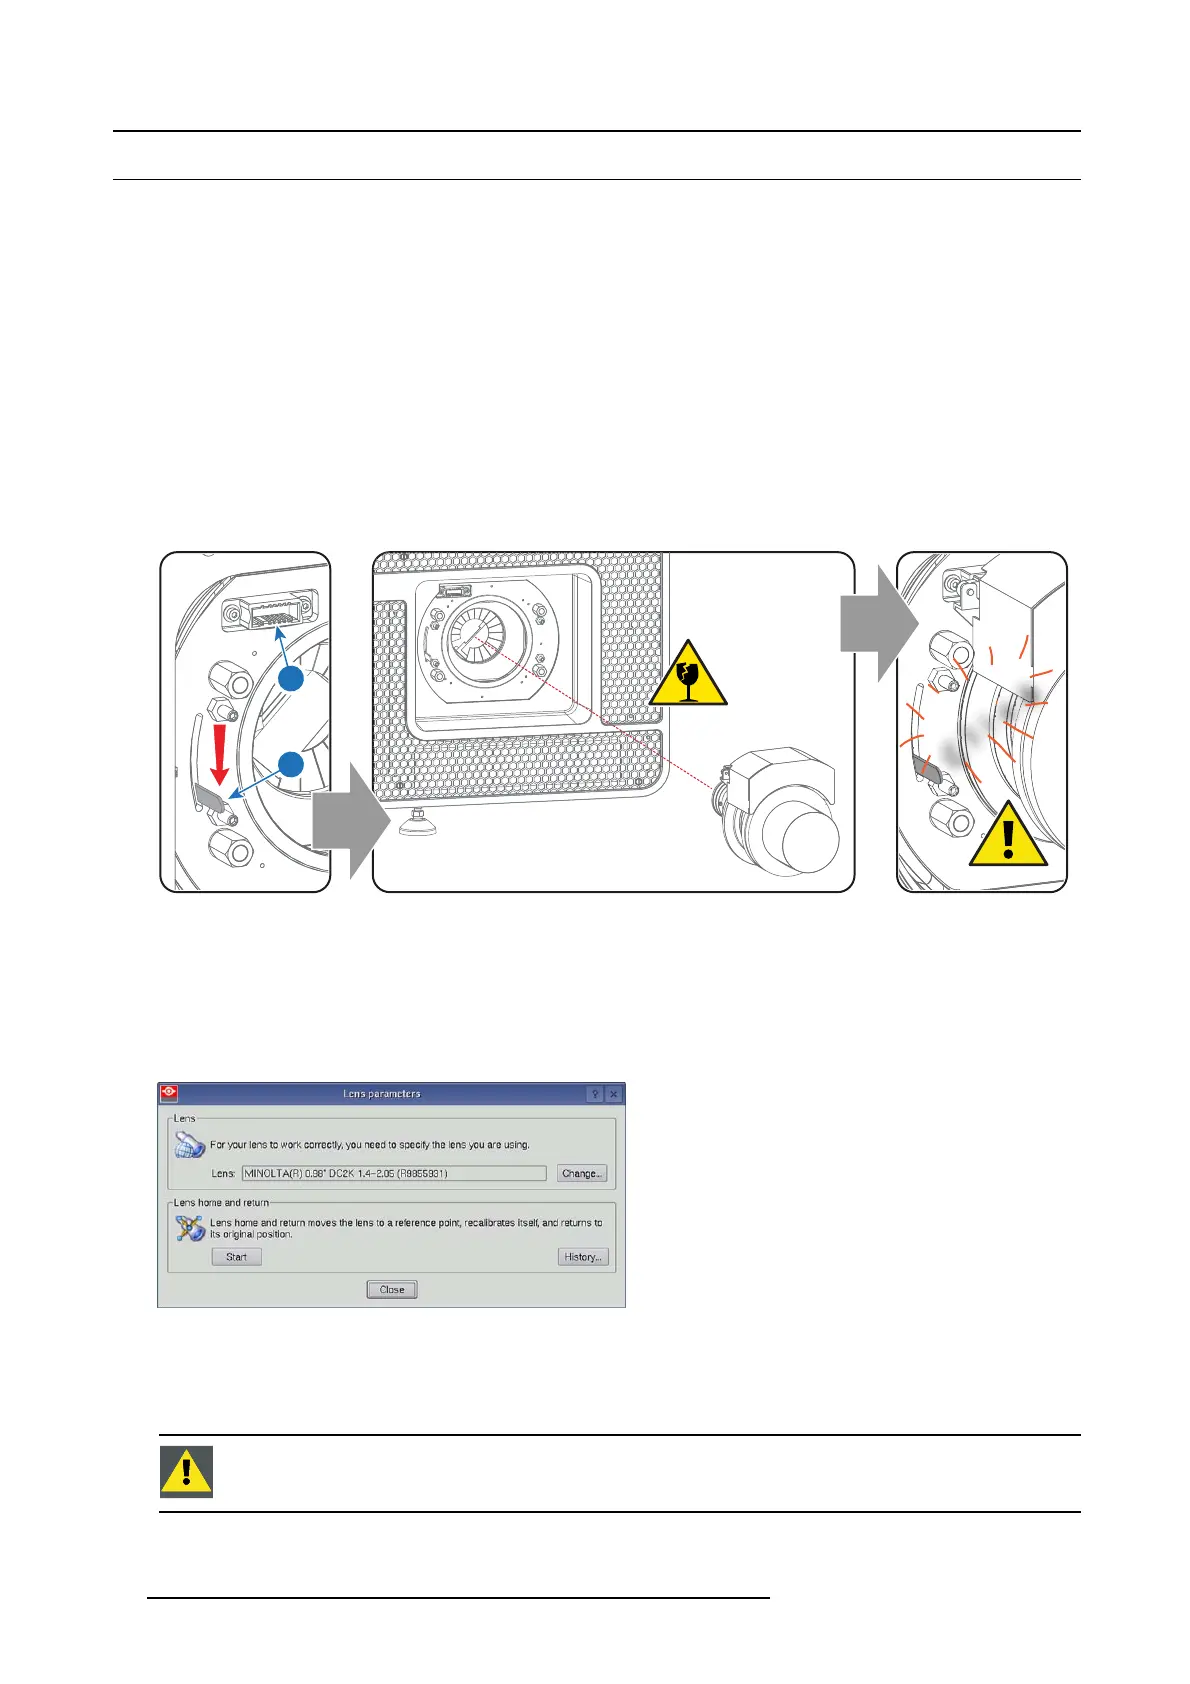
How to install a le n s into the Lens Holder?
1. Remove the foam rubber in the opening of the Lens Holder if not removed yet.
2. Take the lens assembly out of its packing material and remove the lens caps on both sides.
Caution: Do not touch t he glass of the lens!
3. Ensure that the Lens Holder stands in the O n-Axis position (horizontal and v ertical m id position).
4. Place the Lens Holder in the “locked” position by moving the lens lock handle (1) downwards, away from the lens po wer supply
socket (2).
5. Gently insert the lens in such a way that the lens connector matches the socket. To prevent c ollision of the lens with the critical
electronics inside the projector, ensur e you c entre the lens and keep it on-axis while appro aching.
Caution: Do not accidentally bump with the lens against the electronic boards inside the Lens Holder.
Warning: Do not release the Lens yet, as the Lens may fall out of the Len s Holder.
6. Push the lens com pletely agains t the Lens Holder front plate. An audible click should be noticed. Once seated, there may be
no airgap between lens fla nge and Lens H older front plate.
Caution: Ensure that the lock handle remains in the “locked” pos ition.
1
2
C
l
i
c
k
Image 6-7
Note: For frequent installation and removal of the lens it is recommende d to install the lens while the lock handle is in “open”
position (upwards) and put the lock handle in “locke
d” p osition once the lens is inserted. Then check if t he lens is properly
installed by trying to pull the lens out of the Lens Holder. (this alternative procedure result in less wear of the Lens Holder )
7. Check if the lens is really secured by trying to pull the lens out of the Lens Holder.
8. Activate the corresponding lens par ameters for the installed lens. (See user guide of the Communic ator chapter Installation >
Advanced > Lens param eters)
Caution: Not using the c orrect lens parameters could result in lens damage.
Image 6-8
9. Perform a lens HOME & RETURN operation. (S ee user guide of the Comm unicator chapter Installation > Advan ced > Lens
parameters)
Note: The HOM E & RETURN operation enab les the projector to determine the reference positions of the motorized Z OOM and
FOCUS barrels of the installed lens.
CAUTION: Never transport the p rojector with a Lens mounted in the Lens Ho lder. Always remo ve the Lens
before transporting the p rojector. Neglecting this can d amag e the Lens Holder and Prism.
34 R5906693 DP2K-E SERIES 19/06/2015
 Loading...


