12.13
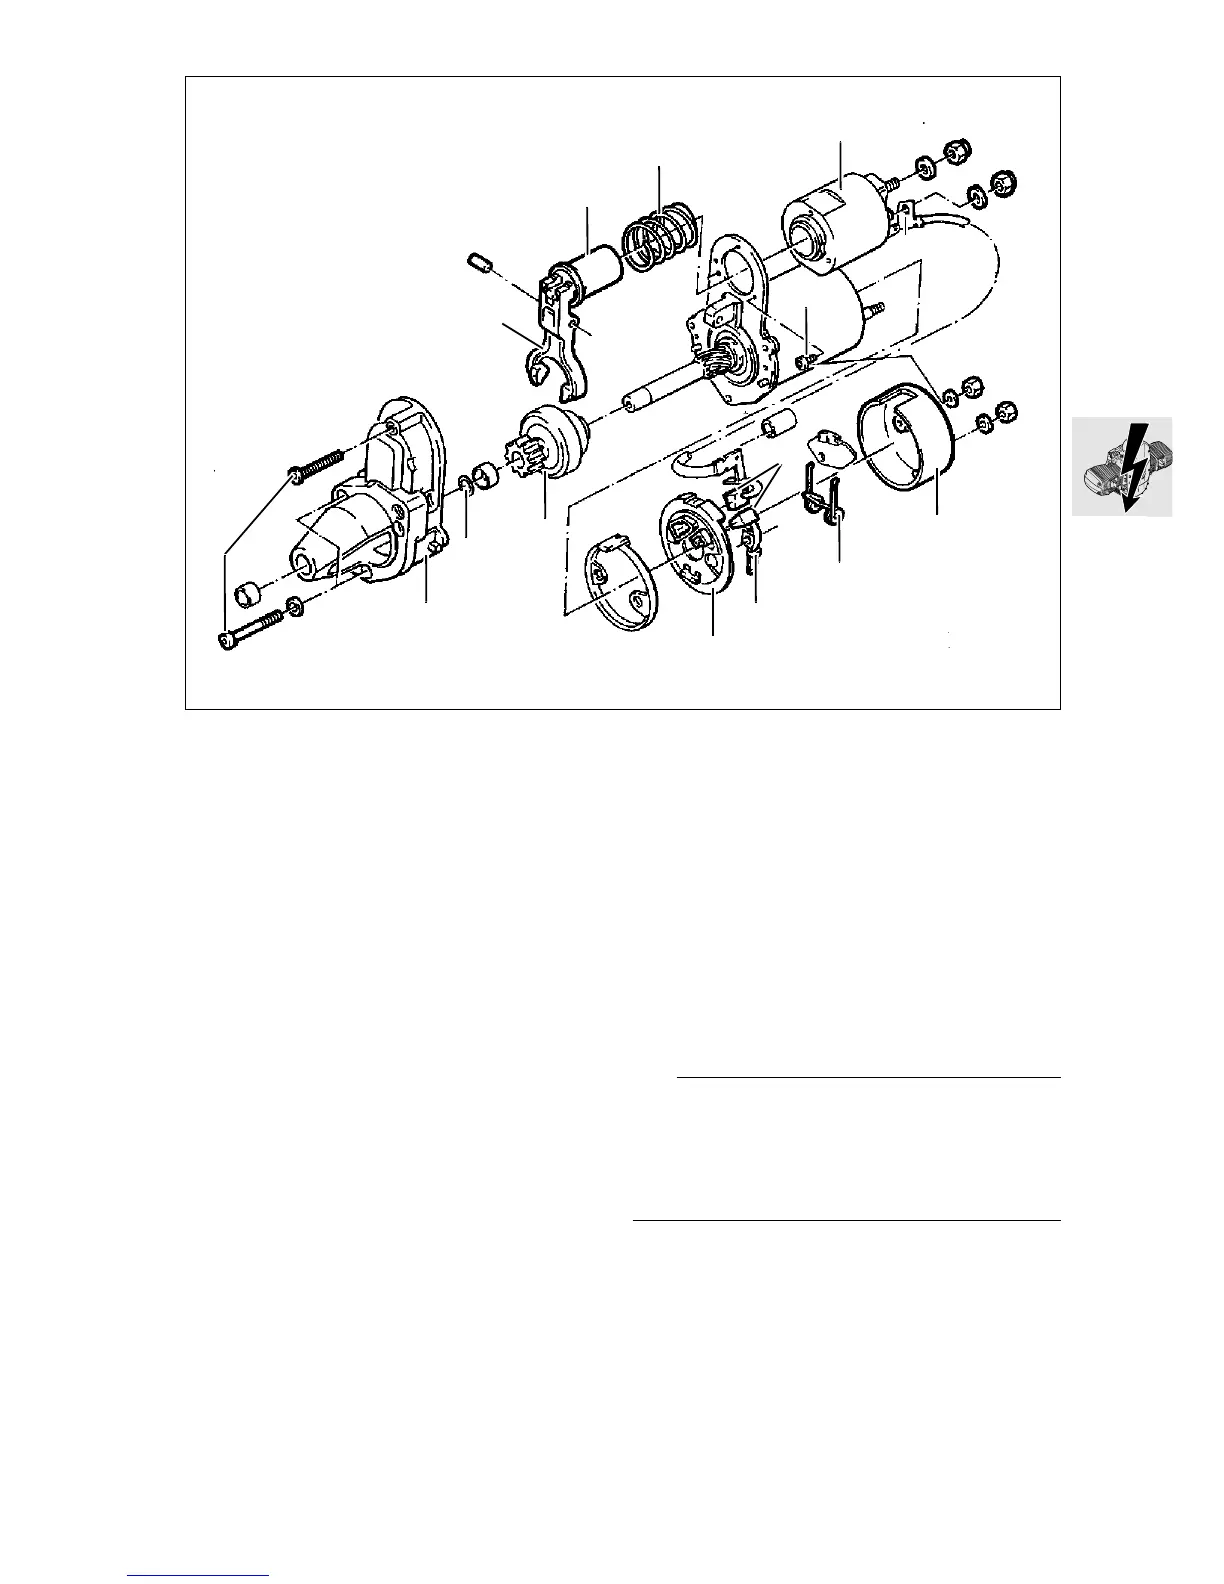
Dismantling/reassembling starter
motor
•
Detach lead (1).
•
Remove retaining screws (2).
•
Remove flange (3).
•
Remove solenoid switch (4) after taking out the
retaining screws (5).
•
Remove release lever (6) and spring (7) from so-
lenoid switch (8).
•
Remove retaining ring (9) and take starter motor
gear assembly (10) off shaft.
•
Install in the reverse order of work.
•
Coat the steep-angle thread and the engaging
ring with Bosch PZ 2 V 3 silicone grease.
Renewing carbon brushes
•
Detach lead (1).
•
Remove cover (11).
•
Remove holder (12) for carbon brushes.
•
Lift up retaining springs (13) and remove carbon
brushes (14).
•
Install carbon brushes with retaining plate.
•
Slide short lead (15) on to threaded pin.
•
Install cover (11).
•
Attach lead (1).
Checking starter motor
Engine temperature > 20 °C
•
Ammeter in positive lead to starter motor.
Starter is in good working order at:
............................................................app. 80...150 A
•
Voltmeter connected to (+) and (-) on starter mo-
tor
Starter is in good working order at:
.........................................................app. 10...11 V
Checking starter relay
L Note:
Before each Ω measurement, calibrate to zero with
the BMW diagnosis tester:
Connect the positive (yellow) and negative (green)
leads. Press the Ω key until the digital display reads
0.00 Ω.
•
After calibation, insert the Ω meter between
terminals 30 and 87.
Ω value ..............................................................0 Ω
•
Connect positive supply to terminal 85 and neg-
ative supply to terminal 86. Then:
Connect (+) to terminal 85, (-) to terminal 86b.
The relay must be energized.
Ω value: ............................................................ 0 Ω
1
11
13
15
12
10
9
3
2
6
8
7
4
14
5
RS120080
 Loading...