7
3
CRANKSHAFT, CAMSHAFT AND BEARINGS
CHECKING CONNECTING ROD BEARING
CLEARANCES
If connecting rod bearings show signs of flaking or
scoring, bearings must be replaced.
Connecting rod bearings and crankpin journals must
be clean and free of oil.
1. With upper bearing assembled to connecting rod,
install connecting rod.
a. Lay a strip of plastigage lengthwise on journal,
Fig. 7.
Do not lay plastigage across oil hole in crankpin
journal.
Fig. 7 – Install Plastigage
PLASTIGAGE
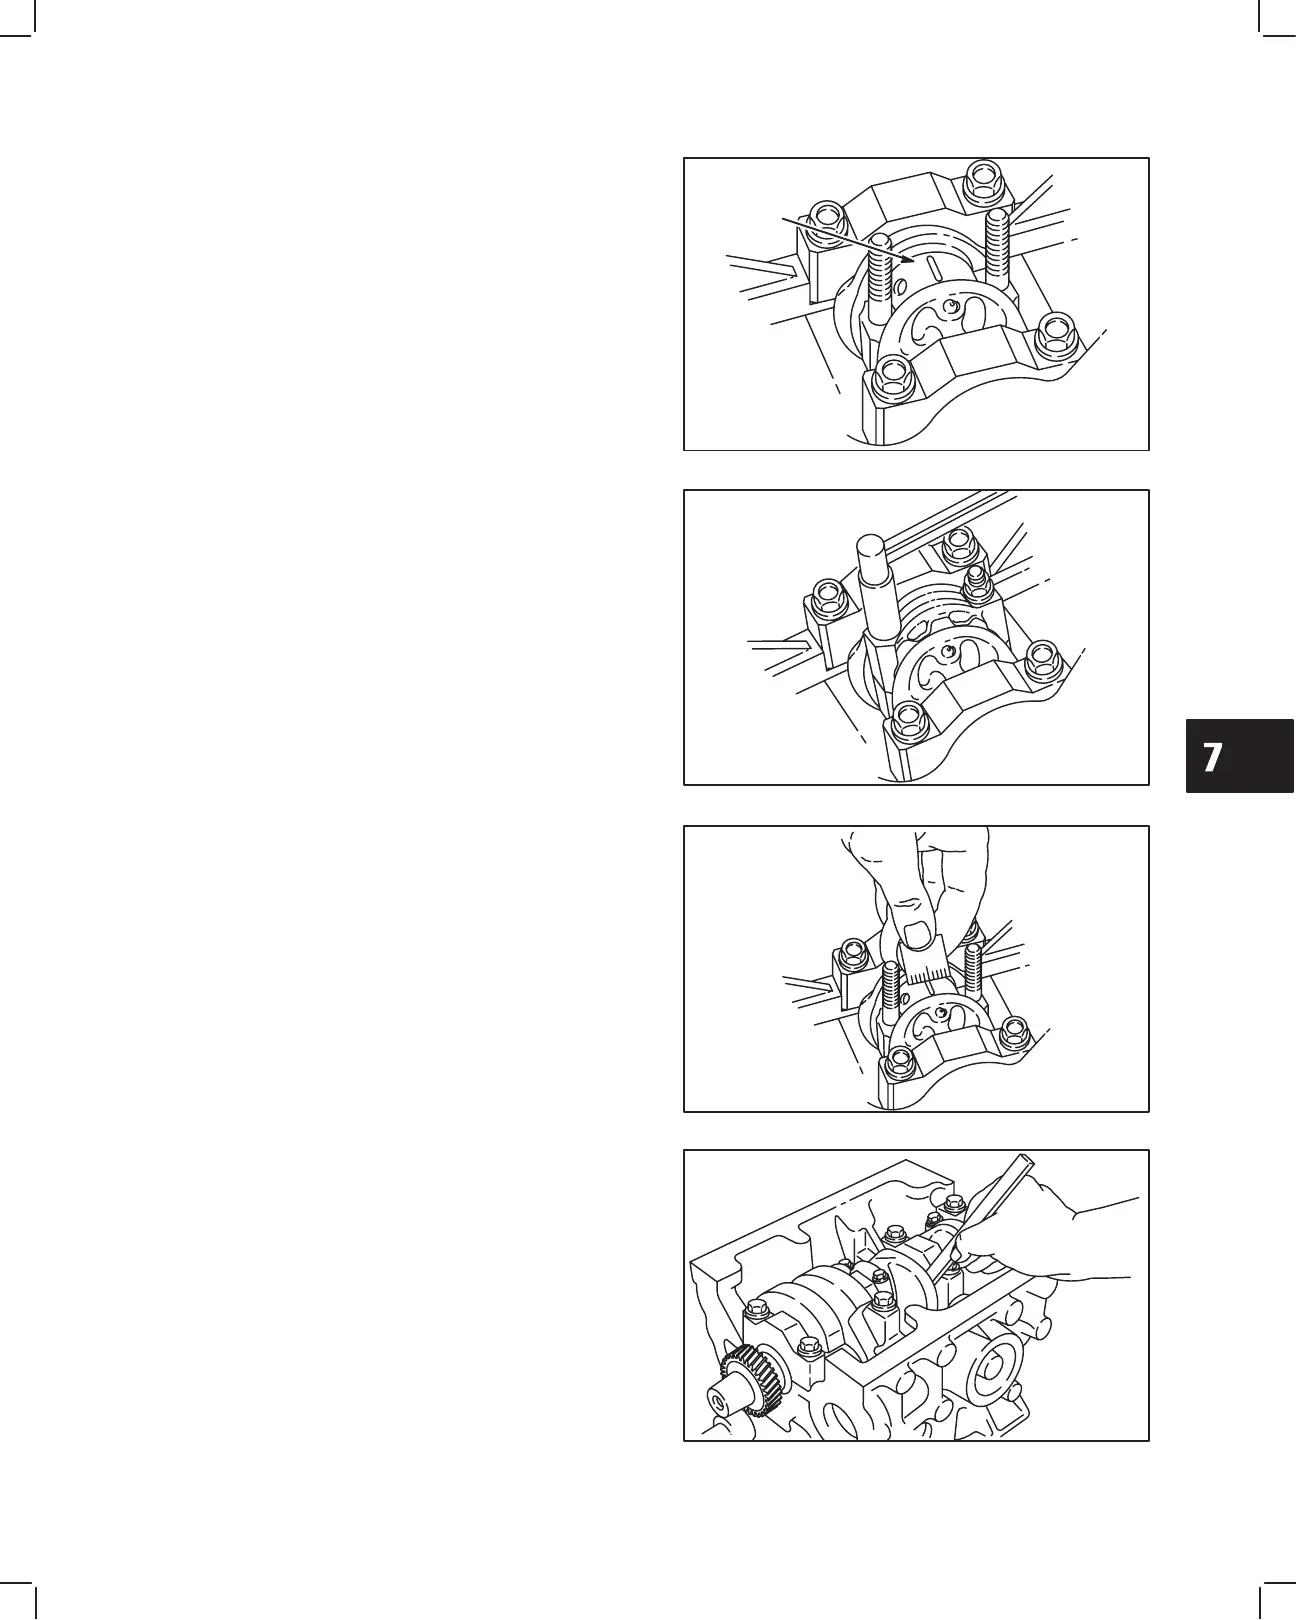
2. Assemble connecting rod cap with bearing and
torque to 36.0 Nm (320 in. lbs.), Fig. 8.
DO NOT ALLOW CRANKSHAFT TO ROTATE.
Fig. 8 – Torque Rod Cap
3. Remove the connecting rod cap. Measure the
plastigage at its widest point, Fig. 9. If the
clearance is not within specification, replace the
bearings.
Connecting Rod Bearing Clearance:
STD: 0.020-0.044 mm (0.0008-0.0017”)
Reject: 0.07 mm (0.0028”)
Repeat procedure for each connecting rod.
Fig. 9 – Measure Clearance
CHECKING CRANKSHAFT END PLAY
With thrust washers installed, check crankshaft end
play at #3 main bearing as shown, Fig. 10.
Crankshaft End Play:
STD: 0.020-0.24 mm (0.0008-0.0094”)
Limit: 0.30 mm (0.012”)
If end play exceeds limit, .125 mm (.005”) over size
thrust washers are available. See illustrated parts list.
Fig. 10 – Checking Crankshaft End Play
 Loading...