4 - 9
Adjustment
Adjustment
Needle bar rise adjustment
1. Attach the front cover.
2. Hold down the backstitching button and the selecting button (right), and turn the power on (the buzzer must sound
four times).
3. Select pattern number [02].
4. Press the [REV] key four times to select the left base line.
5. Attach the J foot and lower the presser hoot lifter.
6. Turn the pulley by hand, moving the needle bar to its lowest point.
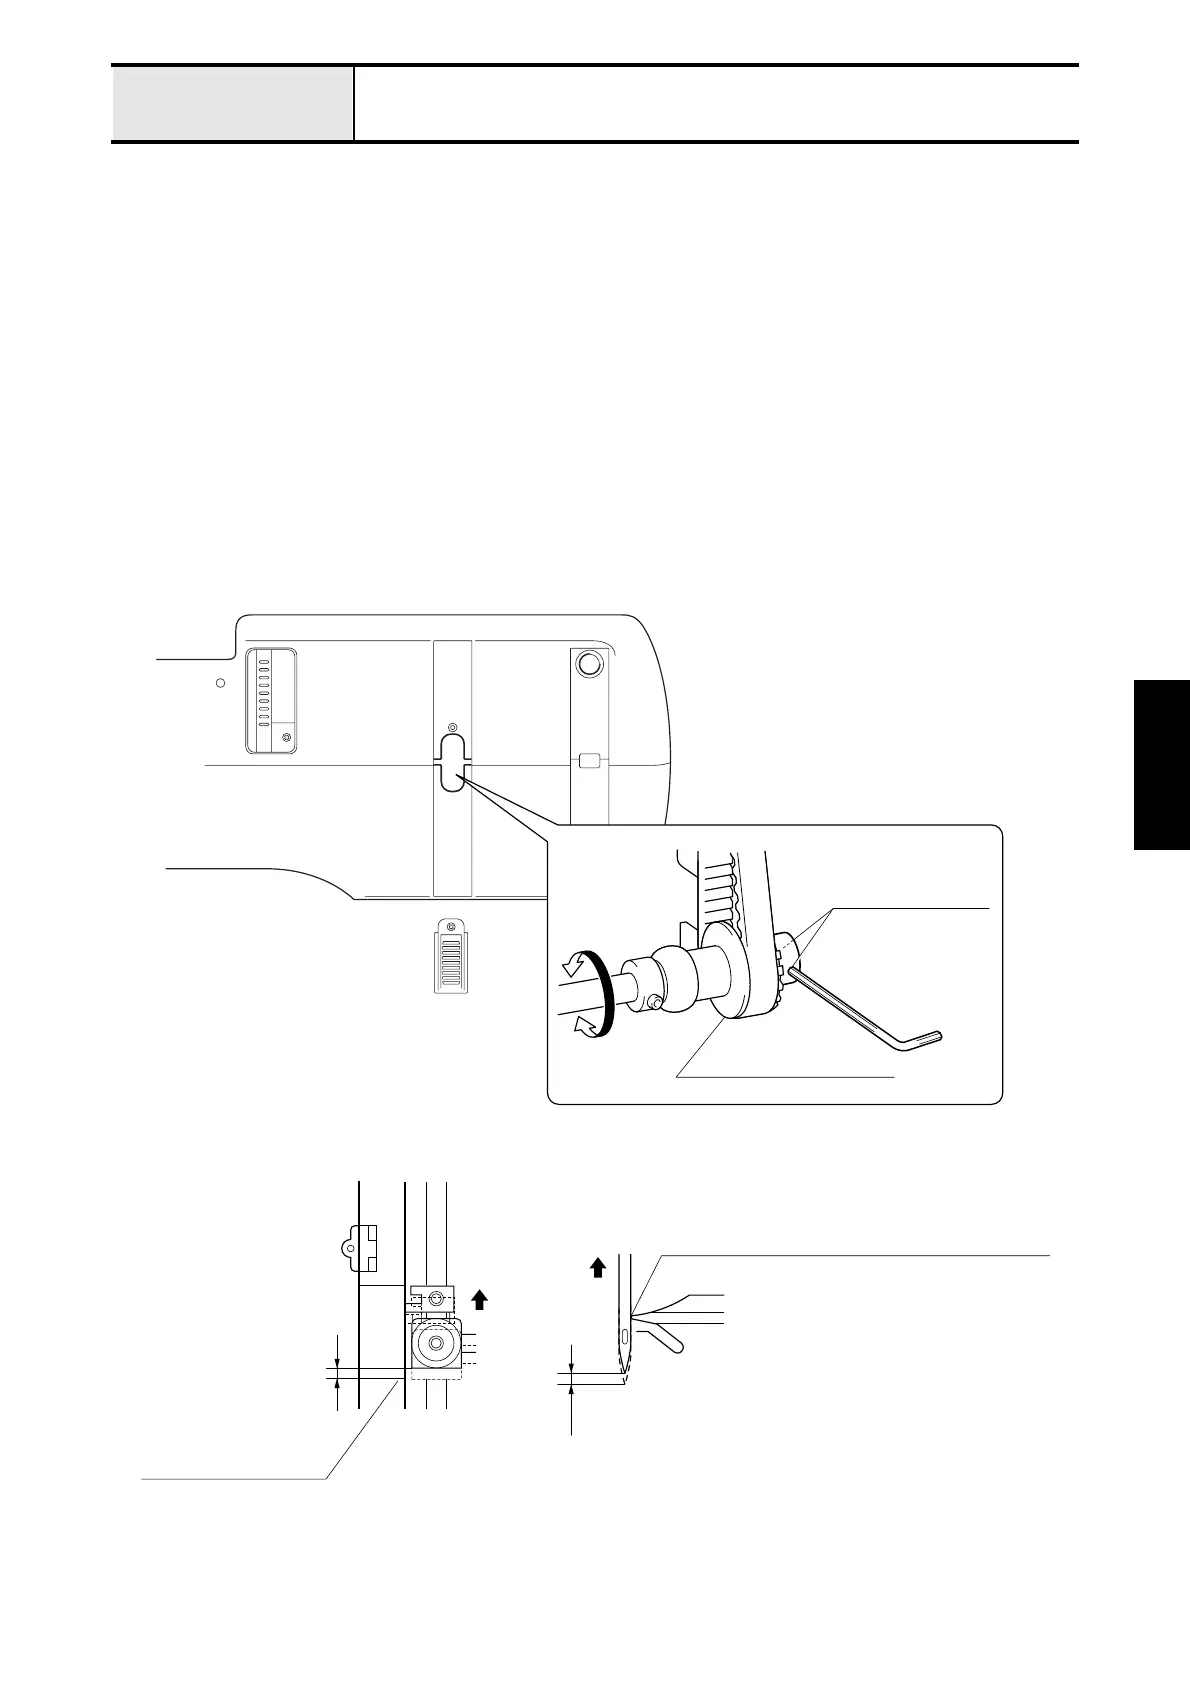
7. Remove the base cover.
8. Loosen the set screws (socket (CP) M5 x 5) (two) on lower shaft pulley D.
9. Rotate the outer rotary hook manually so that the right edge of the needle is aligned with the tip of the outer rotary
hook when the needle bar is raised 2.9 to 3.3 mm from the reference line of the lowest point.
10. Fully tighten the set screws (socket (CP) M5 x 5) on lower shaft pulley D.
11. Attach the base cover.
Socket set screws
(CP, M5x5) (2 pcs.)
Lower shaft pulley D
Draw a reference line
extending from the lowest
point of the needle bar.
The right edge of the needle is aligned
with the tip of the outer rotary hook when
the needle bar is raised 2.9 to 3.3 mm
from the lowest point.
2.9-3.3mm
2.9-3.3mm
 Loading...