3 - 15
Main parts
Main unit
Assembly
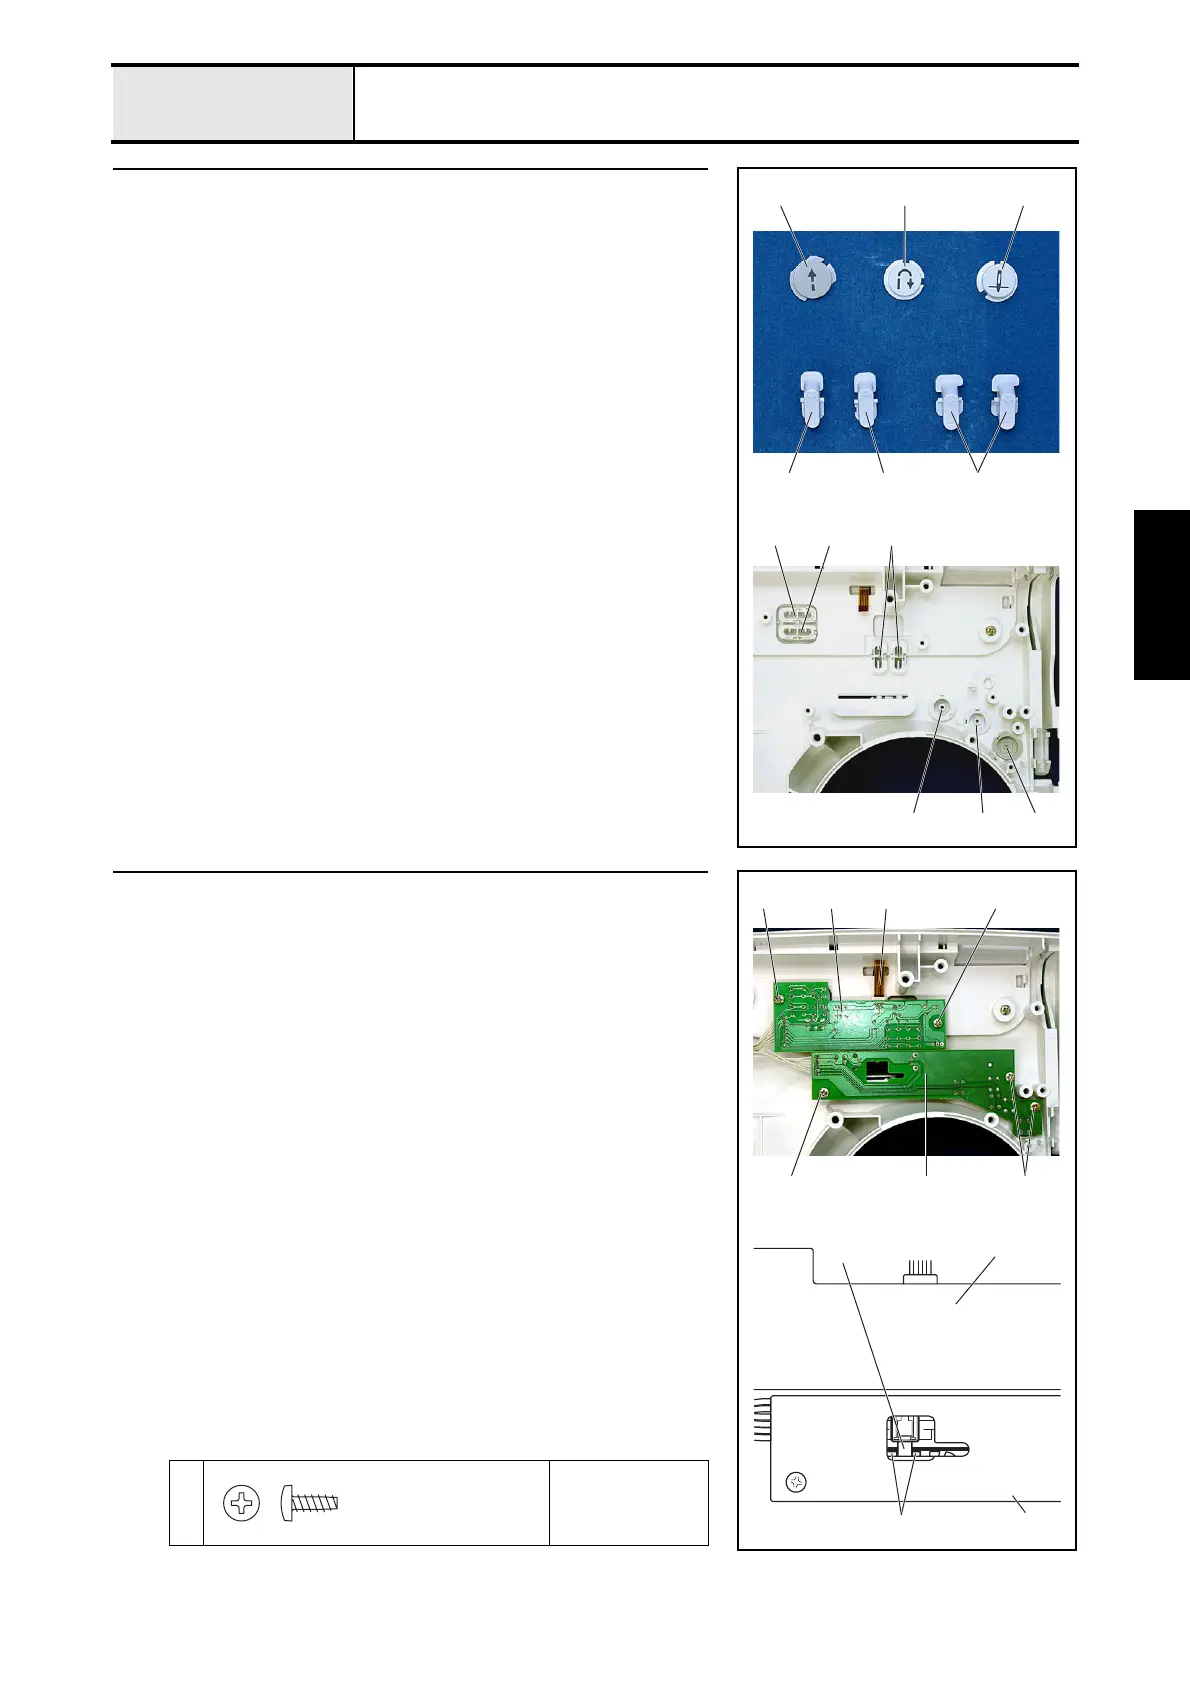
22 Button attachment
1. Attach the SS button 1, the backstitching button 2, and the NP button 3.
2. Attach manual button A 4, manual button B 5, and 2 selecting buttons
6.
45 6
321
123
456
23
Operation PCB assembly and SSVR PCB assembly attachment
1. Attach the operation PCB assembly 1 with the 2 screws 1.
2. Attach the SSVR PCB assembly 2 with the 3 screws 2.
*Key point
• Insert the speed dial of the SSVR PCB assembly 3 into the
slot on the SV keytop 4.
3. Connect the LCD cable 5 to the operation PCB assembly 1.
*Key point
• Bind the operation PCB cord and SSVR PCB cord, and secure
these with two bands. <Refer to "5 - 1 Special Instructions of
Wiring" for wiring details.>
1
2
Torque
0.39 – 0.78 N
·m
1
22
1
2
15
3
2
1
4
Taptite, Bind B
M3X8
Color; Gold
 Loading...