3 - 27
Feed unit
Main unit
Assembly
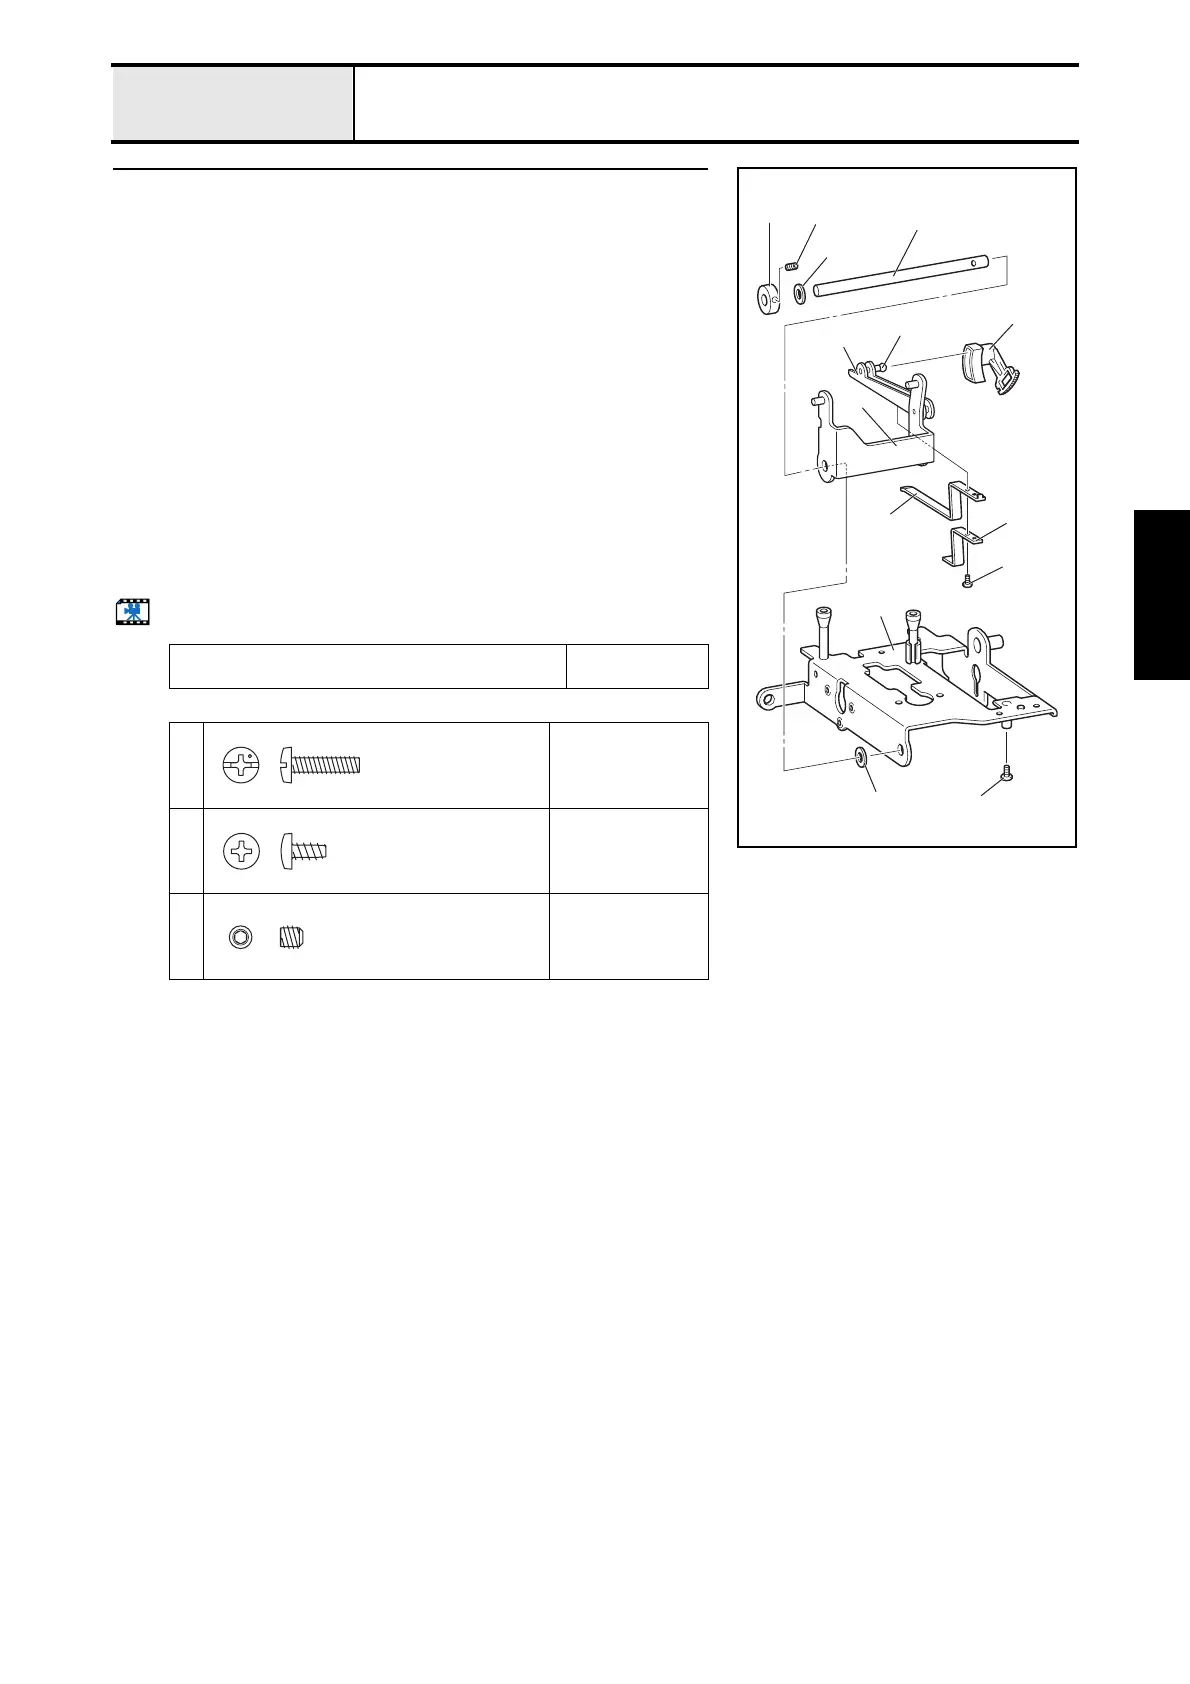
7 Feed arm A assembly attachment
1. Insert the feed arm A assembly 1 from the rear of the base plate assembly
2, and then insert the square shaft 4 of the feed arm B assembly 3 into
the feed adjuster 5.
2. Insert the thrust washer 7 between the feed arm A assembly 1 and the
base plate assembly 6.
3. Apply a bead of EPCON AP(N) 0 to the hole on the feed arm A assembly
1 and the hole on the base plate assembly 6.
4. Insert the horizontal feed shaft 8 into the feed arm A assembly 1, and
secure them with the screw 1.
*Key point
• Insert the horizontal feed shaft 8 through the feed arm A
assembly 1 so that the hole on the shaft faces FPM, and
align this hole with the hole on the base plate assembly 6.
5. Attach the feed supporting plate 9 and feed supporting plate B 8 to the
feed arm B assembly 3 with the screw 2.
6. Insert the thrust washer 7 and the set collar 9 into the horizontal feed
shaft 8, and then secure them with the screw 3.
Start movie clip (CD-ROM version only)
Apply EPCON AP(N) 0 to the hole on the feed arm A
assembly and the hole on the base plate assembly.
Bead
XC8387***
1
Torque
0.78 – 1.18 N
·m
2
Torque
0.00 – 0.00 N
·m
3
Torque
0.78 – 1.18 N
·m
6
2
8
9
4
1
3
7
0
6
5
1
2
3
Screw, Bind
M3X12
Color; Silver
Taptite, Bind B
M3X6
Color; Gold
Set Screw, Socket (CP)
M4X4
Color; Black

 Loading...