4 - Sprayer Setup
71
Liquid System
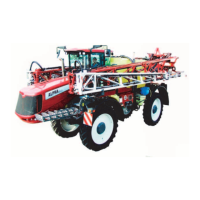
Self-Cleaning Filter - Choice of Restrictor
It is important to have a large flow through the filter. This is achieved by
choosing the restrictor size in relation to the liquid consumption of the
spray boom. 4 restrictors are supplied. Use the green one with largest
orifice (A) first.
Remove the hose (N) from the filter. Be careful not to loosen the seal.
Place the restrictor in the hose and mount the hose again.
If the required working pressure cannot be obtained, the restrictor is too
large. Choose a smaller restrictor. Start with a black one, then a white and
finally a red one.
When cleaning the filter, remove the hose (N) and the hose at the safety
valve and check that there are no residues.
Standard filter size is 80 mesh. Filters of 50 and 100 mesh are available
and can be changed by opening the filter top.
Check the condition of the O-rings before reassembly and replace them
if damaged.
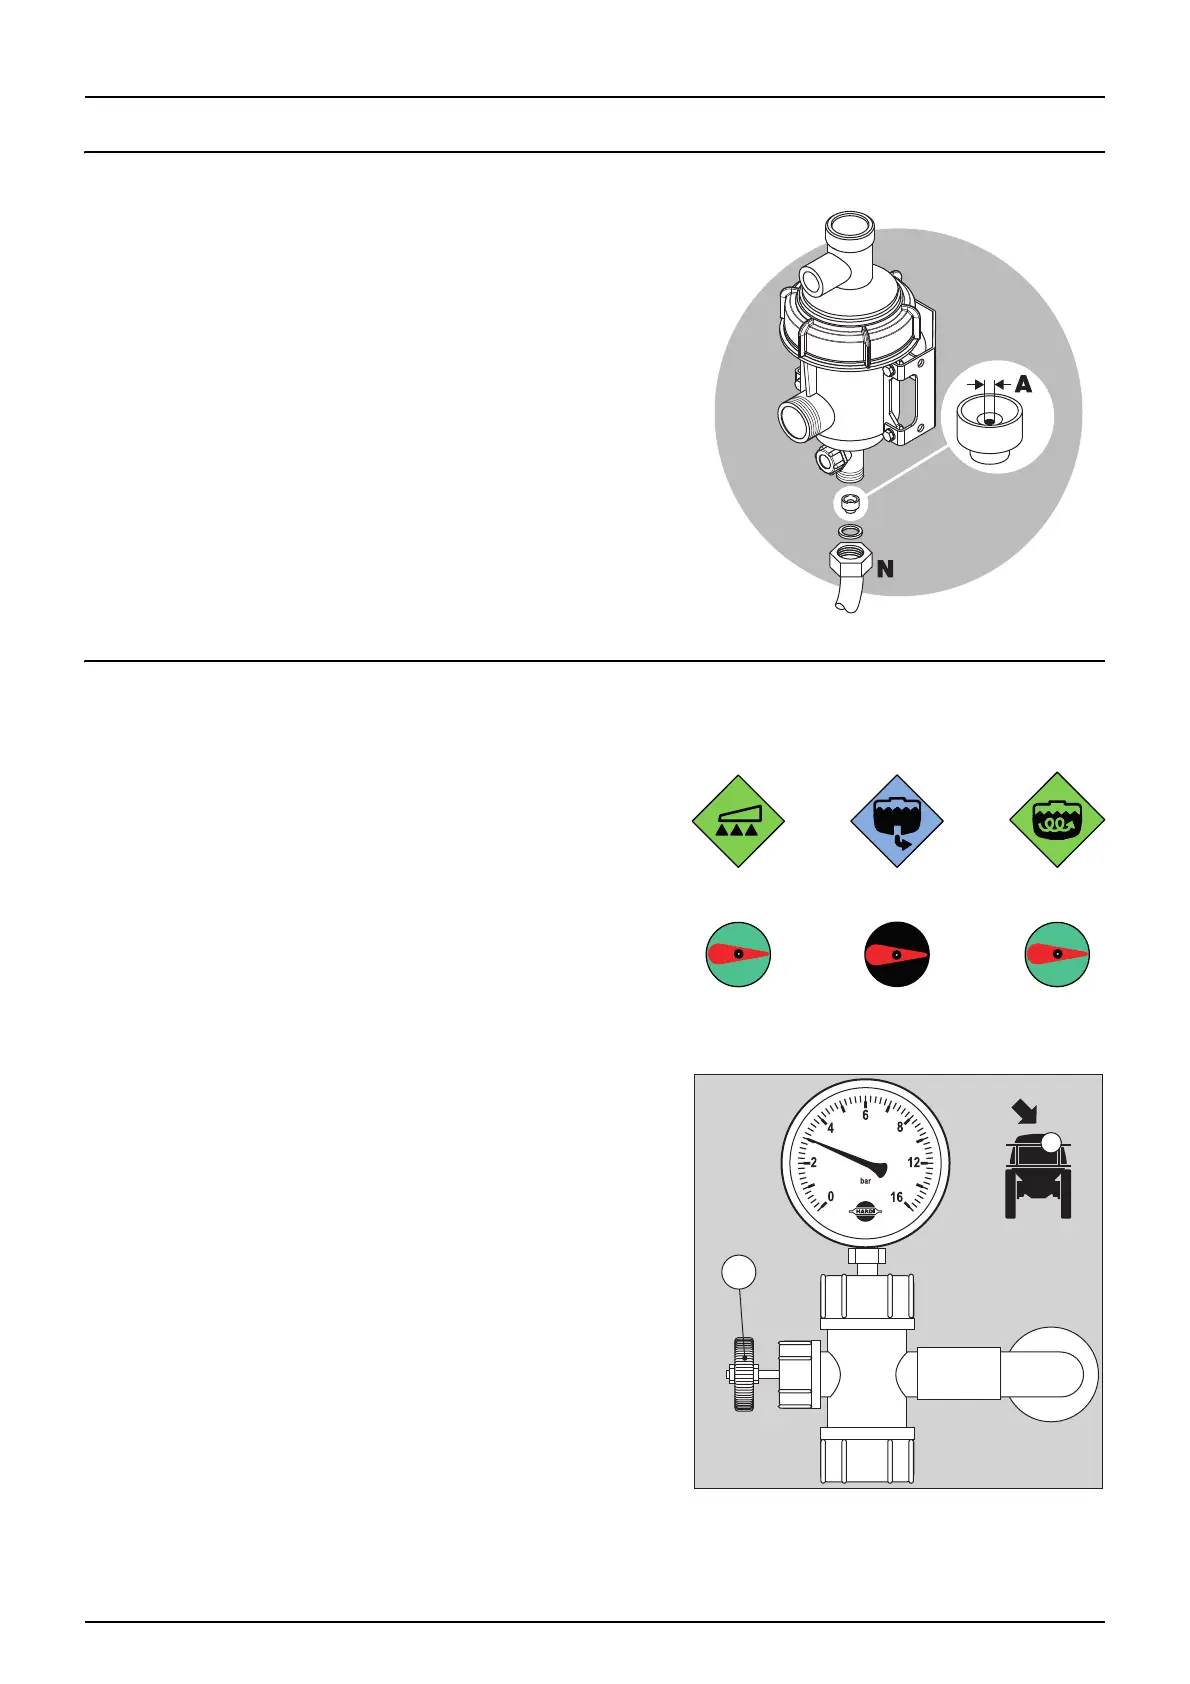
BoomPrime Adjustment
The BoomPrime system works within a fixed pressure range of around 3 bar, but it must be adjusted for the specific spray
job (due to different choice of nozzles etc.):
1. Unfold the spray boom and start the PTO.
2. Turn the pressure valve to “Spraying”.
3. Turn the suction valve to “MainTank”.
4. Turn the agitation valve to “Agitation”.
Only open the agitation valve to suit the tank content, e.g. half
open.
5. Manually adjust the spray pressure to what will be used when
spraying.
6. Close all nozzles.
7. Turn the BoomPrime adjustment screw (A) to increase the
BoomPrime pressure to 3 bar, or until the nozzles start to drip.
8. If the nozzles leak, then lower the BoomPrime pressure by 1 bar on
the adjustment screw (A).
μ
ATTENTION! If not adjusted correctly, the nozzles will not close
(i.e. they will drip), when the spraying is stopped, or the tubes will
not be primed.
The possible priming circulation speed of BoomPrime relies on the non-
drip valves to keep the nozzles closed.
 Loading...