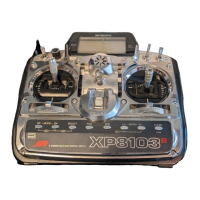
. T
ur
n
the transmitter ON while you simultaneously hold the
UP and DN keys to enter the System Mode. Using the UP key
,
move to WING TYPE. Now press the UP and DN keys
simultaneously to enter the Wing T
ype Function. Press the CH
key to move the cursor arrow to the dual flap position. Press the
L/+ key to activate the dual flap function.
B. With the UP key
, move the display to INPUT SELECT and
press the + key to change the display to FLAP SW+P6
.
C. Press the UP and DN keys simultaneously twice to move to
the Function Mode. Use the UP key to move through the
functions to the display that reads [D/FlapT
.]. Use the + key to
change the display to POT
.5
INH. Press the CH key and repeat
for POT
.6
and POT
.7
. This deactivates the three pots on the
transmitter to eliminate any inadver
tent changes to the flap and
aileron position.
3.
Use the UP key to move the display to REVERSE SW
. Check
the movement of all servos and adjust the ser
vo direction for all
sur
faces.
4.
Use the UP key again to move to the S.TRIM (Sub-T
rim
Function). With the SEL key
, move to the next screen and with
the CH key move the cursor arrow to FLAP and AUX 2 and
adjust in the direction that moves the ser
vo ar
ms so that they
raise the flaps. (Suggested values: FLAP U-90; AUX 2-90.)
5.
With all trims in neutral, the aileron ser
vo arms should angle
for
ward 2
0-3
0 degrees (see illustration below). This allows for
more up throw mechanically. The flap ser
vo ar
ms should be
angled slightly to the rear or ver
tically (see illustration at below).
These set-ups should be the same on each wing as symmetr
y
here helps in programming the landing mode and camber
(which will be explained later).
6.
In setting up the aileron dif
ferential, it is best to use the end-
point adjustment in the TRVL ADJ. Program 3 or 4:1 dif
ferential is
generally used on most aileron equipped gliders. Many pilots
will program as much up-aileron as possible and 1/8” to 1/4”
down-aileron as a star
ting point.
7.
The XP8
10
3 has an aileron/rudder mix [AILE-RUDD MIX].
No values are set in this program. Use the UP key to move
through the Function Modes to AILE-RUDD MIX. Use the CH key
to move to SW. If you want aileron/rudder coupling at all times,
use the + key to move the display to ON. T
o
turn this mix OFF
for aerobatics, etc., move the display to MIX. This will allow you
to use the mix switch located at the right, top-rear of the
transmitter to turn the aileron/rudder coupling ON and OFF
. T
o
set the amount of coupling, use the CH key to move the cursor
arrow to Rate:. Now adjust the value on the display to the
desired amount of rudder movement in the proper direction.
Aileron Ser
vo Arm Angle
Fla

 Loading...