www.modelflight.com.au – World’s best source of JR products
.
3
Launch and Reflex Presets
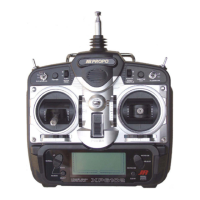
In the initial set-up of your XP8
10
3 transmitter
, if you set the flap
control preference to SW+P6, the set-up of your Launch (and
Reflex) presets is par
tially done for you.
Launch Preset
1.
Pull the preset switch down to the launch preset position.
This will droop the flaps down fur
ther than ideal for most launch
situations. Move to the TRVL ADJ. (Endpoint adjustment) por
tion
of your Function Mode settings. With the SEL and CH key, move
to the flap channel. Reduce the value shown on the display until
you get the amount of flap throw desired for launch. You need
only adjust the flap channel as the AUX 2 channel should follow
automatically in Dual Flap Mode. This change in value should
not af
fect the flap throw in Landing or Camber (crow) Mode.
2.
Aileron/camber should automatically be mixed into this
launch preset if you have chosen the FLP-D switch for the
flap/aileron mix. Y
ou may have to fine tune the aileron down
throws.
3.
If you wish to add some elevator up-trim to your launch
preset, use the UP key to move to FLAP-ELEV MIX. Use the CH
key to SW and set with the data keys to F-U+D. Move to the
Rate display and add the desired amount of up elevator for
launch preset. Leave the of
fset for this mix at 0.
T
railing Edge Reflex Preset
The preset for T
railing Edge Reflex does not require the use of
the programmable mixes in the XP8
10
3 if you are using the
SW+P6 Function for your flaps.
1.
Position the flap switch in the reflex (UP) position. This will
make the flaps raise. Move to the TRVL ADJ. (Endpoint
adjustment) por
tion of the Function Mode and adjust the flap up
travel to the desired amount of reflex.
2.
T
o
set the ailerons for reflex, use the UP key to move to the
FLAP-AILE MIX display
. Use the CH key to move to SW
: and set
to F-U+D. Move to Rate: with the CH key and adjust the value
to raise the ailerons to match flaps. You may have to fine tune
by adjusting the aileron travel through the T
ravel Adjust (Endpoint
djustment Function) to achieve a straight line along the entire
trailing edge.
3.
If you wish to automatically adjust elevator trim in the reflex
preset, move to the MIX F-E with the DN key
. Make sure the
switch select for this mix is FU+D and adjust the elevator trim to
the desired amount. (Generally
, a slight amount of down is used
for better penetration or increased speed.) Leave the of
fset for
this mix at 0.
4.
T
o
automatically adjust the aileron/rudder mix with the reflex
preset (in many cases you may reduce the amount of mix), use
the UP key to move to MIX E. Use the CH key to move to MIX E
CH 1-1 and set the channels to 2-4 using the + and - keys. Use
the CH key to move the display to MIX E SW
. Use the UP key to
select SW F-UP
. Move the flap switch to the UP position, and
use the CH key to move to the mix value display. The value will
have to be set for both left and right movement of the aileron
stick, and it will be a negative value — tr
y around -1
0% to star
t.
Leave the of
fset for this mix at 0.
ram
For gliders using flaps for glide path control, the following
infor
mation will allow you to program the 8
10 3
for precise spot
landings and safe descent from high altitude.
ll of the options and mix requirements for glide path control
using flaps are incorporated into one portion of the software. For
both landings and variable trailing edge crow (camber), you
will use butter
fly
, which is par
t of the Function Mode. There are
actually two modes (or set-ups) available. These are determined
by the position of what is called the crow (camber)/mix switch
(more properly the landing/camber switch), which is located at
the left-top front of the transmitter
. Landing position for this switch
will be toward the rear of the transmitter (POS.
1 in your display).
Using Butter
fly will allow you to operate your flaps with crow
(ailerons rising up as spoilerons, if you want), with automatic
electronic elevator compensation all from the left stick (Mode II).
This function can operate at neutral flap with the left stick either
up or down. However
, the trim operates only with the stick at the
bottom position. So, if you want to use the trim tab, neutral flap
should be with the left stick down. The trim tab should stay in the
center
. The 8
10 3
has a noticeable detent at center that is ver
y
easy to locate while flying.
1.
In the Function Mode, use the UP key until the left side of the
display reads Butter
fly
. Now use the CH key to move the cursor
GLID
135

 Loading...