3. Place the power supply adapter in the tray as shown in Figure 14 on page 61.
Figure 14: SRX110 Services Gateway Rack Installation — Positioning Power
Supply Adapter Tray
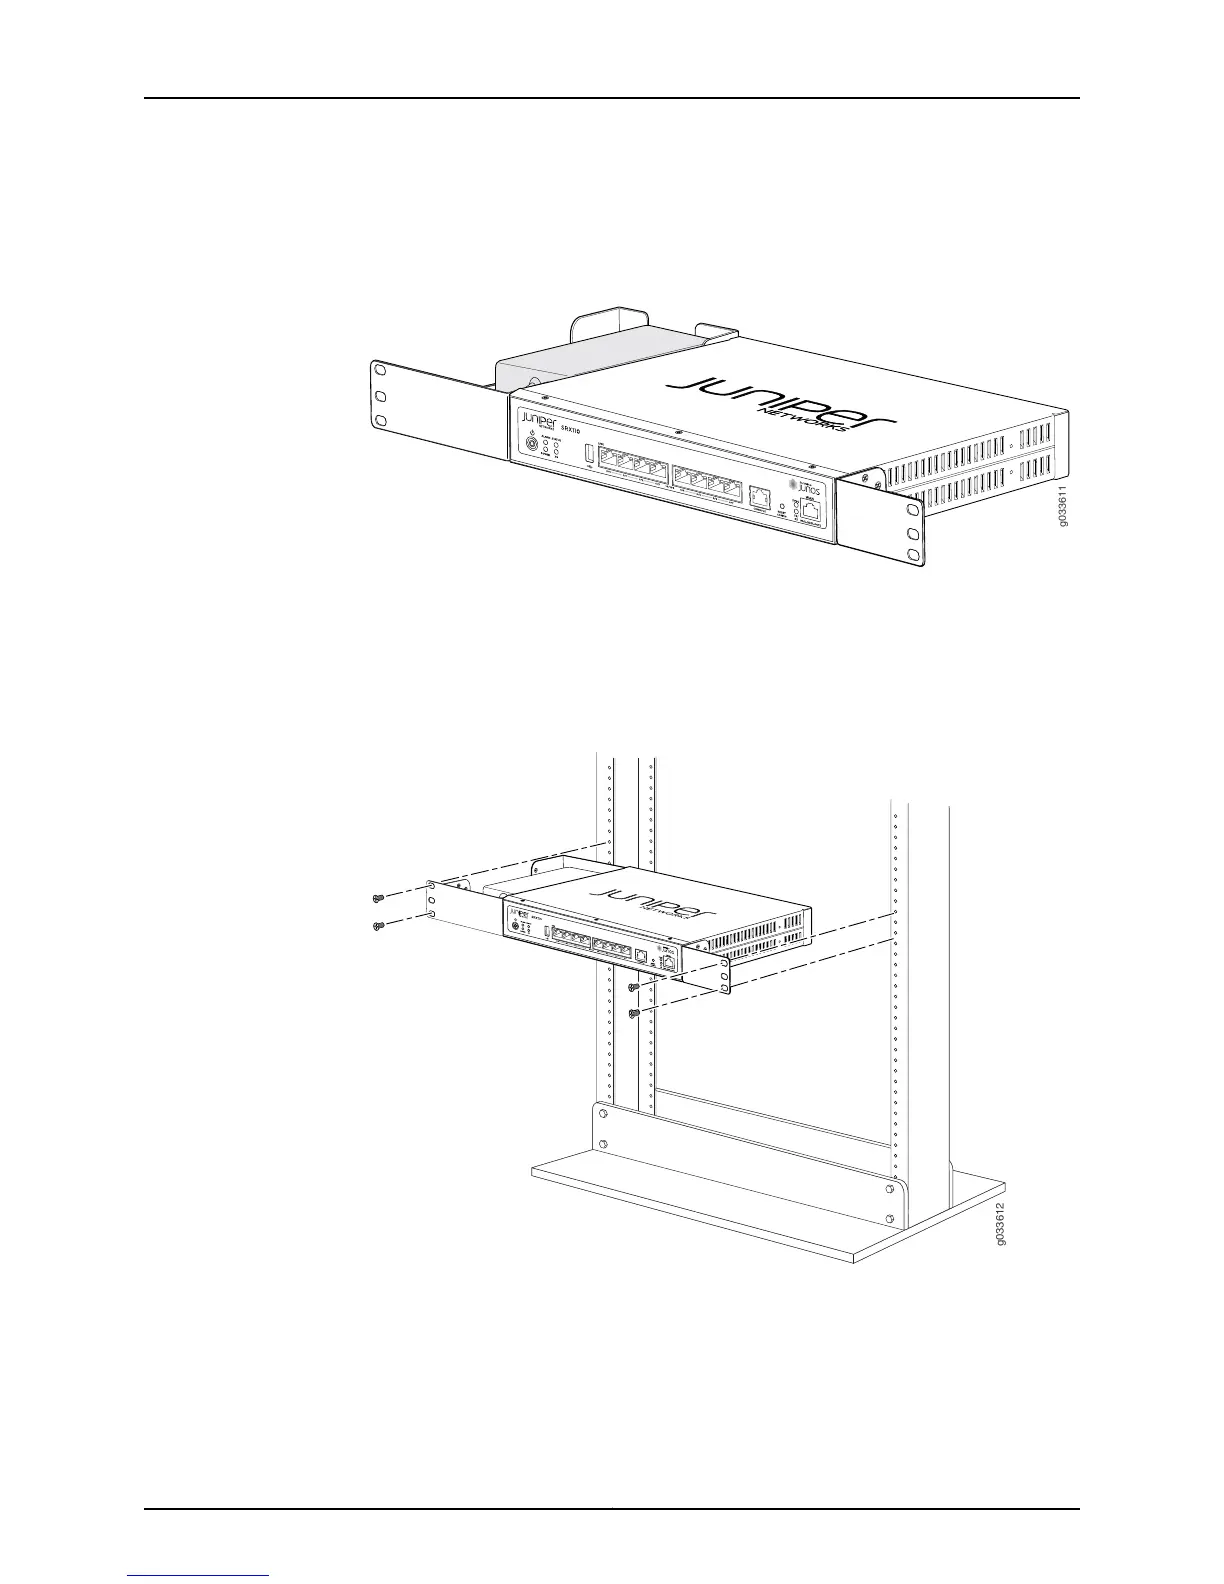
4. Have one person grasp the sides of the device, lift it, and position it in the rack.
5. Align the bottom hole in each mounting bracket with a hole in each rack rail as shown
in Figure 15 on page 61, making sure that the chassis is level.
Figure 15: SRX110 Services Gateway Rack Installation — Hanging the
Services Gateway in a Rack
6. Have a second person install a mounting screw into each of the two aligned holes.
Use a Phillips (+) screwdriver, number 3, to tighten the screws.
61Copyright © 2015, Juniper Networks, Inc.
Chapter 10: Installing the Services Gateway
 Loading...