OPERATOR’S MANUAL
CustomDSO PlugIn Mode
This is the mode in which CustomDSO really shows its power. You can insert any ActiveX control or graph.
Resize the control. A. In the Properties window set Width 11940. B. In the Properties window set Height 2475.
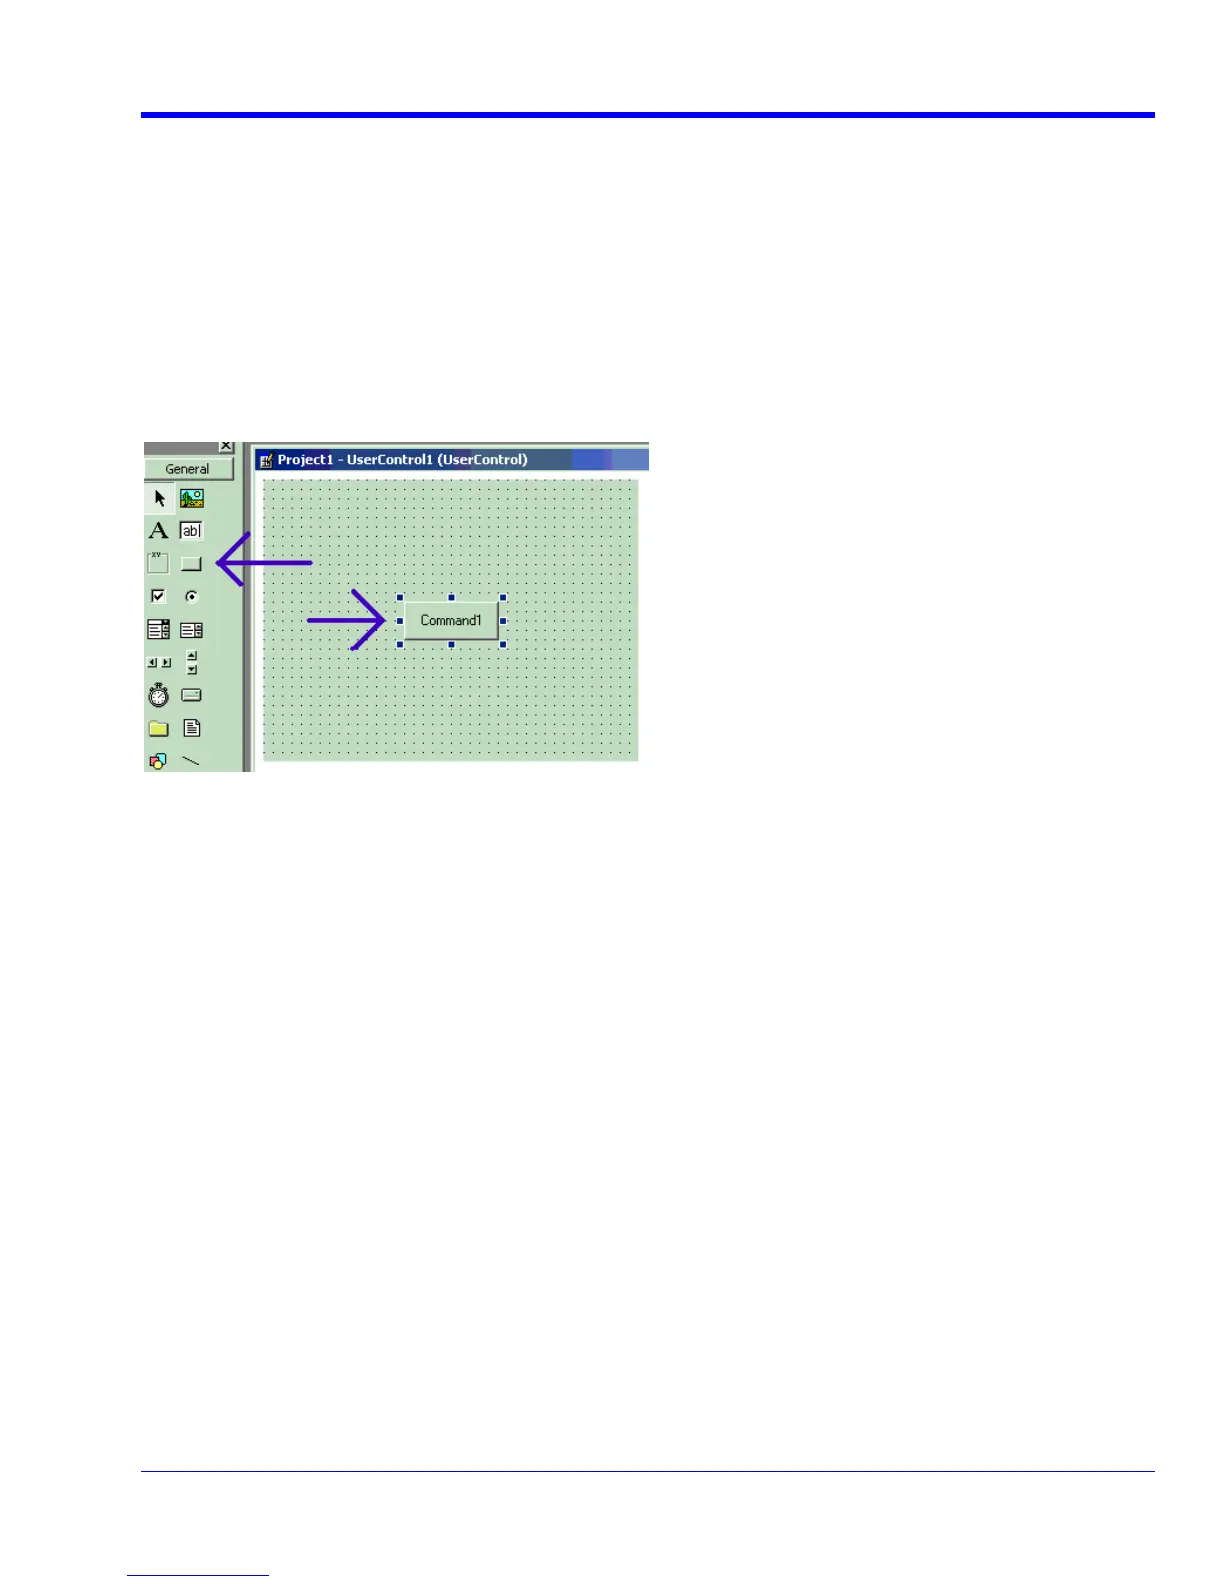
Place two buttons on the control. A. Double click on the command button at left of screen (left arrow below). B.
Move and resize the resulting button as required, using the handles (right arrow below). C. Repeat for the second
button. D. In the Properties window set the Name properties to SingleButton and AutoButton, respectively. E.
Set the button Caption properties to Single and Auto, respectively
Creating a CustomDSO PlugIn
Follow these steps to create an example Visual Basic PlugIn:
Start a new VB project. Select ActiveX Control from the New tab.
Create code for the buttons. A. Double click on the Single button. B. In the resulting code window, insert code to
Application”)
app.Acquistion.TriggerMode = “Stopped”
Application”)
ful step, because you can test your
rument.) A. Start the instrument. B. Click the Run button In Visual Basic.
C. Click the Stop button in Visual Basi he ou have finished.
ject in Visual Bas A. Click the top button in Visual Basic. B. Select Make Project1.ocx from the
make the following subroutine:
Private Sub SingleButton_Click()
Dim app as Object
Set app = CreateObject(“LeCroy.XStream
End Sub
Double click on the Auto button.
In the resulting code window, insert code to make the following subroutine:
Private Sub AutoButton_Click()
Dim app as Object
Set app = CreateObject(“LeCroy.XStream
app.Acquistion.TriggerMode = “Auto”
End Sub
Test the Component in Internet Explorer. (This is an optional, but very use
work without installing anything in the inst
c w n y
Make the Pro Sic.
File menu.
WRXi-OM-E Rev C 219

 Loading...