6-19
Chapter 6 INSPECTION AND REPAIR OF BASIC ENGINE
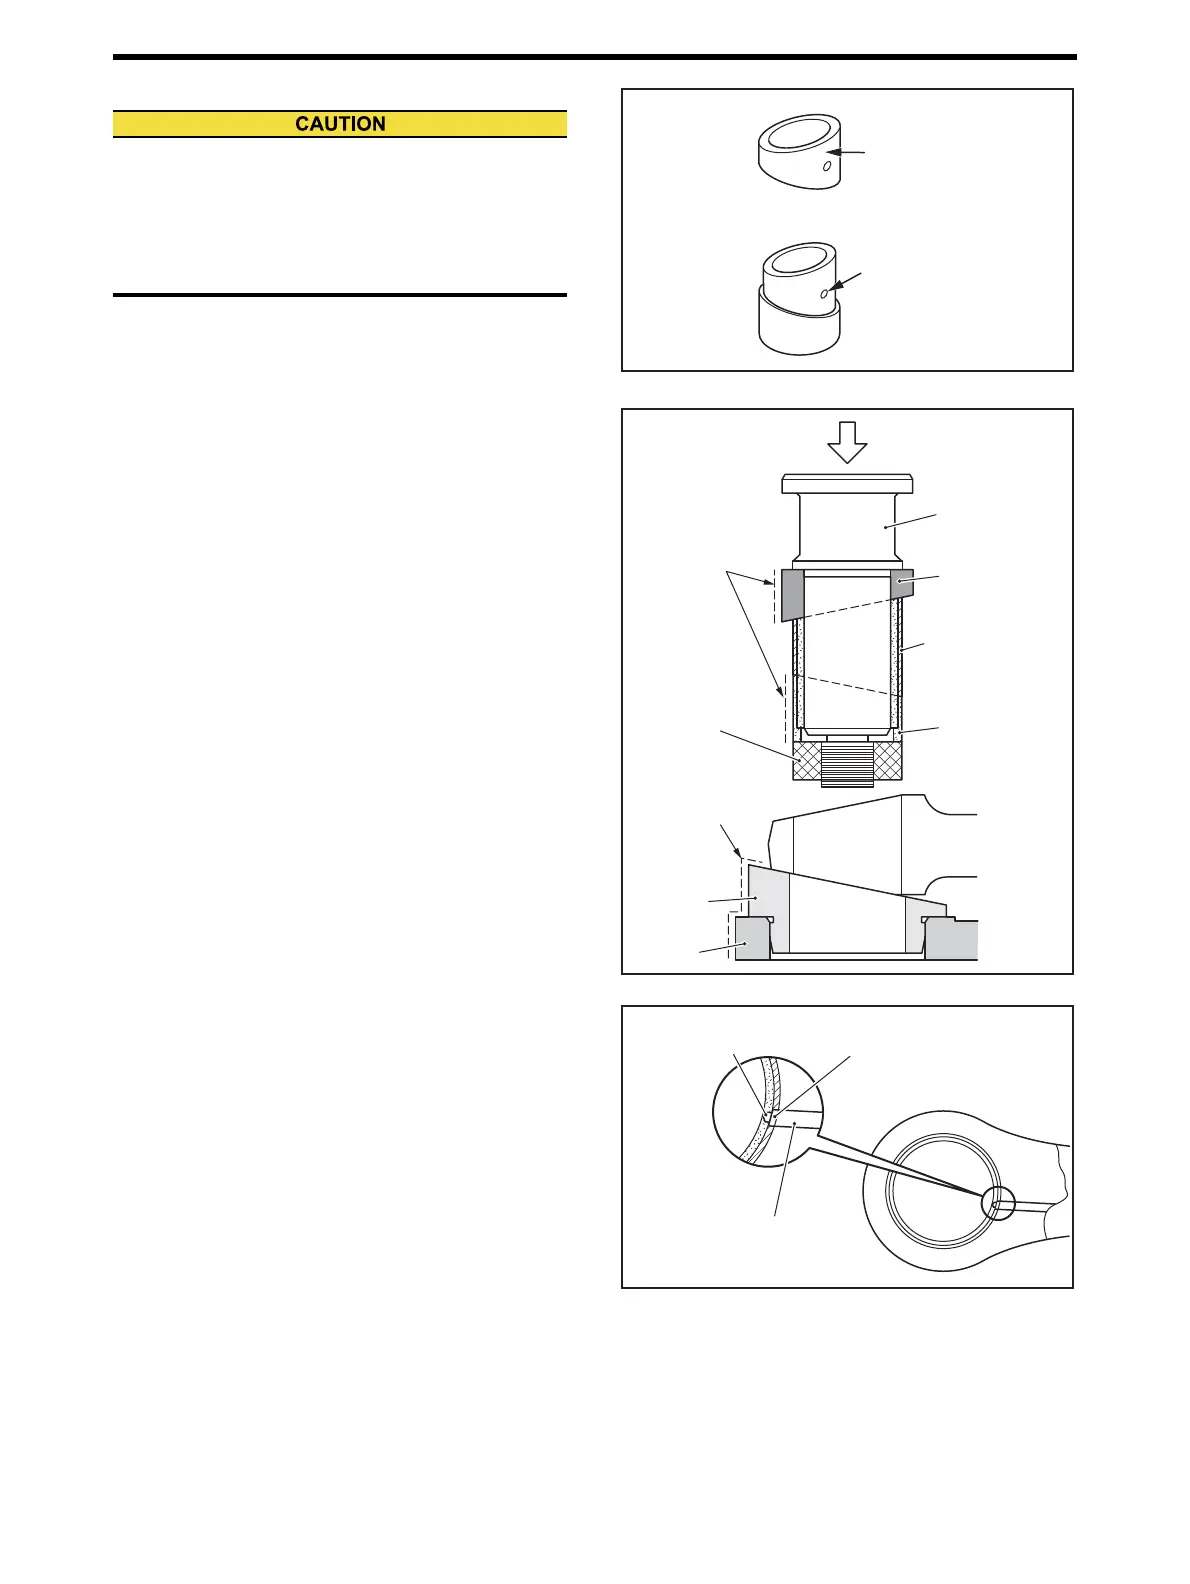
4.10.3 Connecting Rod Bushing - Press-In
(1) Align the oil hole with match mark on collar A (ø4 mm
[0.16 in.] red), and install a new connecting rod bushing
on collar A.
(2) Install the combination of collar A and collar B to man-
drel, and fix them with nut.
Connecting Rod Bushing Installer - Use (4)
Connecting Rod Bushing Installer - Use (5)
(3) Apply engine oil to outer surface of connecting rod
bushing. Align the match mark (red line) on collar A
with mark of collar B to align the oil hole of connecting
rod bushing and oil hole of connecting rod. Press-in the
bushing into connecting rod with pressing machine.
Connecting Rod Bushing Installer - Use (6)
(a) Make sure that the match marks (red lines) on col-
lars A and B are align.
(b) Make sure that the oil hole of connecting rod
bushing is in alignment with match mark (red ø4
mm [0.16 in.]) on collar A.
Connecting rod bushing
oil hole
Collar A
match mark
(ø4 mm [0.16 in.] red)
Mark on adapter
(red stamp marks)
Mandrel
Collar B
Collar A
Connecting rod
bushing
Adapter
Base
Nut
Mark on collar A and B
(red stamp marks)
Mark on collar A and B
(red stamp marks)
Collar A match mark
(ø4 mm [0.16 in.] red)
Connecting rod oil hole
Connecting rod
oil hole

 Loading...