7-32
Chapter 7 ASSEMBLY OF BASIC ENGINE
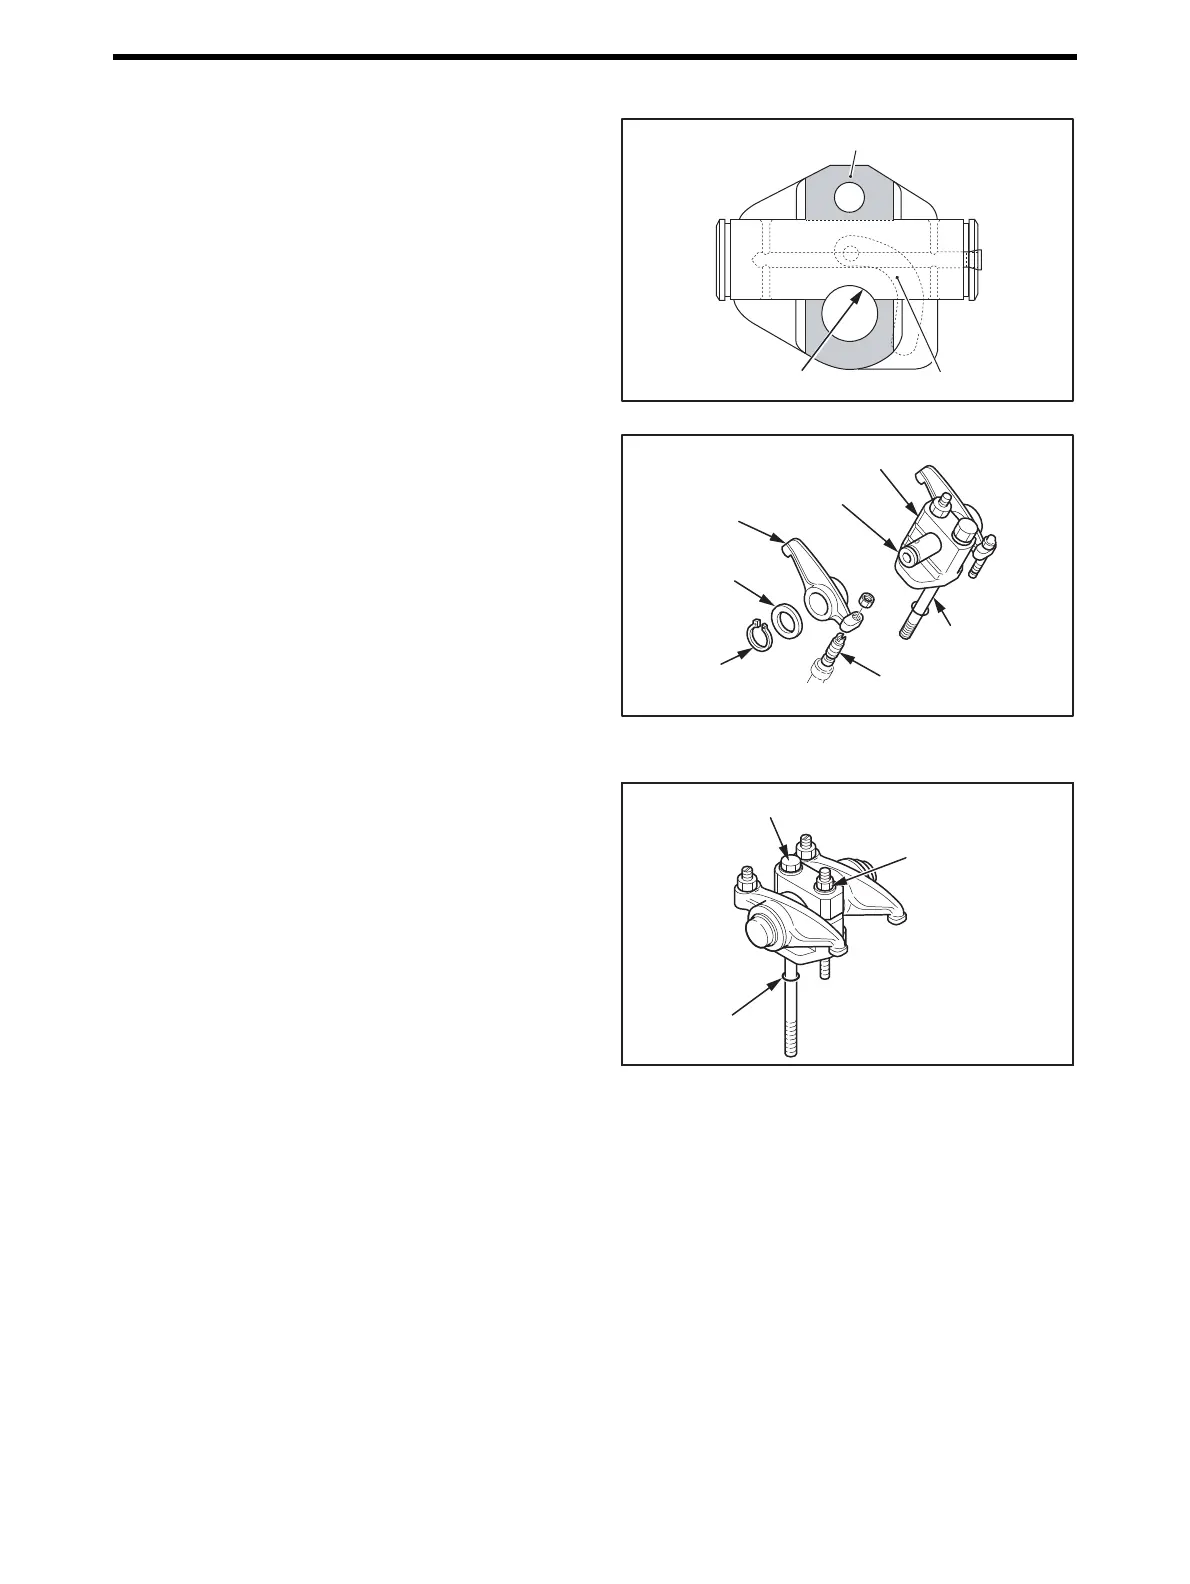
5.11 Rocker shaft assembly - Assemble
(1) Insert the rocker shaft bracket to the rocker shaft
bracket.Match the chipped parts of the rocker shaft and
the head bolt hole of rocker shaft bracket.
Rocker Shaft - Assemble
(2) Install the rocker arm to the rocker shaft, and tighten
them with washers and snap rings.
Rocker shaft assembly - Assemble
5.12 Rocker Shaft Assembly - Install
(1) Install the push rod to the tappet hole from the cylinder
head.
(2) Install a new O-ring to the cylinder head bolt (long),
and tentatively install the rocker shaft assembly to the
cylinder head.
(3) Insert the rocker bracket bolt to the rocker shaft
bracket.
(4) With the bracket mounting bolt loosely tightened,
adjust the bracket position so that the ends of both rock-
ers come into contact equally with the respective bridge
cap tops.
(5) Tighten the cylinder head bolts.
For tightening procedure, refer to "Cylinder Head Bolt -
Tighten" of "ASSEMBLY OF BASIC ENGINE".
(6) Tighten the rocker bracket bolts to the specified torque.
Rocker Shaft Assembly - Install
Rocker shaft
Notch
Rocker shaft bracket
Rocker arm
Adjusting Screw
Rocker shaft
Cylinder head
bolt (long)
Rocker shaft bracket
Snap ring
Washer
Rocker bracket bolt
49 ± 2.5 N·m
{5 ± 0.25 kgf·m}
[36 ± 1.84 lbf·ft]
Cylinder head bolt (long)
O-ring

 Loading...