6881076C20-E February 3, 2003
Introduction: Control Head Descriptions 1-5
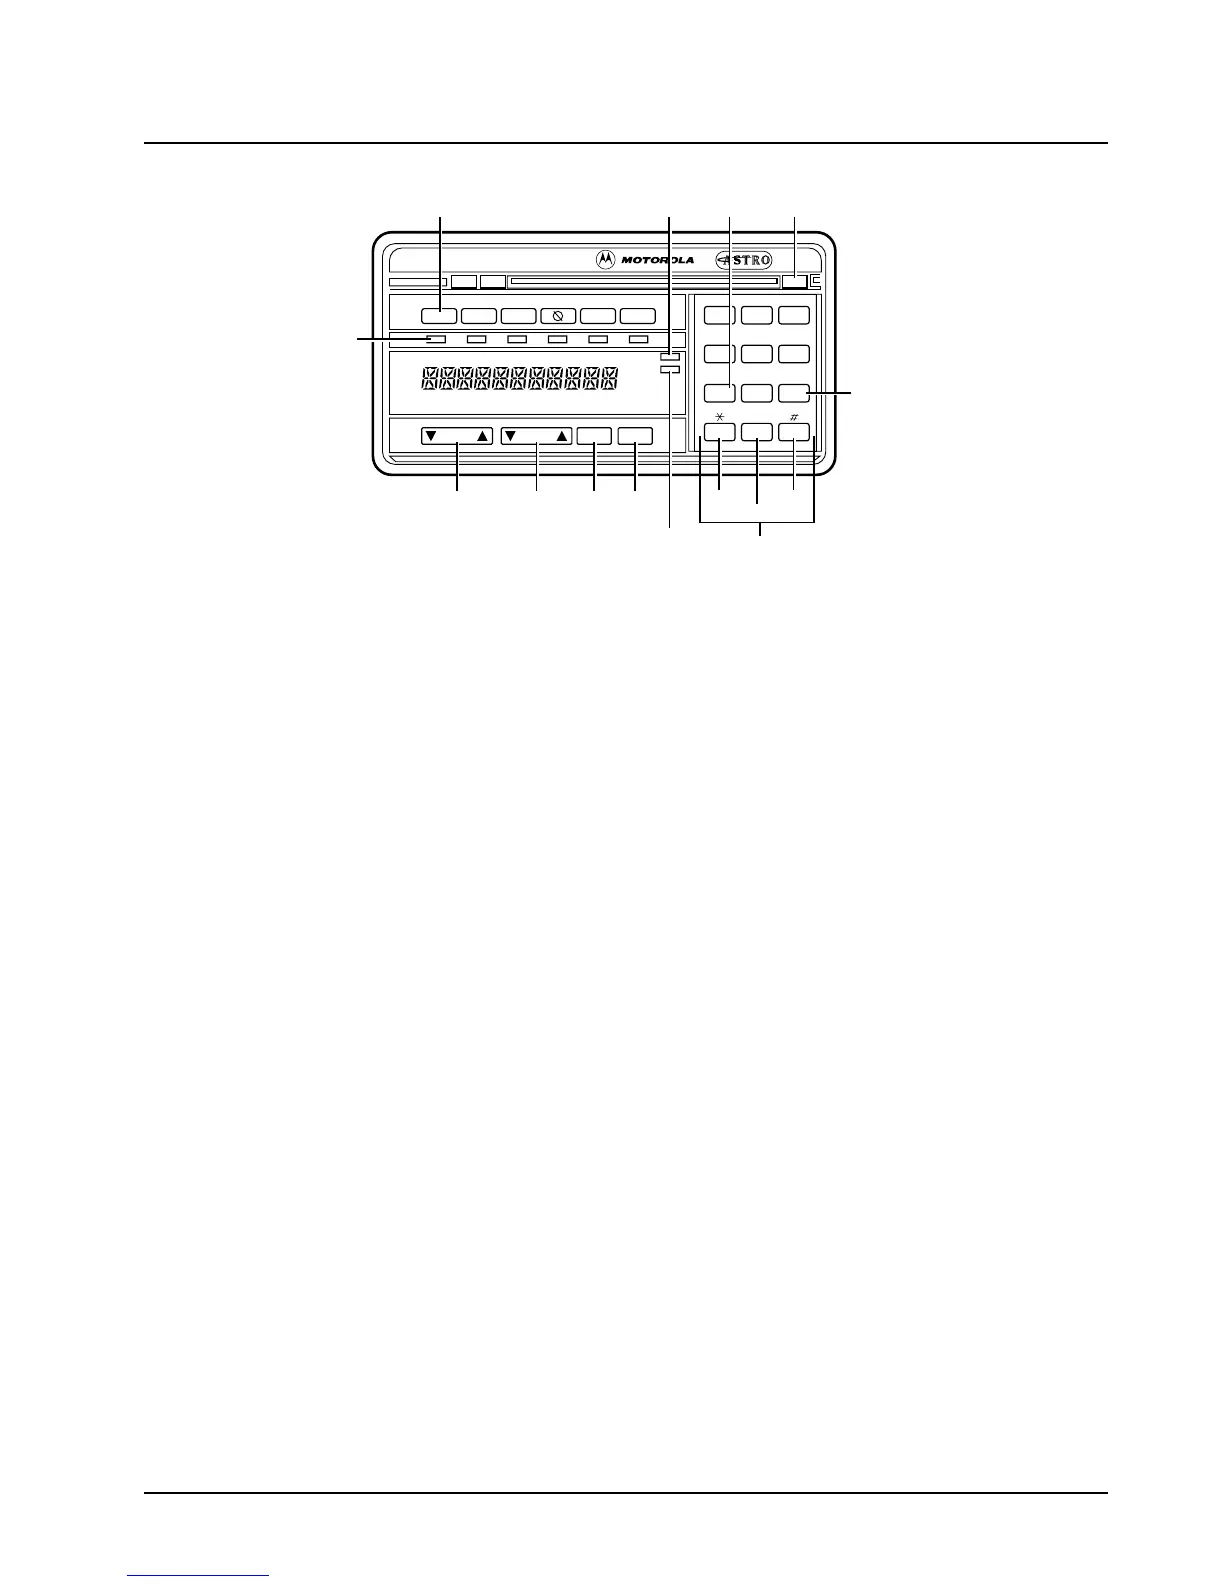
Figure 1-5. Typical W9 Pushbutton Control Head
1.3.1.4 Models W4, W5, W7, and W9 Controls
• Power Switch — The power (PWR) switch turns the radio and its accessories on or off. The
power switch is part of the rotary volume knob on the W4 model, a push-type switch on the W5
and W7 models, and a slide switch on the right-hand bottom surface of the W9 model.
• Mode Switch — The Mode switch is used for selecting modes and programming menus. The
Mode switch is a rotary switch on the W4 model and a rocker switch on the W5, W7, and W9
models. Pressing the right side of this rocker switch increases the mode number. Pressing the
left side decreases the mode number. If you press and hold the switch, it scrolls the mode
number up or down. The mode names appear in the display window.
• Volume Switch — The Volume switch is used for selecting the volume level, editing names, and
making certain radio adjustments. The Volume switch is a rotary switch on the W4 model and a
rocker switch on the W5, W7, and W9 models. On the pushbutton models, pressing and
releasing the volume switch checks the volume setting. Your display will show “VOLUME_ _”
and a number value (0-15). Press and hold the left side to decrease the volume. The number
value scrolls up or down to your desired level. The Volume rocker switch also controls the
volume level of the public address (PA) and external radio speaker (Ex Rd) options when they
are enabled. The display window shows “PA VOL _ _” when public address is on and the
Volume rocker switch is pressed.
• Dim Button — The DIM button is used to control the brightness of the display and button
backlighting. When you turn on the system, the display comes on at the brightness level it was
on before the system was last turned off. Press the DIM button once to reduce the brightness of
the display to medium level and twice for low brightness level. Press the DIM button a third time
to turn the display and button backlighting off. This is called the “surveillance” mode.
• Home Button — The Home button is used for restoring preprogrammed mode, establishing
programmed mode, selecting programming entries, etc. Press the Home button to go to the
radio’s preprogrammed “home” mode. On the W7 models, you may use the Home button
instead of Mode switch to change modes. Hold the Home button until a beep sounds to enter
the configuration state. The display shows an entry prompt. Use the keypad to enter your new
mode choice and press the Home button again. Your mode is now changed without scrolling.
• Select Button — The Sel button is used to configure radio options.
XMIT BUSY
Call
ScanEmer
DIM
Pri
Non
Pri
123
456
789
0
Mode
Vol Sel
Home
Phon H/L
Rcl Sql Del
Dir
Sts Msg
VOLUME
ROCKER
MODE
ROCKER
SELECT HOME
KEYPAD
RECALL
SQUELCH
DELETE
DIMMER
CONTROL
PRIORITY
INDICATOR
FUNCTION
BUTTON
NON-PRIORITY
INDICATOR
FUNCTION
ON/OFF
INDICATORS
* Optional buttons (included but not installed or programmed)
MESSAGE*
STATUS*
 Loading...


