14 – ENGLISH
4.2.3 USING THE CONTROL UNIT BUTTONS
The control unit has 4 buttons, which behave differently in relation to the
current status of the control unit.
OPERATION DURING PROGRAMMING
A
f
– scrolls the programming menu forward
– increases by one point the value of the parameter being modied
B
g
– accesses the conguration of the selected parameter
– conrms the selected value of the chosen parameter
C
h
– scrolls the programming menu backwards
– decreases by one point the value of the parameter being modied
D
i
– not enabled
NORMAL OPERATION
A
f
– performs an opening manoeuvre
B
g
– stops the current manoeuvre
– with the motor stationary, it switches the courtesy light off
– if pressed for 3 seconds, the programming menu appears
C
h
– performs a closing manoeuvre
D
i
– allows for memorising or deleting radio remote controls
4.3 ADDRESSING OF DEVICES CONNECTED WITH
THE BLUEBUS SYSTEM
By means of addressing using special jumpers, the “BlueBUS” system
enables the user to make the control unit recognise the photocells and
assign the correct detection function.
The addressing operation must be done on both the TX and RX photocells
(setting the jumpers in the same way), while making sure there are no other
pairs of photocells with the same address.
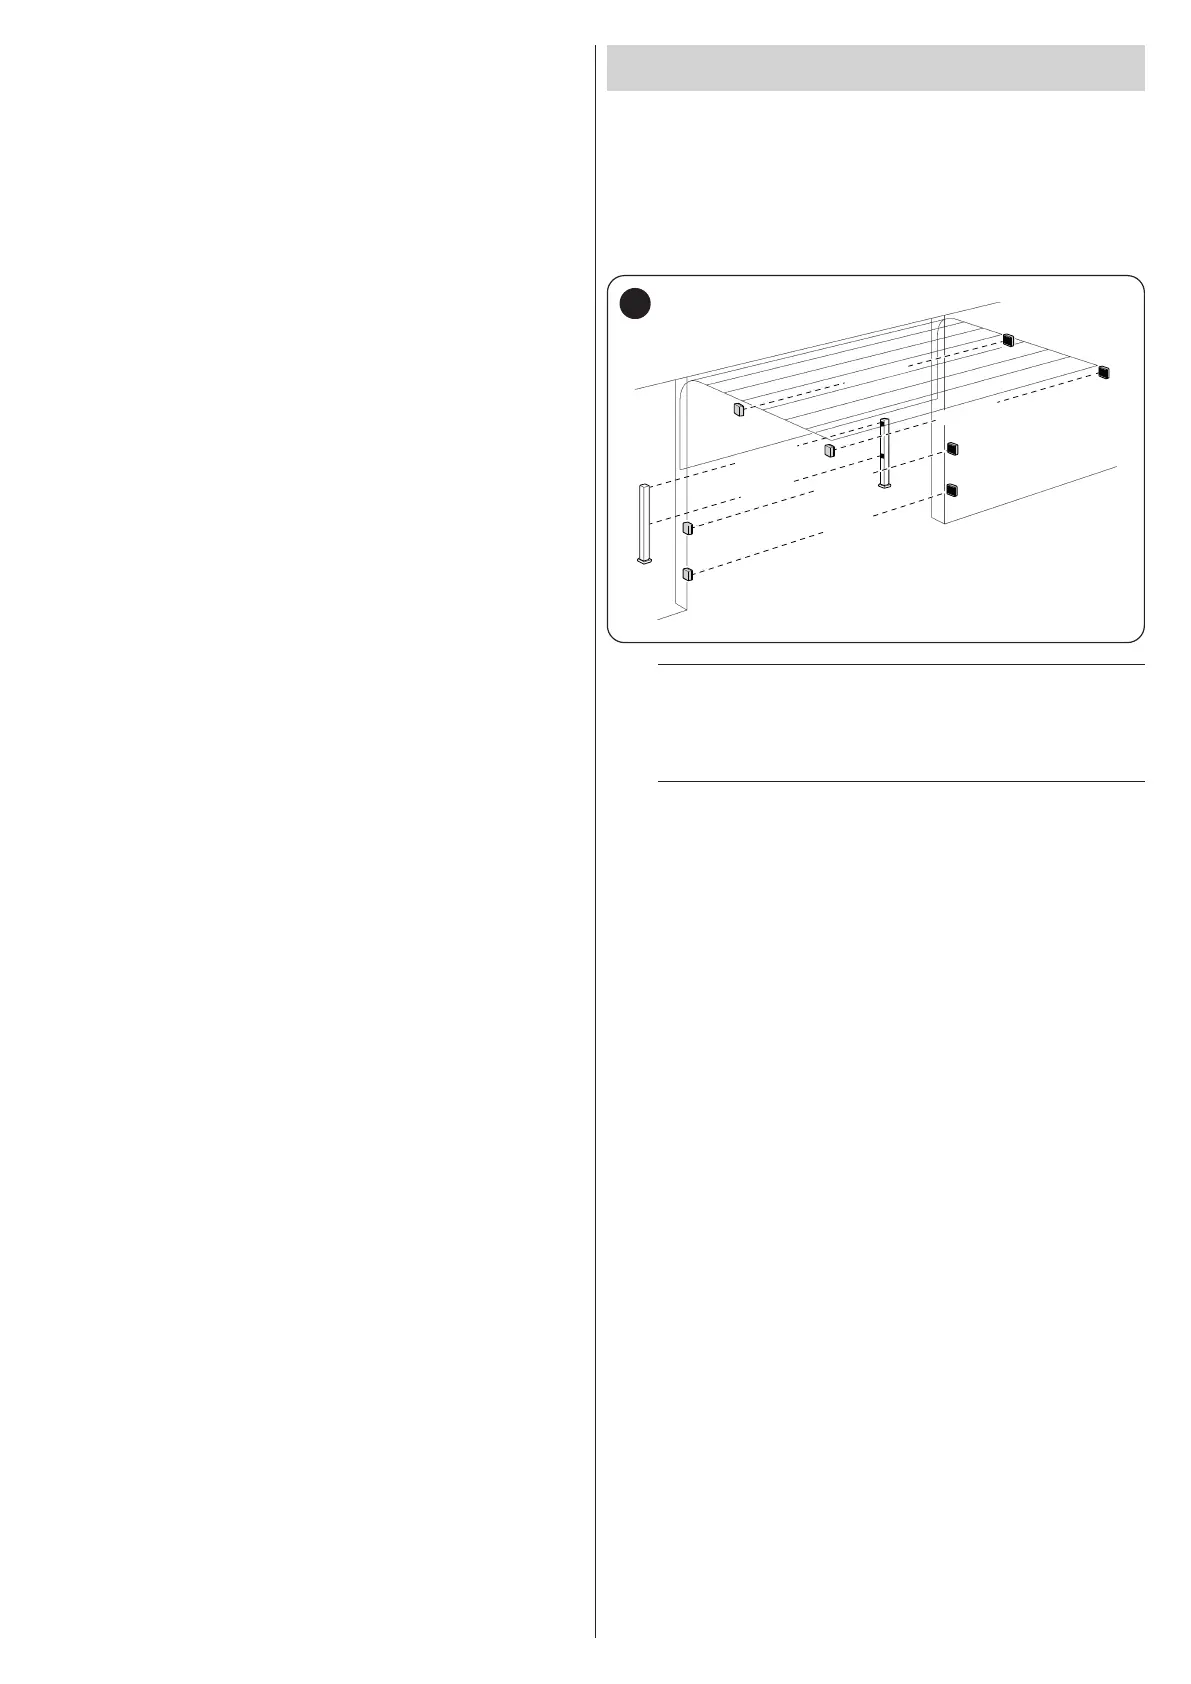
In systems for automated overhead doors, the photocells can be connect
-
ed as shown in the gure below.
FOTO 1 II
FOTO 1
FOTO 2
FOTO 2 II
FOTO II
FOTO
30
m
At the end of the installation procedure, or after photo-
cells or other devices have been removed, it is neces-
sary to complete the learning procedure (see the “Device
learning” paragraph).
a
WARNING! Do not place the following photocells adja-
cent to one another:
PHOTO with PHOTO 2
PHOTO II with PHOTO 3
PHOTO 1 with PHOTO 2 ii
Refer to Table “Table 6” shown below.
 Loading...