PG-FP5 CHAPTER 3 SOFTWARE INSTALLATION
R20UT0008EJ0400 Rev. 4.00 Page 26 of 240
Jul 15, 2010
The folder configuration after programming GUI installation is as follows.
3.2.1 Notes on installation
(1) Multiple versions of the PG-FP5 can be installed on a single host machine. Although we recommend using the
latest version of any development tool, leaving a previous version on your host machine and then installing the
latest version lets you easily switch the development environment.
(2) You might be asked to reboot your computer after installing the PG-FP5. Be sure to close all other applications
before rebooting your computer.
(3) You must have administrator privileges to install the PG-FP5.
(4) The PG-FP5 can only be installed in a folder that is named using ASCII characters. (Note that the 11 characters /
* : < > ? | " \ ; , and character strings that begin and end with a space cannot be used.) The PG-FP5 might not
operate correctly if installed in a folder that is named using other characters.
(5) The PG-FP5 cannot be installed from a network drive or on a network drive.
(6) The installer does not specify environment variable paths. If these paths are required, add them after installation.
(7) The help feature was created using HTML Help files. If the help feature is not operating correctly, make sure you
are using Microsoft Internet Explorer 5.0 or later (5.5 SP2 or later is recommended).
3.2.2 Installation of USB driver
The USB driver must be installed after installation of the programming GUI when connecting the FP5 and the host
machine via the USB interface. When the FP5 is connected to the USB port on the host machine for the first time, the
operating system automatically detects the FP5 by Plug and Play and the Welcome to the “Found New Hardware Wizard”
will start.
In this section, displays of Windows XP are used for explanation. Displays are different when using Windows 2000, but
installation can be performed in the same manner.
(1) Start up the host machine.
(2) Use a USB cable to connect the FP5 to the host machine, plug in the AC adapter and the AC adapter to the FP5
power supply connector.
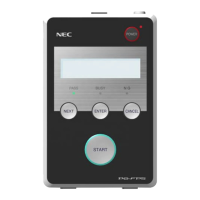
(3) Press the POWER button on the FP5; the POWER LED will then turn on and “Command >” is displayed in the
message display.
(4) The following window appears. Select “No, not this time” and click the Next > button.
\Program Files
C:\
\NEC Electronics Tools
\PG-FP5
\V2.00
\bin
[FP5.exe]
\doc
\V2.10
\driver
Folder structure for which installation is specified
Folder where programming GUI is stored
Folder where documents are stored
Folder where USB driver is stored
\FP5_PRJ
Folder where PR5 files and ESF files are stored
 Loading...