Preparations for Use as a Network Scanner
24
2
D
DD
D
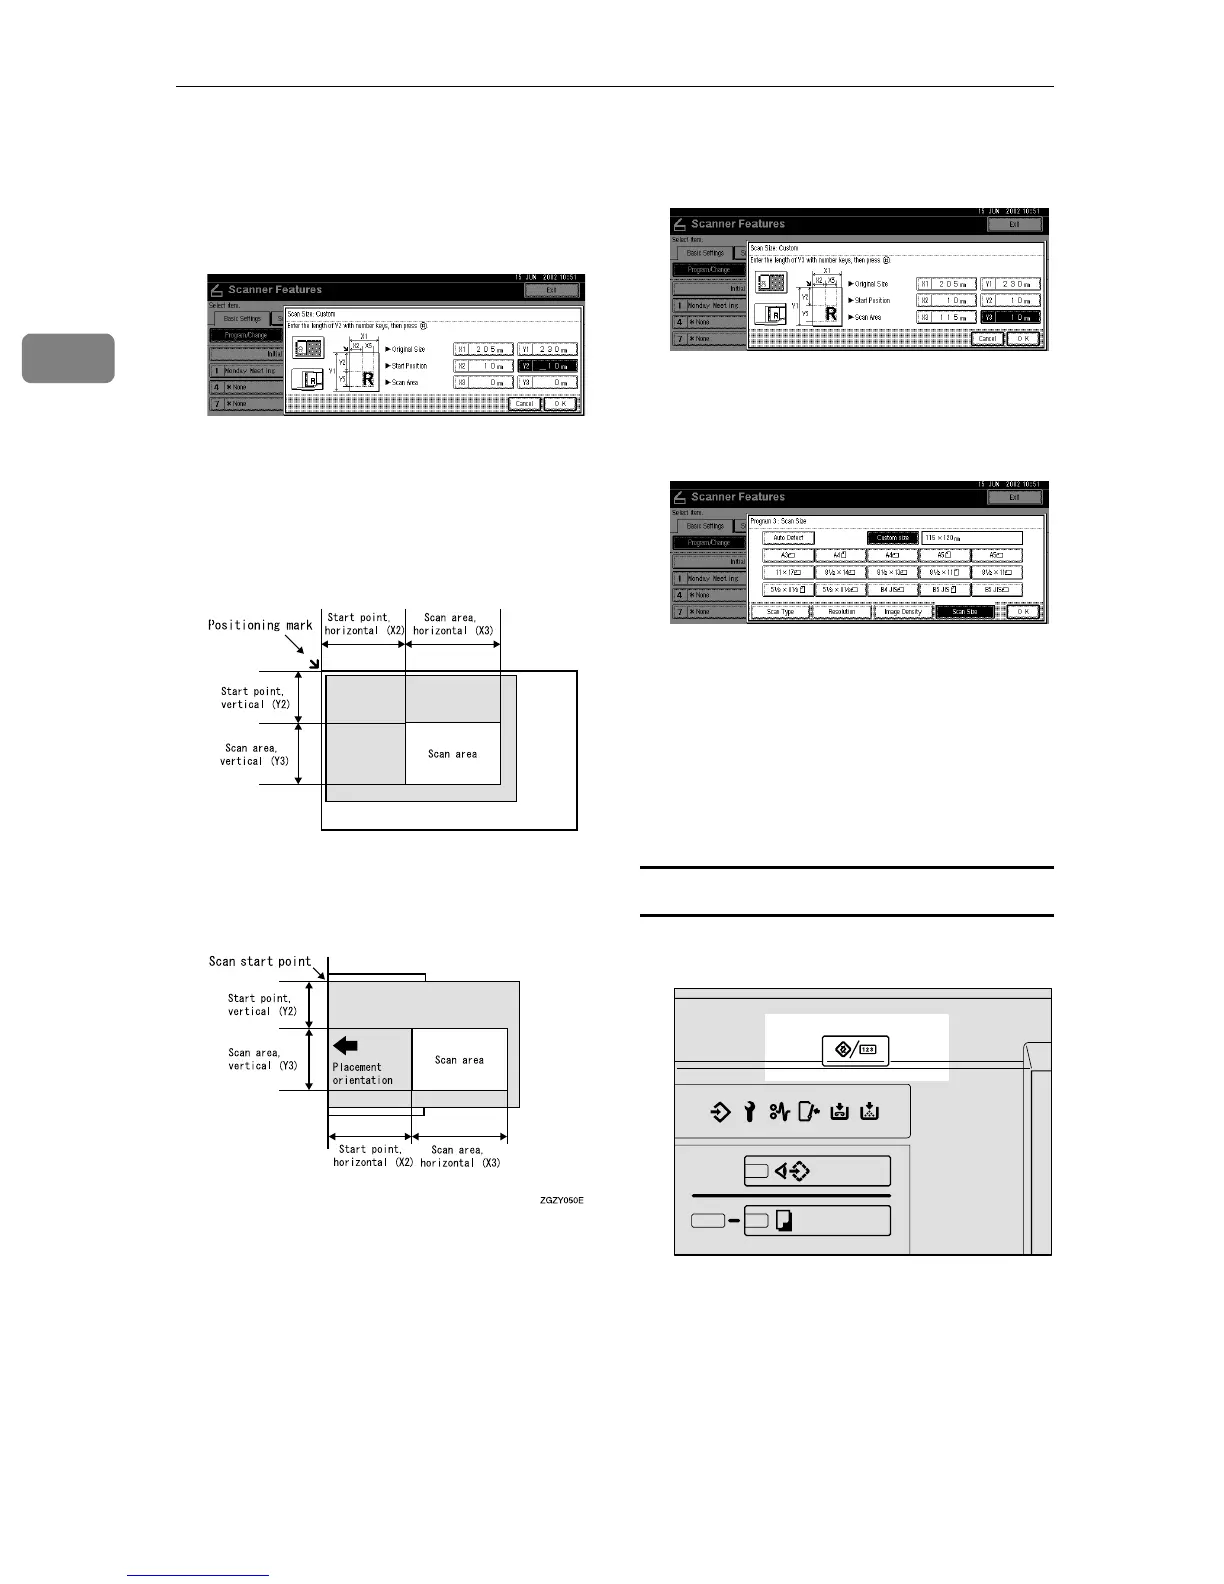
Enter the scan size (area) with the
number keys.
Select and enter values for [X3] and
[Y3].
Depending on how the original is
positioned, the scan area will be as
shown:
A
When the original is placed on
the exposure glass
B
When the original is placed on
the ADF
Scan sizes can be 10 - 432mm
(0.4” - 17”) in the X direction
(width) and 10 - 297mm (0.4” -
11.7” ) in the Y direction
(height).
The size of originals can be 140 -
432mm (5.6” - 17”) in the X di-
rection (width) and 140 -
297mm (5.6” - 11.7”) in the Y di-
rection (height). Keep the scan
area settings within this range.
E
EE
E
When all dimensions have been
entered, press [OK].
F
FF
F
Verify that the area set in step
D
DD
D
(X3 and Y3) is shown next to the
[Custom size] field, then press [OK].
G
GG
G
Press [Exit].
The screen returns to the User
Tools/Counter/Inquiry.
H
HH
H
Press [Exit].
The main menu is shown again.
Deleting programmed scan settings
A
AA
A
Press the {
{{
{User Tools/Counter}
}}
} key.
The User Tools/Counter/Inquiry
screen is displayed.
ZGZY060E
ZGZS320E

 Loading...


