PISTON
PIN
AND
PIN
BORE
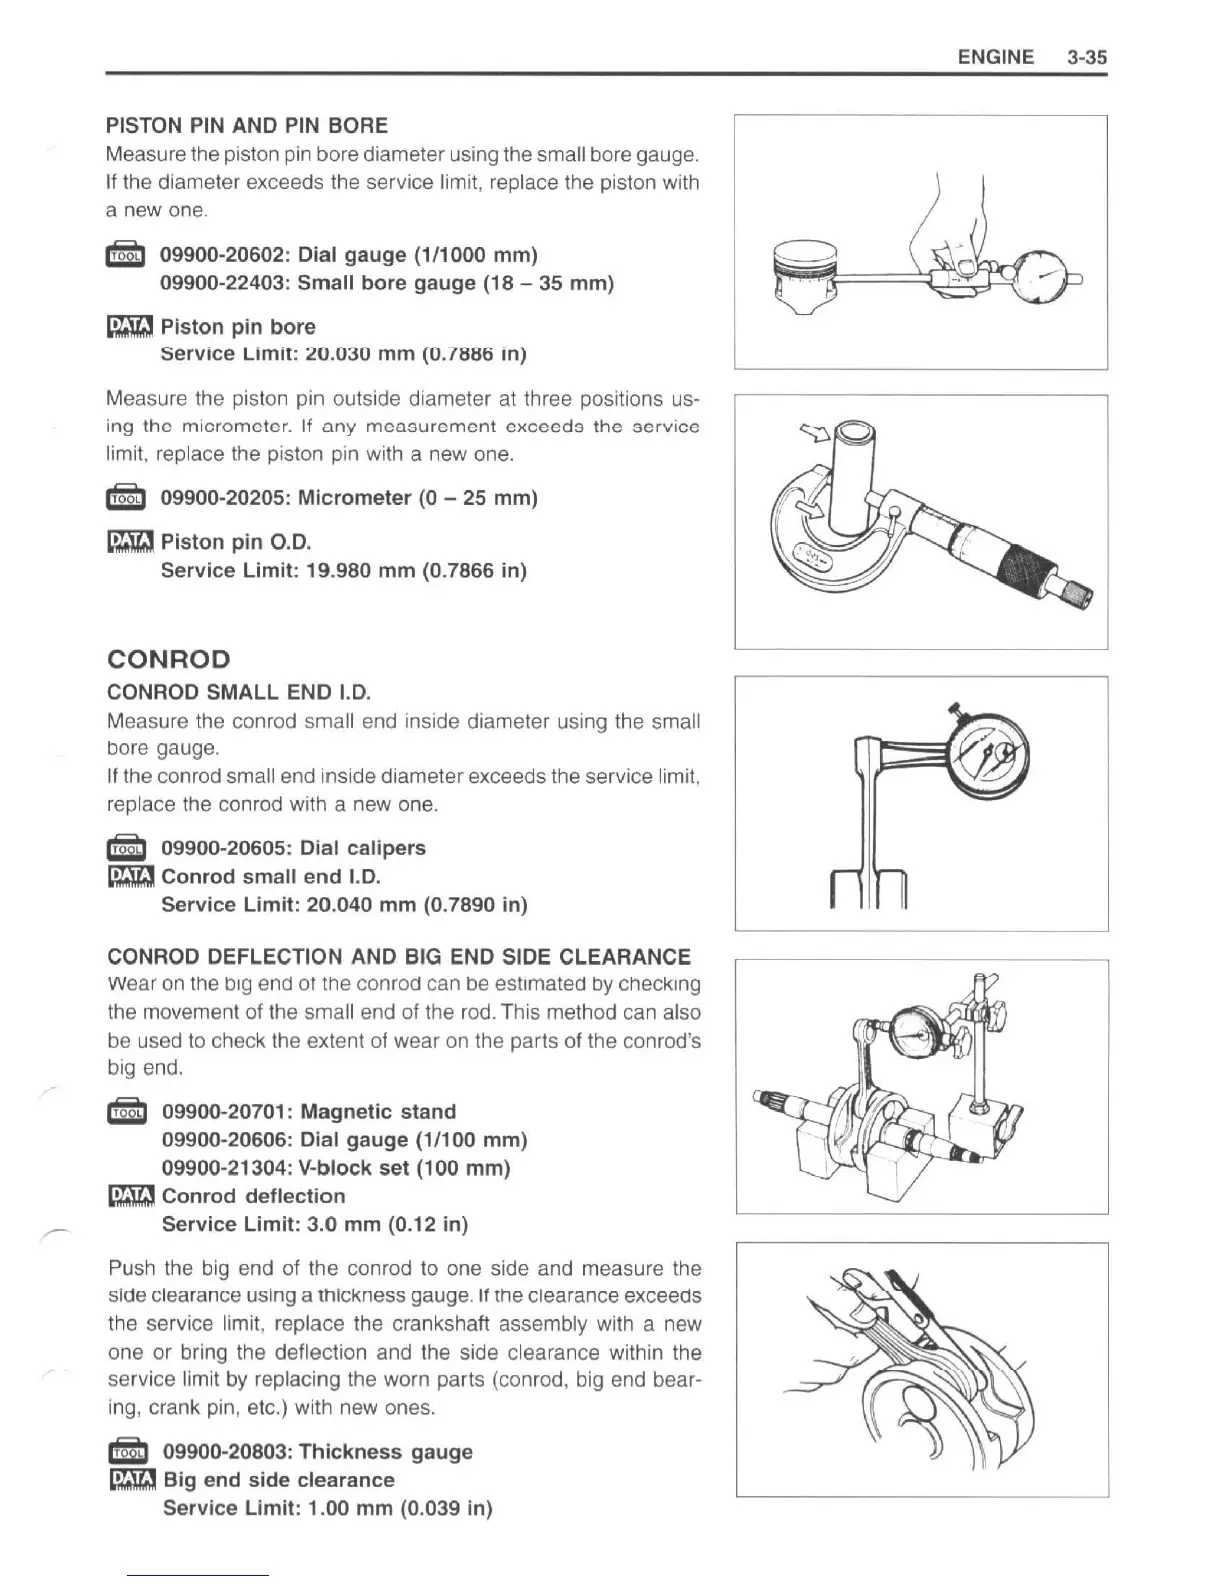
Measure the piston
pin
bore diameter using the small bore gauge.
If
the diameter exceeds the service limit, replace the piston with
a new one.
S 09900-20602: Dial gauge (1/1000
mm)
09900-22403: Small
bore
gauge (18 -
35
mm)
• Piston
pin
bore
SerVice Limit: 20.030
mm
(0.7886 In)
Measure the piston pin outside diameter
at
three positions us-
ing
the
micrometer
. If
any
measurement
exceeds
the
service
limit, replace the piston
pin
with a new one.
S 09900-20205:
Micrometer
(0
-
25
mm)
• Piston pin
0.0
.
Service Limit:
19
.980
mm
(0.7866 in)
CON
ROD
CON ROD SMALL END 1.0.
Measure the conrod small end inside diameter using the small
bore gauge.
If the conrod small end inside diameter exceeds the service limit,
replace the conrod with a new one.
S 09900-20605: Dial calipers
•
Conrad
small
end
1.0.
Service
Limit
: 20.040
mm
(0.7890
in
)
CONROD DEFLECTION AND BIG END SIDE CLEARANCE
w ear
on
the
big
end
01
the
conrOd
can
be
estimated
by
checking
the movement of the
small end of the
rod
. This method can also
be used
to
check the extent
of
wear
on
the parts of the conrad's
big end.
S 09900-20701 :
Magnetic
stand
09900-20606: Dial
gauge
(1/100
mm)
09900-21304: V-
block
set (100
mm)
• .
Conrad
deflection
Service
Limit
: 3.0
mm
(0.12 in)
Push t
he
big end of the conrod to one side and measure the
side cl
ea
rance
us
ing a thickness gauge. If the clearance exceeds
th
e
se
rvice limit, replace the crankshaft assembly with a new
one or bring t
he
deflection and the side clearance within the
service
li
m
it
by
replacing the worn parts (conrod, big end bear-
in
g,
crank pin, etc.) with new ones.
S 09900-20803:
Thickness
gauge
• Big end
side
clearance
Service
Limit
: 1.
00
mm
(0.039 in)
ENGINE
3-
35
http://www.motorcycle.in.th

 Loading...