REASSEMBLY
AND
REMOUNTING
Reassemble and remount
the
master cylinder
in
the
reverse
order
of
removal and disassembly, and also carry
out
the
fol-
lowing steps:
CAUTION:
Wash
the
master cylinder components with fresh brake fluid
before reassembly. Never use cleaning solvent
or
gasoline
to
wash them. Apply brake fluid
to
the
cylinder bore and all
the
internals
to
be inserted into
the
bore.
CAUTION:
Bleed
the
air after reassembling master cylinder. (Refer
to
page
2-13.)
Adjust the rear brake light switch and brake pedal height
after
installation. (Refer
to
page 2-12.)
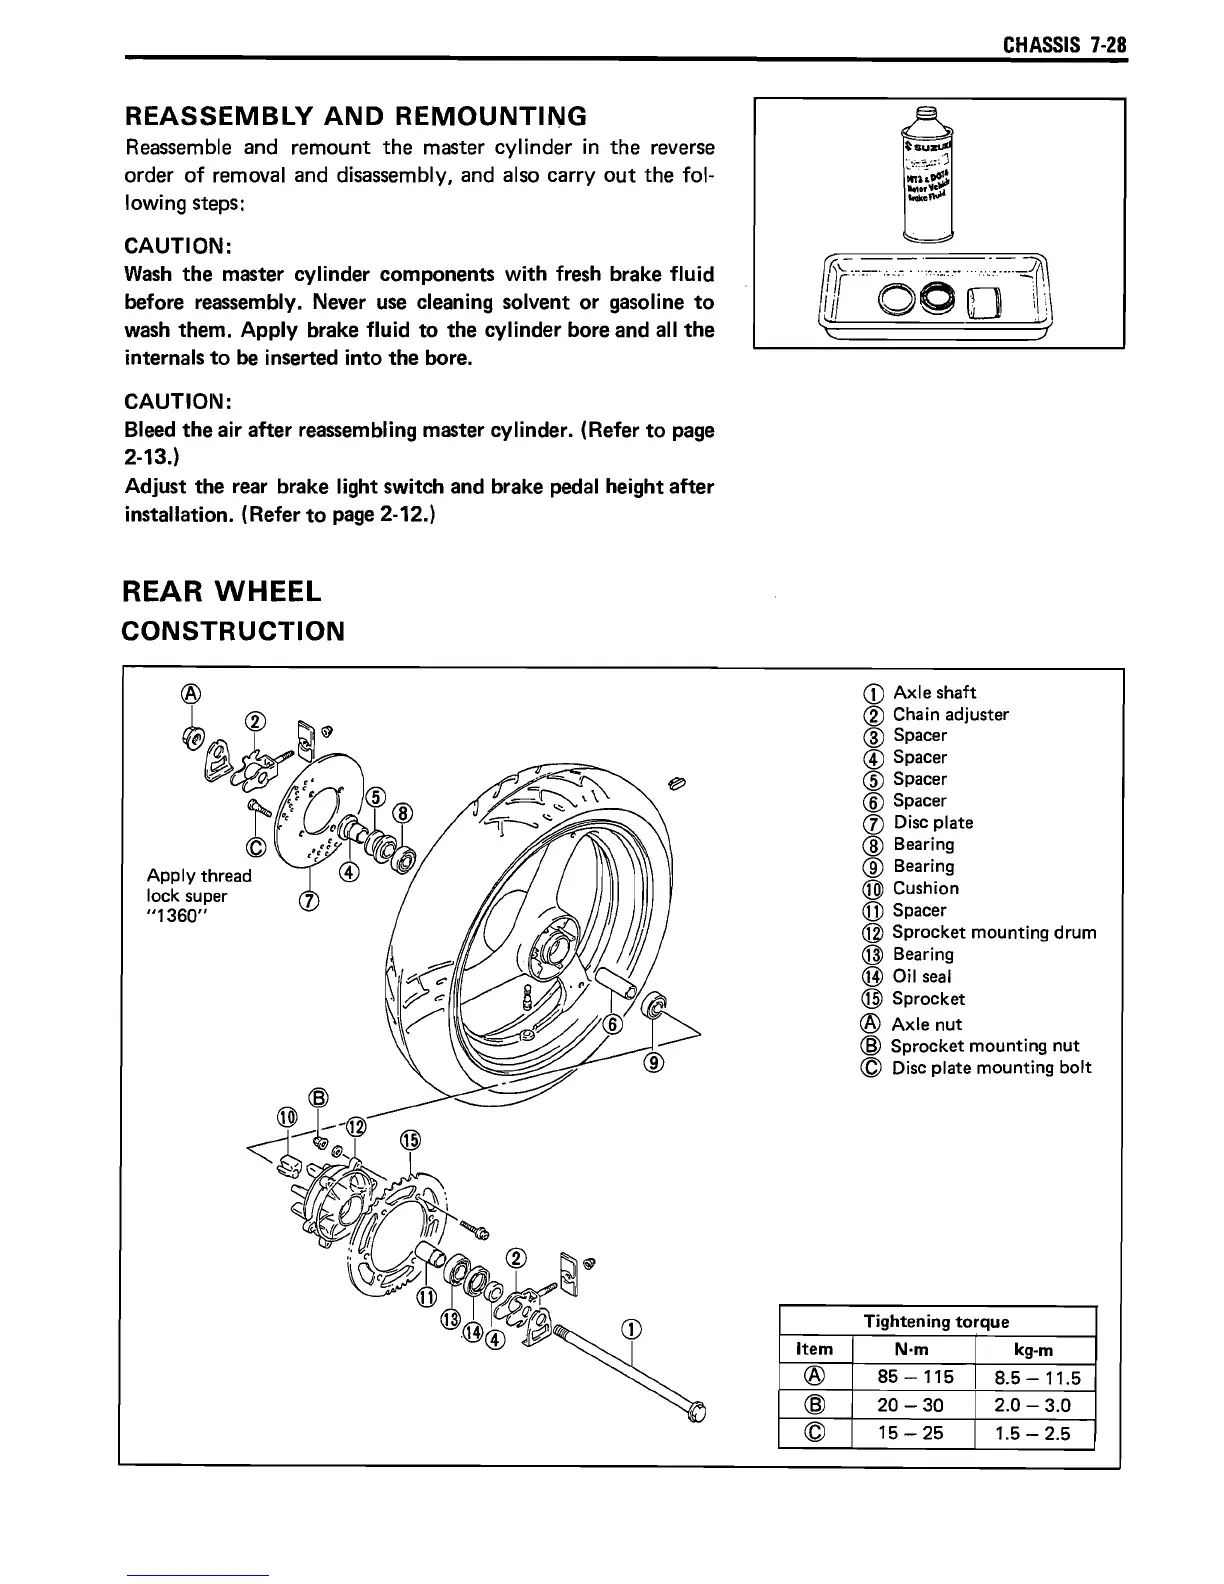
REAR WHEEL
CONSTRUCTION
Item
®
@
©
CHASSIS
7-28
CD
Axle
shaft
CID
Chain adjuster
® Spacer
@ Spacer
CID
Spacer
® Spacer
(])
Disc plate
® Bearing
® Bearing
@ Cushion
(jJ)
Spacer
@
Sprocket
mounting drum
@ Bearing
@ Oil seal
@
Sprocket
® Axle
nut
@
Sprocket
mounting
nut
© Disc plate mounting
bolt
Tightening
torque
N·m
kg-m
85 - 115
8.5 - 11.5
20-30
2.0 -
3.0
15 - 25 1.5 - 2.5
 Loading...