Follow steps 5 through 7 for default templates:
5. Select Template from the Scan to Mailbox screen.
6. Choose from a previously saved template or select an Unused one and create a new
uniquely named one and save it.
7. Check off System Power On Default if desired. The customized saved template
displays at power up.
Step 2: Selecting Scan to Mailbox Features
Additional selections from the Scan to Mailbox screen are shown below:
• Rendering (Output Type)
• File Format (Single-page and Multi-page)
• Original Type
• Compression
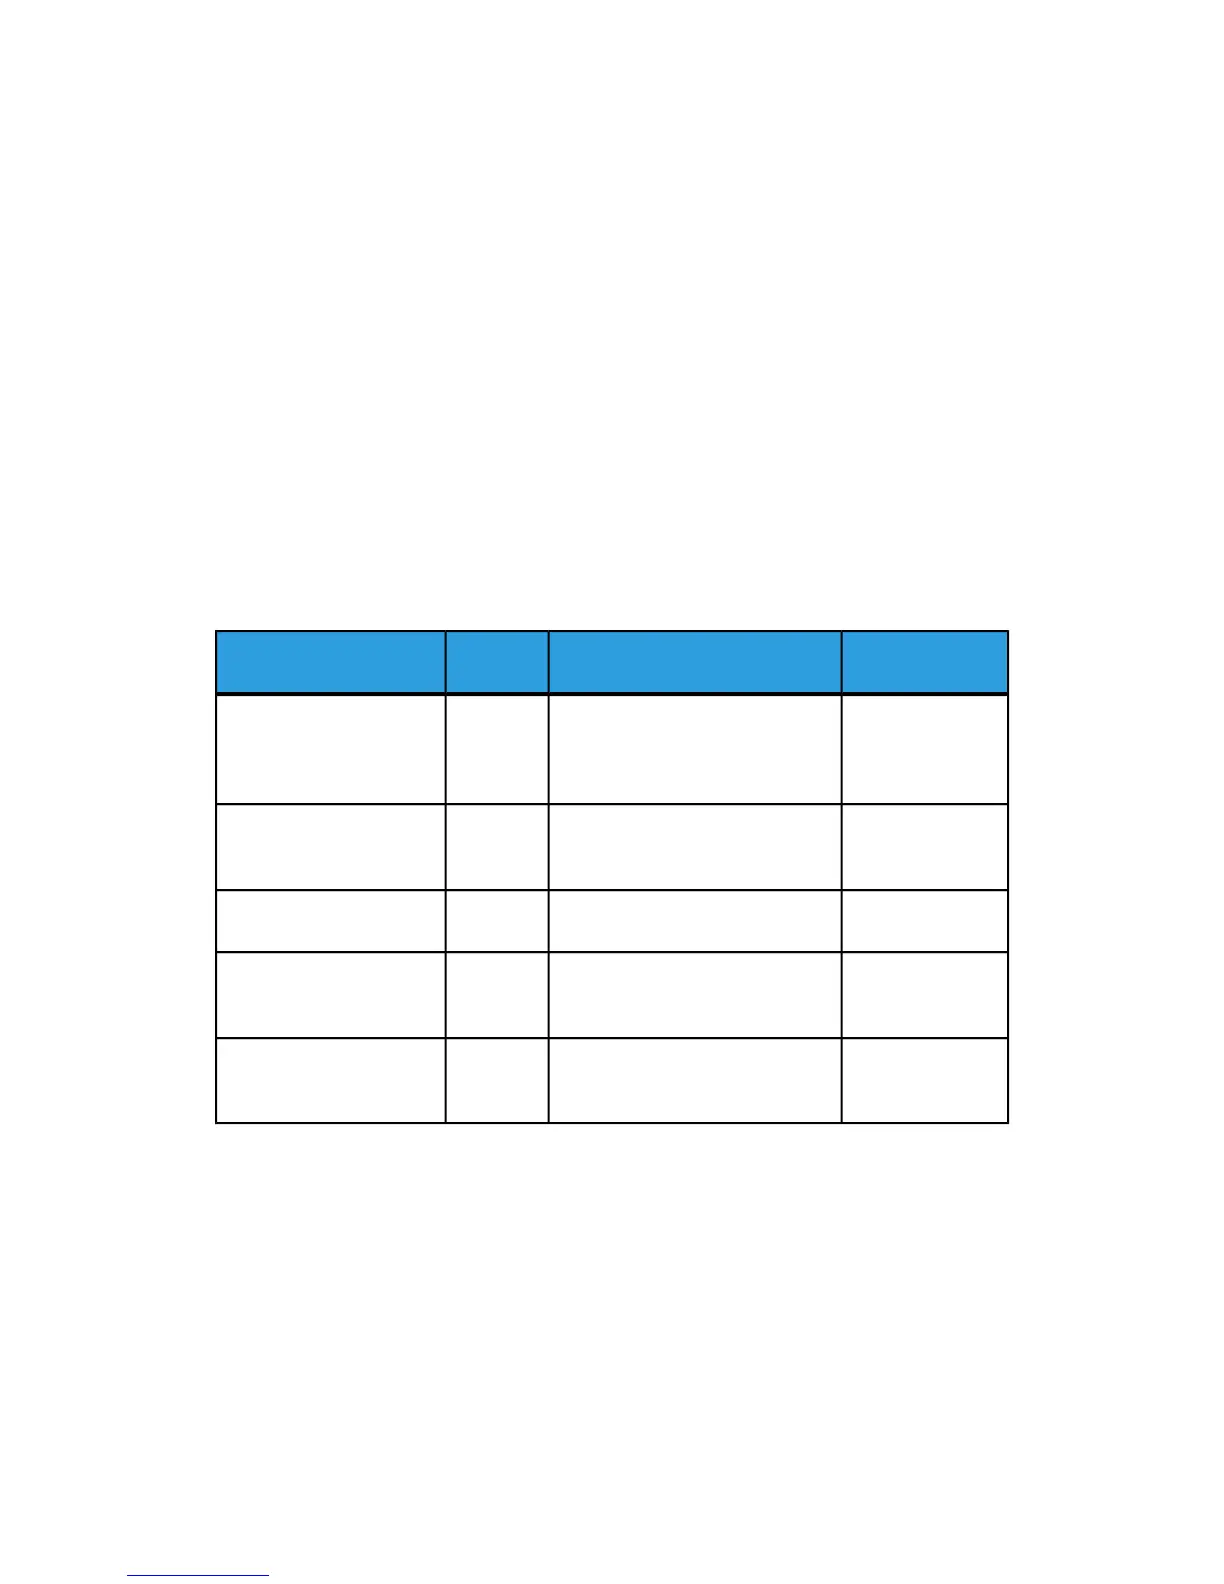
Table 17: Scan to Mailbox Features
CompressionOriginal TypeFile
Format
Rendering
CCITT4Photo (Halftone)
Photo (Contone)
Text/Photo
Blue Line
TIFFS
PDF
CALS
B & W (1-bit)
CCITT4Text/LineTIFFS
PDF
CALS
Snap to Black (1-bit)
Packbits
Raw
Text/PhotoTIFFGrayscale (8-bit)
Normal, Best
Compression, Best
Image Quality
Text/PhotoPDF
JPEG
Grayscale (8-bit)
Packbits
Index
Index ED
Text/PhotoTIFFS
PDF
JPEG
Color (24-bit)
Selecting Scan-to-Mailbox features:
1. Select the output type Rendering to generate the electronic file.
2. Select the output File Format type desired.
3. Select the input Original Document Type you are scanning.
Xerox
®
Wide Format 6604/6605 Solution
™
3-12
User Guide
Scanning Documents
 Loading...