6-23
E
LOWR
SHIMMING
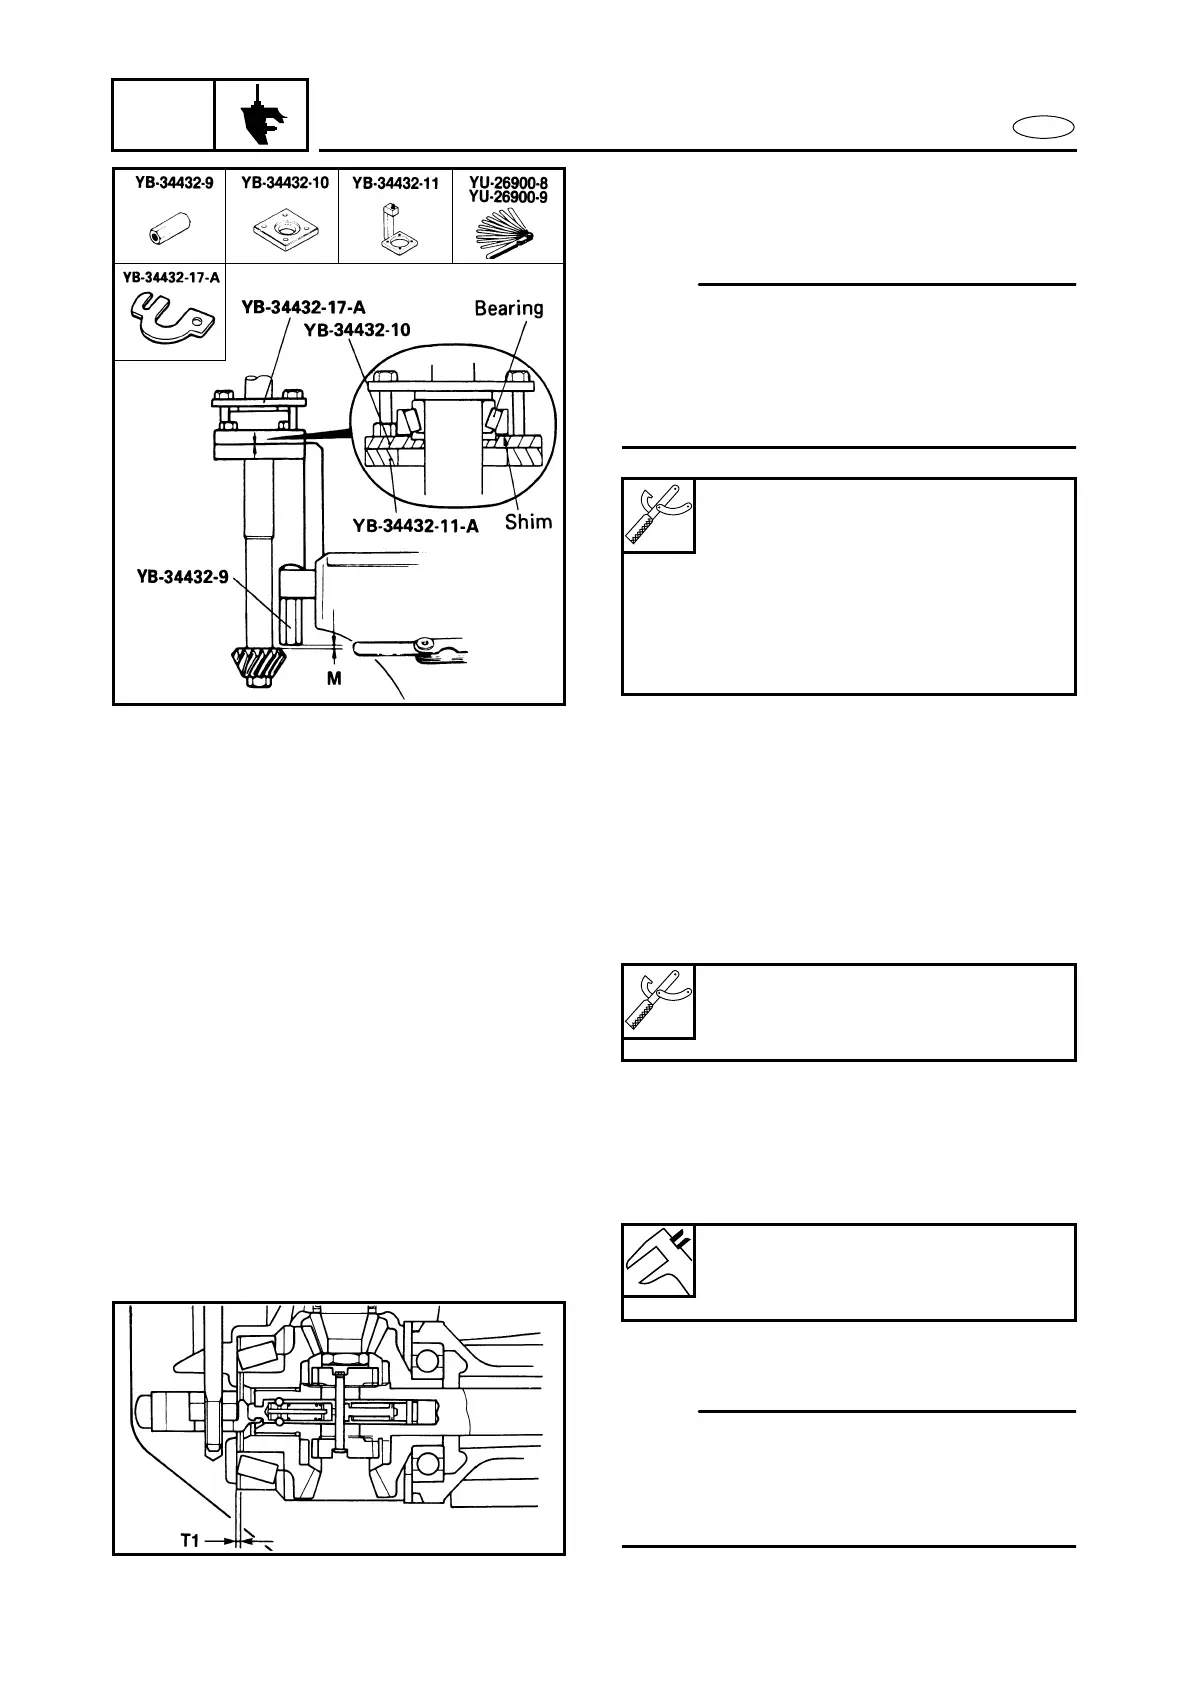
2. Assemble the shimming gauge with the
drive shaft, bearing and shim(s) as
shown in the illustration.
NOTE:
● Attach the adapter plate onto the gauge
base using four bolts of the appropriate
size.
● If the original shim(s) is unavailable, start
with a 0.50 mm shim.
Gauge block:
YB-34432-9
Adapter plate:
YB-34432-10
Gauge base:
YB-34432-11-A
Clamp:
YB-34432-17-A
3. Install the pinion gear onto the drive
shaft and tighten the pinion gear nut to
the specified torque.
4. Using a thickness gauge at the specified
measurement (M) established above,
check the clearance between the shim-
ming gauge and lower surface of the
pinion gear as shown.
5. If the thickness gauge at the M specifi-
cation will not fit, then remove or add
the shim(s) until it just fits between the
shimming gauge and lower surface of
the pinion gear.
Forward gear shim
NOTE:
Find the forward gear shim thickness (T1)
by selecting shims until the specified mea-
surement (M) is obtained with the special
tool.
Thickness gauge:
YU-26900-8
YU-26900-9
Available shim thickness:
0.10, 0.12, 0.15, 0.18, 0.30, 0.40,
and 0.50 mm

 Loading...