7.2.4 Replacing ESB Bus Coupler Module
Replace ESB bus coupler module according to the following procedure.
n
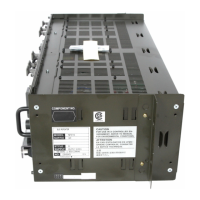
Procedure for Removing ESB Bus Coupler Module
1.
Remove the fixing screws of the ESB bus coupler module. There is one at the upper part
and one at the bottom part.
2. Pull the ESB bus coupler module forward and remove it from the base unit.
3. Remove the upper and lower part screws of the cable connector thus to remove the ESB
bus coupler module.
n
Procedure for Installing ESB Bus Coupler Module
Use a Phillips screwdriver to tighten the screws to secure the ESB bus coupler module. As a
guideline, the screw tightening torque should be approximately 0.5 N•m.
Install the ESB bus coupler module following the steps of the "Procedure for Removing ESB
Bus Coupler Module" in the reverse order
.
1. Install the cable connector on the ESB bus coupler module to be installed.
2. Use the screws at the upper and lower part of the connector to fasten the cable connec-
tor.
The torque to fasten the screws on ESB bus connector is about 0.3 N•m.
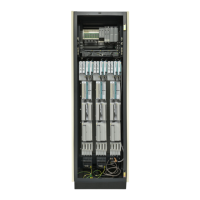
3. Install the ESB bus coupler module into the base unit.
4. Fix screws in one place at the upper part and one place at the bottom part of the ESB bus
coupler module.
You can check the status of hardware in the SCS State Management Window.
<7.2 Replacing Common Modules > 7-14
IM 32Q06C10-31E 4th Edition : Jan.30,2015-00
 Loading...