ACTA 4000 User Guide Getting started
9836 4171 01 2008-12 19 (136)
3.3 Startup
No torque must be applied to the transducer at start-up.
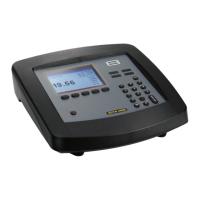
When you start ACTA, the following appear in the display:
1. Atlas Copco logo flashes up briefly.
2. The
Measurement dialog box appears.
3. The
Calibration dialog box flashes up briefly (if an Atlas Copco torque transducer is connected).
4. The
Measurement dialog box resumes.
ACTA initializes and performs a self-test. The
Calibration dialog box appears to indicate that ACTA is
communicating with the Atlas Copco torque transducer and performing an automatic setup. It reads the
transducer’s serial number and calibration data, which it stores in its memory.
ACTA can work with most major transducer types. If you use an Atlas Copco non-
memory transducer or a different brand, see section Technical specifications on how to set
up your transducer b
efore continuing.
3.4 Using Quick programming
This section focuses on how you can start measuring in minutes with the Quick Programming function
using Atlas Copco Torque/Angle transducers. The quick programming functions automatically make
advanced programming for you.
All versions of ACTA feature a Quick Programming function that allows you to set up a measurement
session without extensive programming knowledge. The ACTA performs the programming operations for
you. It is ideal with ACTA Basic or for quick and simple torque checks.
For information on the settings used by
Q.prog see section Default Setup, Q-prog.
The quick programming menu has three basic options:
Tool measurement programming, four different tool types
Synchronization with controller
Tool measurement according to standard ISO 5393
This section describes how to get started and perform Tool measurement without and with
synchronization. For information on tool measurement using synchronization, according to standard ISO
5393 standard, and for complete description of the menu items, selections and views, see the
corresponding section in this User Guide.

 Loading...