8. Repeat steps 5 through 7 to add additional Steps (i.e., pages).
9. When you have added all the required Steps for your Scenario, click the Save &
Finish button located at the bottom of the Navigation tree; a message box appears
informing you that the Scenario has been successfully created.
10. Click OK; the Scenario mode is quit and the menu tree of the Configuration tab
appears in the Navigation tree.
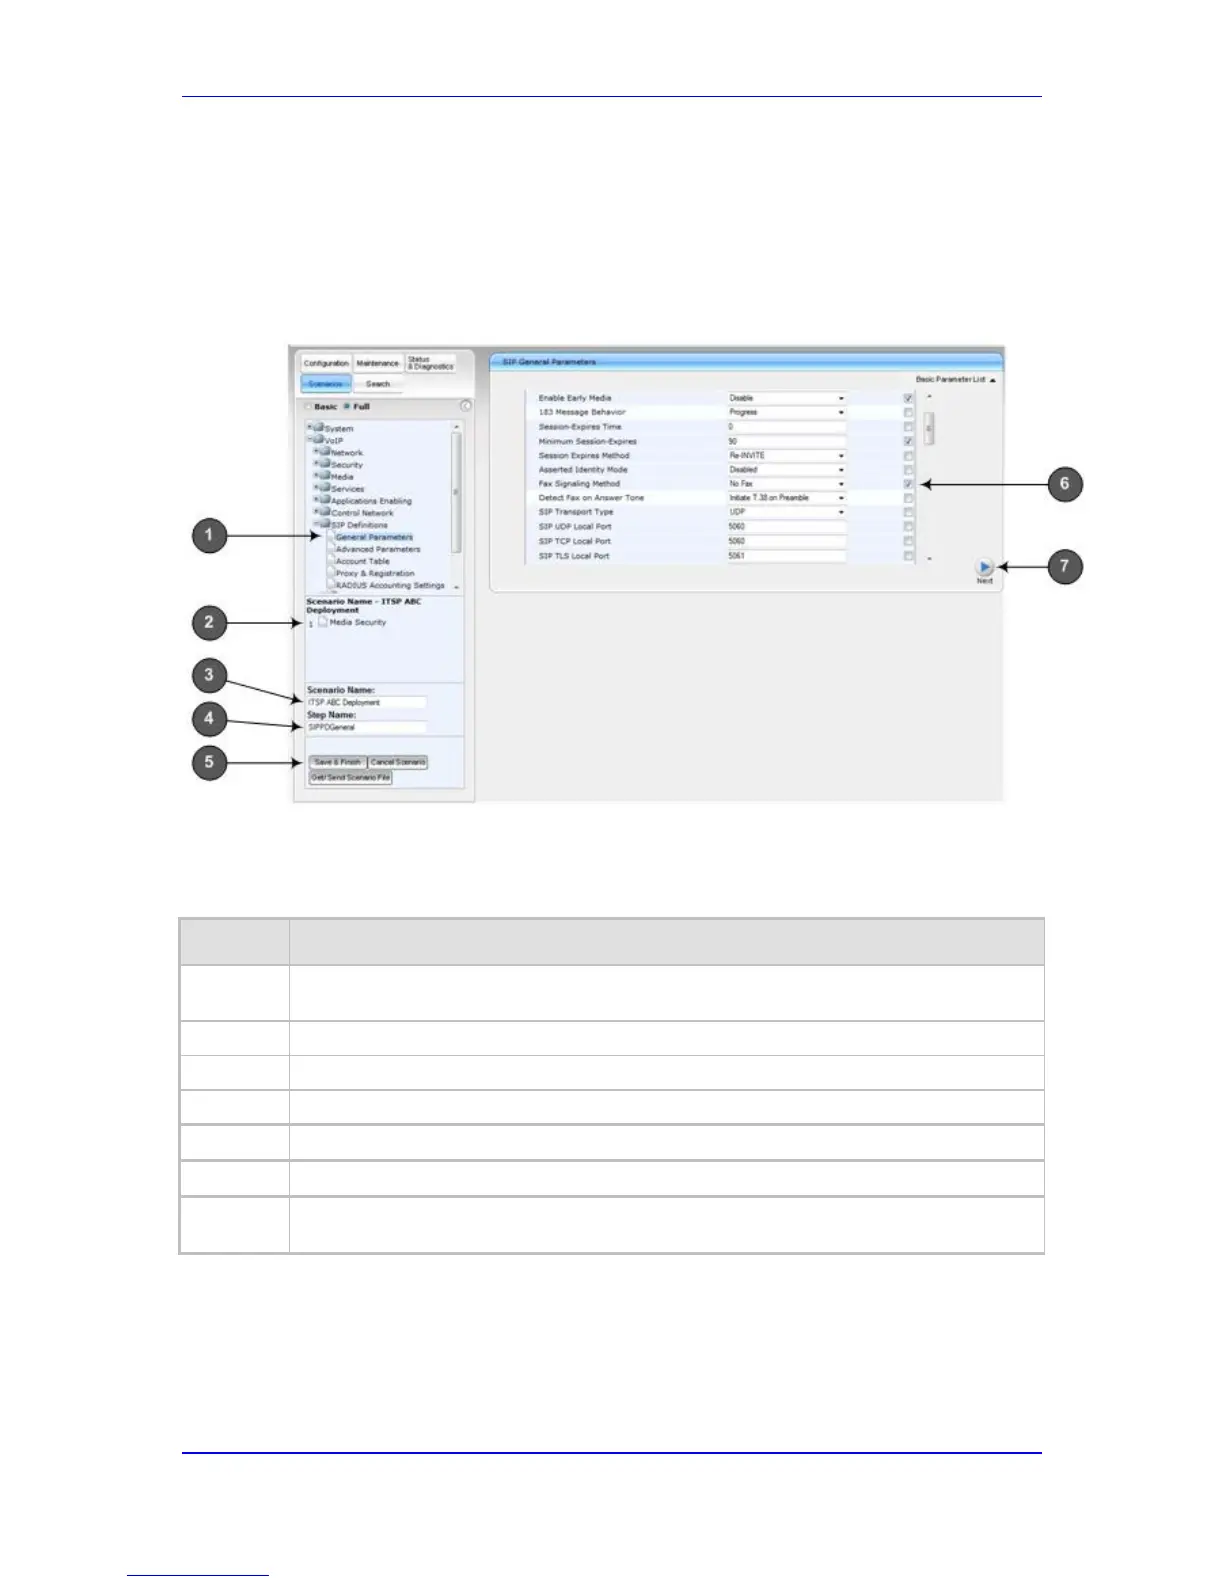
Figure 4-17: Creating a Scenario
Table 4-7: Scenario Description
Table 4-8: Item
Table 4-9: #
Description
1
Selected page item in the Navigation tree whose page contains the parameter that you
want to add to the Scenario Step.
2
Name of a Step that has been added to the Scenario.
3
'Scenario Name' field for defining a name for the Scenario.
4
'Step Name' field for defining a name for a Scenario Step.
5
Save & Finish button to save your Scenario.
6
Selected parameter(s) that you want added to a Scenario Step.
7
Next button to add the current Step to the Scenario and enables you to add additional
Steps.

 Loading...