11. Scheimpflug
Scheimpflug adjustment steps:
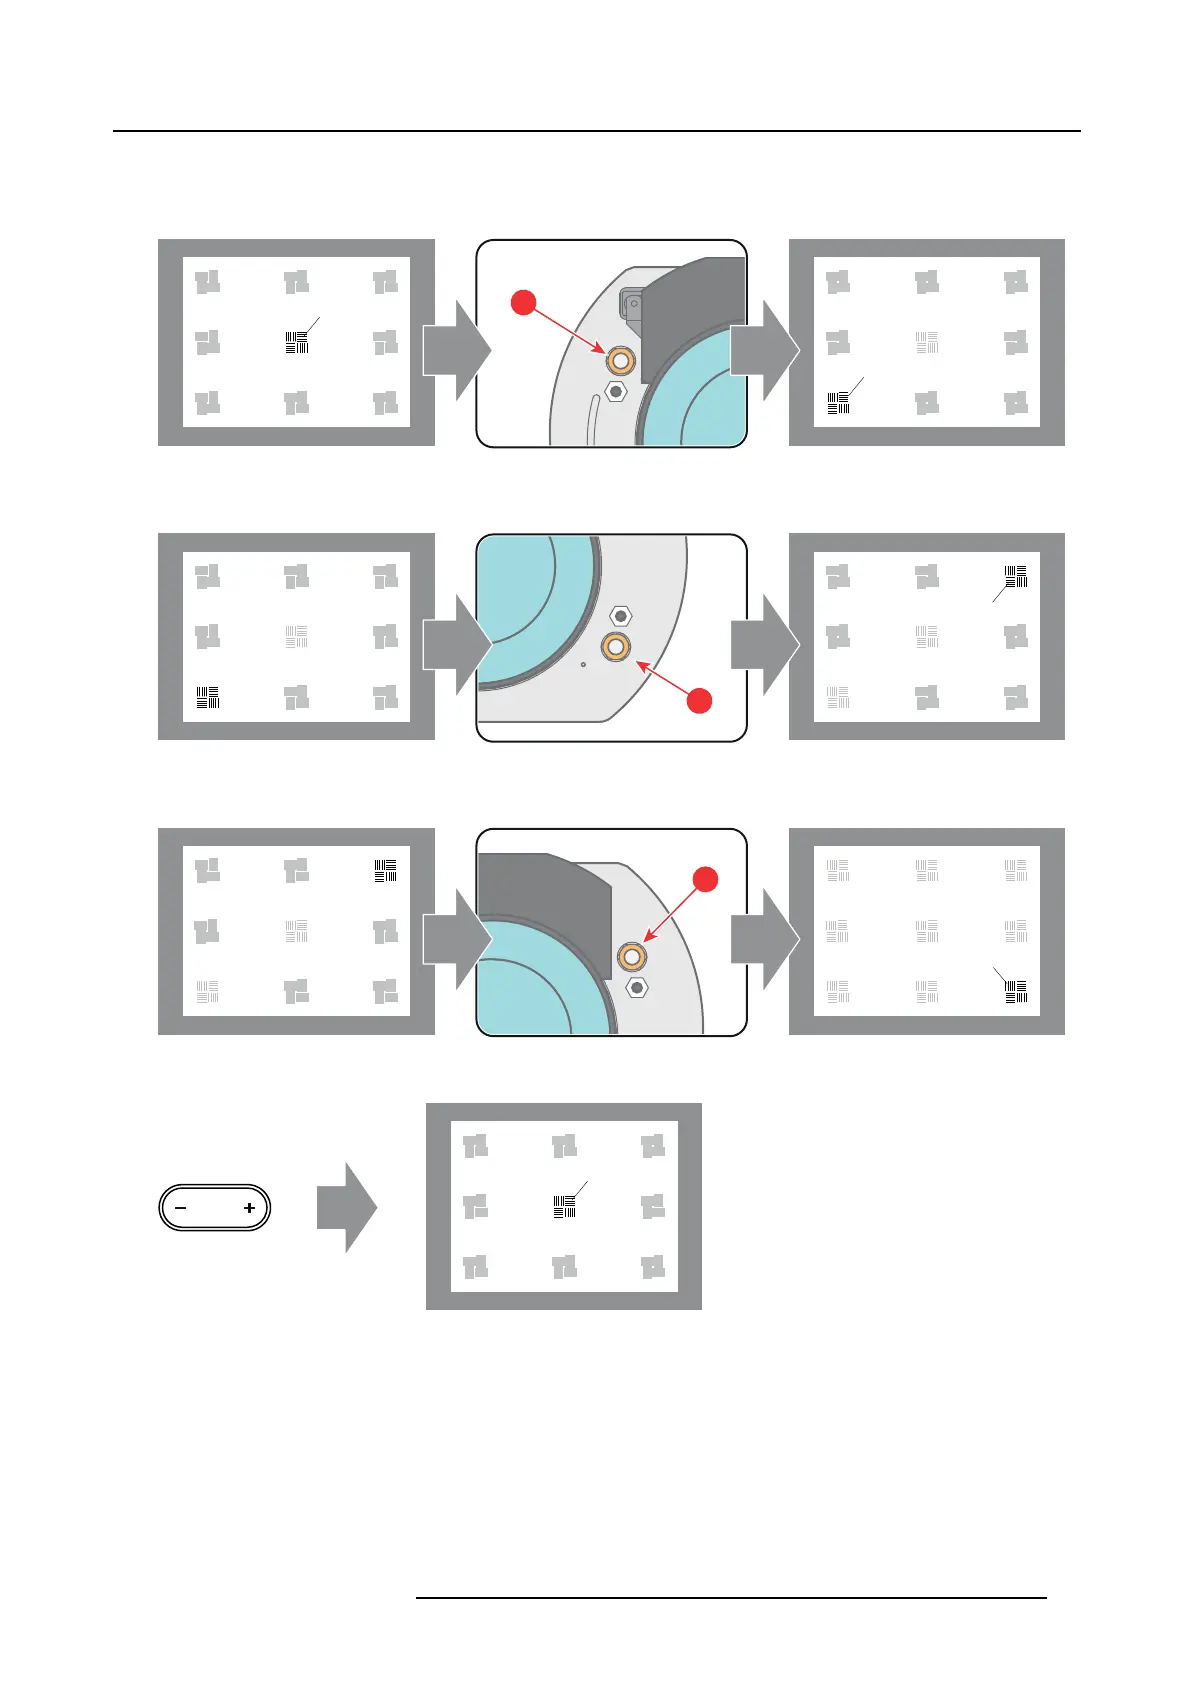
1. Sharpen the image at the bottom left corner of the s creen by turning the uppe r left Scheimpflug adjustment nut (reference 1
image 11-6). A s a resu lt the focus in the center will fade a bit but that’s normal.
F
F
1
Image 11-6
2. Sharpen the image at the top right co rner of the screen by turning the lower right Sc heimpfl ug adjustment nut (reference 3 im-
age 11-7).
F
3
Image 11-7
3. Sharpen the image at the bottom right corner of the screen b
y turning the upper right Scheimp flug adjustment nut (reference 2
imag e 11-7).
F
2
Image 11-8
4. Optimize the focus of the projected image in the center of the screen using the motorized focus control (Local Keypad).
F
FOCUS
Image 11-9
5. Repeat from s tep 1 until the projected focus pattern is as sharp as possible in the ce nter, left, right, top and bottom of the screen.
6. Proceed with the procedure "Fixation of the Lens H older front plate", page 84.
R5906693 DP2K-E SERIES 19/06/2015
83
 Loading...


