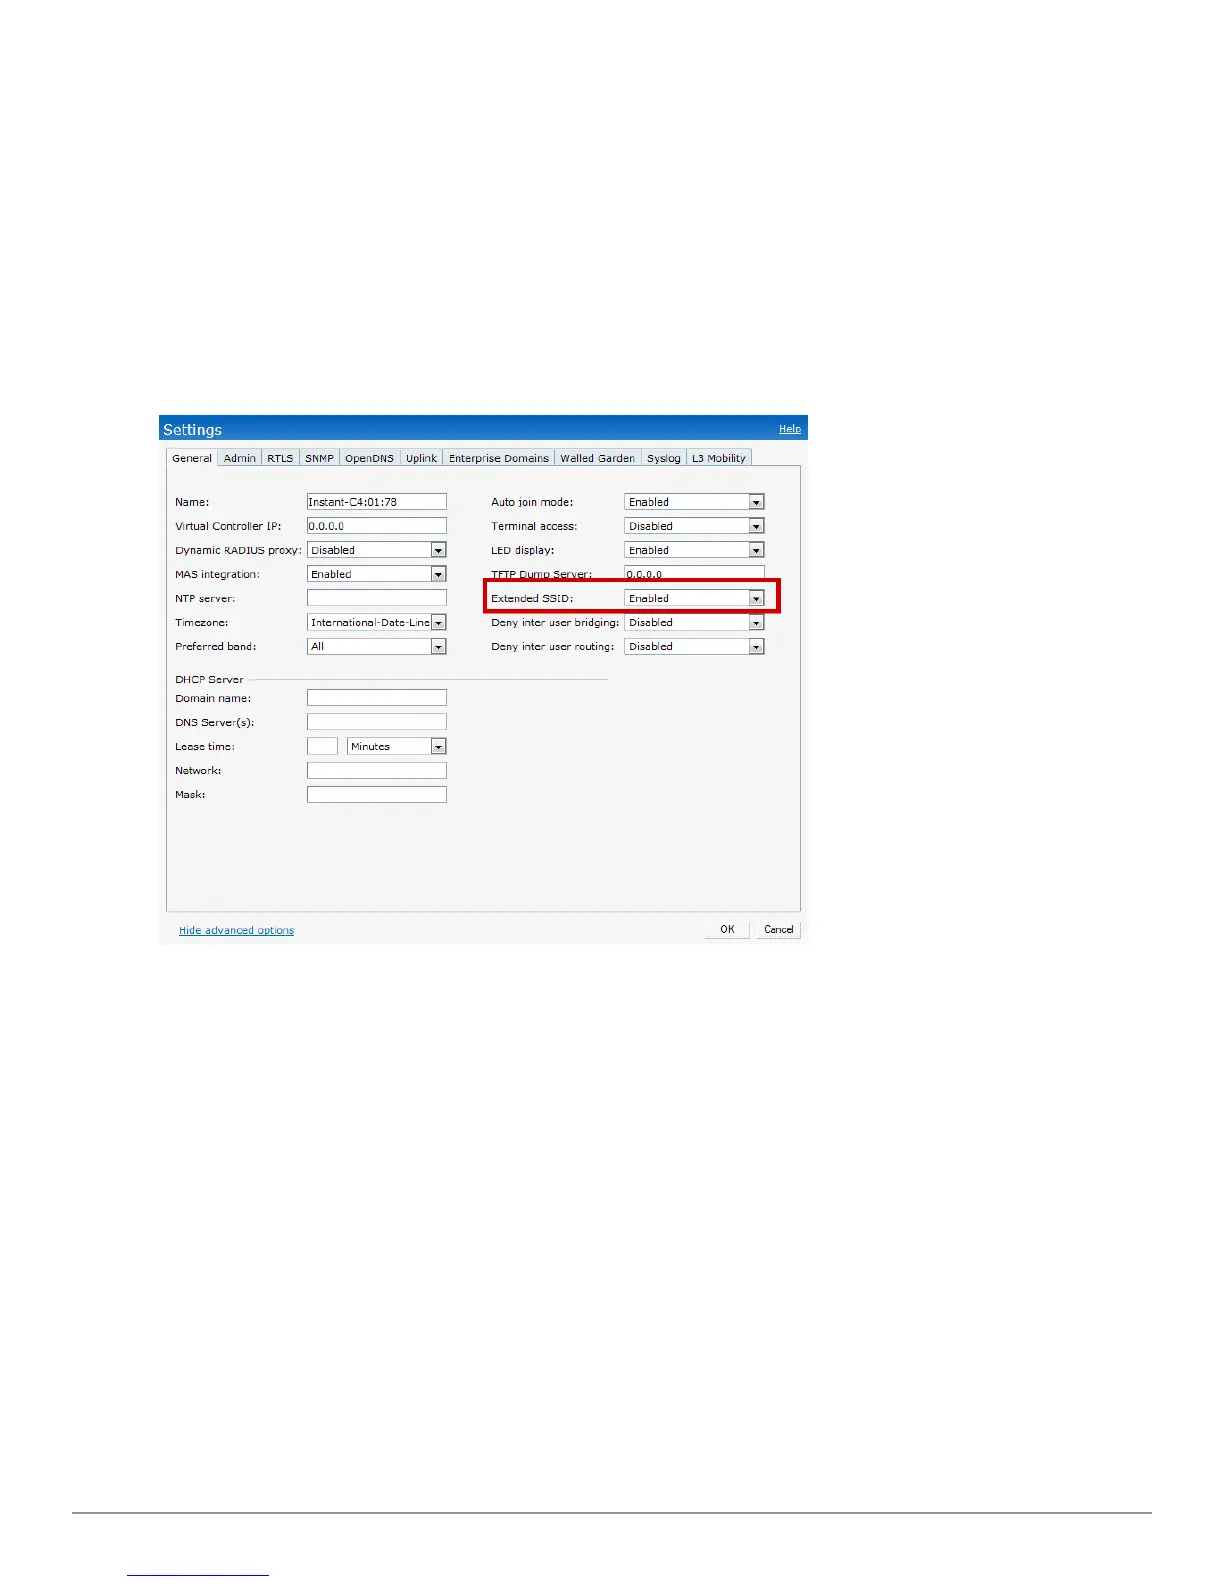
Enabling the Extended SSID Option
To enable the extended SSID option:
1. Click the Settings link at the upper right corner of the Dell W-Series Instant UI.
2. Click the Show advanced options link.
3. In the General tab, select Enabled from the Extended SSID drop-down list.
4. Click OK.
5. Reboot the AP for the changes to take effect.
After you enable the option and reboot, the Wi-Fi link and mesh are disabled automatically.
Figure 43 - Enabling Extended SSID
VLAN Pooling
In a single W-IAP cluster, there can be a large number of clients in the same VLAN. This leads to a
high level of broadcasts in the same subnet. The solution to this is to partition the network into
reasonably-sized subnets and use L3-mobility between those subnets, when clients roam.
However, there are various situations, like simple network design considerations, where a large
number of clients need to be in the same subnet. VLAN pooling provides a solution in such
scenarios. Each client is randomly assigned a VLAN from a pool of VLANs on the same SSID,
thereby automatically partitioning a single broadcast domain of clients into multiple VLANs.
Dell PowerConnect W-Series Instant Access Point 6.2.0.0-3.2.0.0 | User Guide 69 | Wireless Network
 Loading...