Configuration menu Set the date and time
Digi CM User Guide 174
Set the date and time
Date and time on the Digi CM unit can either be kept internally or by an NTP server. To set the
parameters for date and time on the Digi CM unit, do the following:
1 Access the configuration menu.
2 Choose System administration.
3 Choose Date and Time.
4 Enter the desired parameters.
5 Choose Save changes.
Access the Boot Loader program
The Boot Loader program can be accessed during the boot process. The main function of the
program is to provide a backup means for restoring the firmware if the Digi CM unit will no longer
boot. It also provides a hardware testing module that detects and tests hardware components on
the unit.
To access the Boot Loader program, do the following:
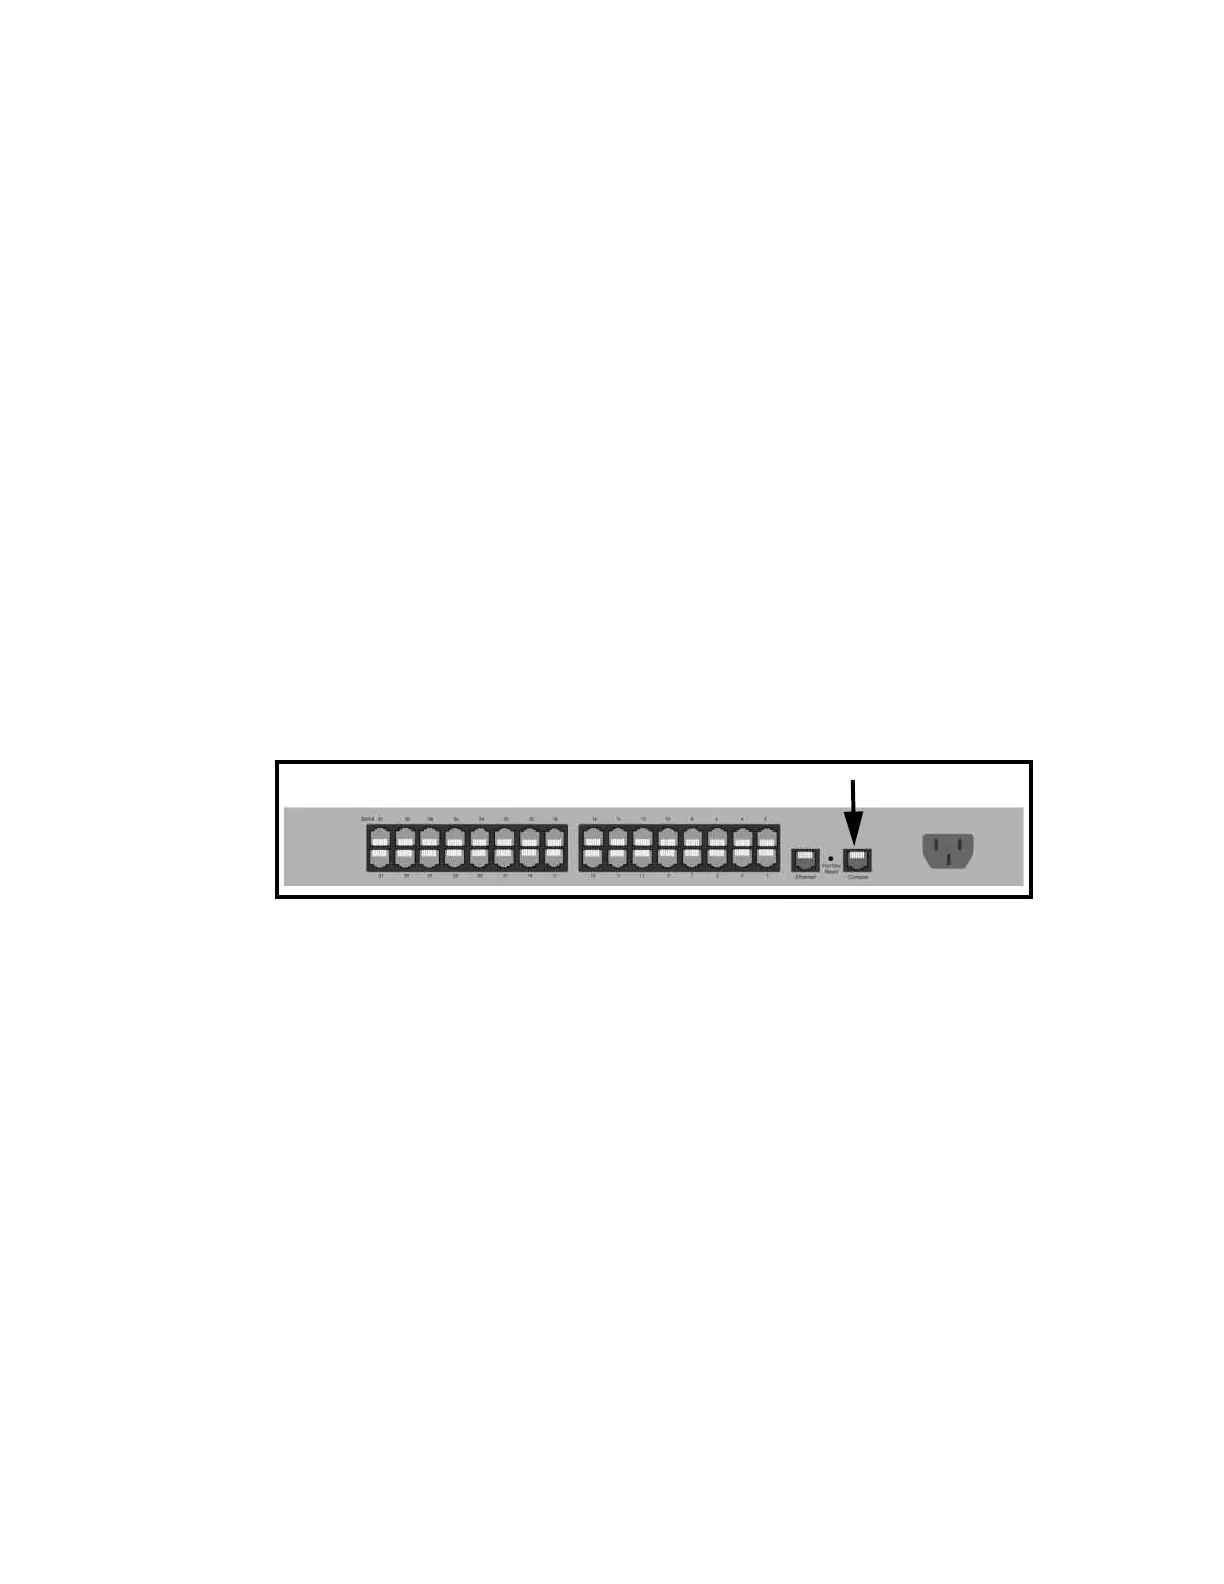
1 Connect the Ethernet cable from the console port on the rear panel of the Digi CM unit to a serial
port on a workstation. Use the Ethernet cable packaged with the Digi CM unit and attach the DB-
9 adapter. The arrow in the following graphic points to the Console Port.
2 Set up a terminal emulation program, such as HyperTerminal, using the following port
parameters: bps=9600, data bits=8, parity=none, stop bits=1, and flow control=none.
3 Turn the power on to the unit.
4 Press ESC within 3 seconds of booting the unit to get Boot Loader menu.
Hardware test menu
The Boot Loader program provides a hardware test for detecting and testing hardware components
on the Digi CM unit. From the Boot Loader menu, choose the number 3 to access the Hardware test.
Options for several components appear.
Disaster recovery
The Digi CM unit provides a disaster recovery procedure in the event the configuration data is
destroyed or corrupted. The Digi CM unit automatically restores a corrupted configuration file
system to the factory default settings. However, if the Digi CM unit fails to boot in spite of being reset
to the factory default settings, the firmware can be restored by using the Boot Loader program.
Console Port
back of Digi CM 32 shown
 Loading...