G3 Series EtherCAT
TM
Technical Manual
5-45
Subject to change without notice
www.asco.com/g3
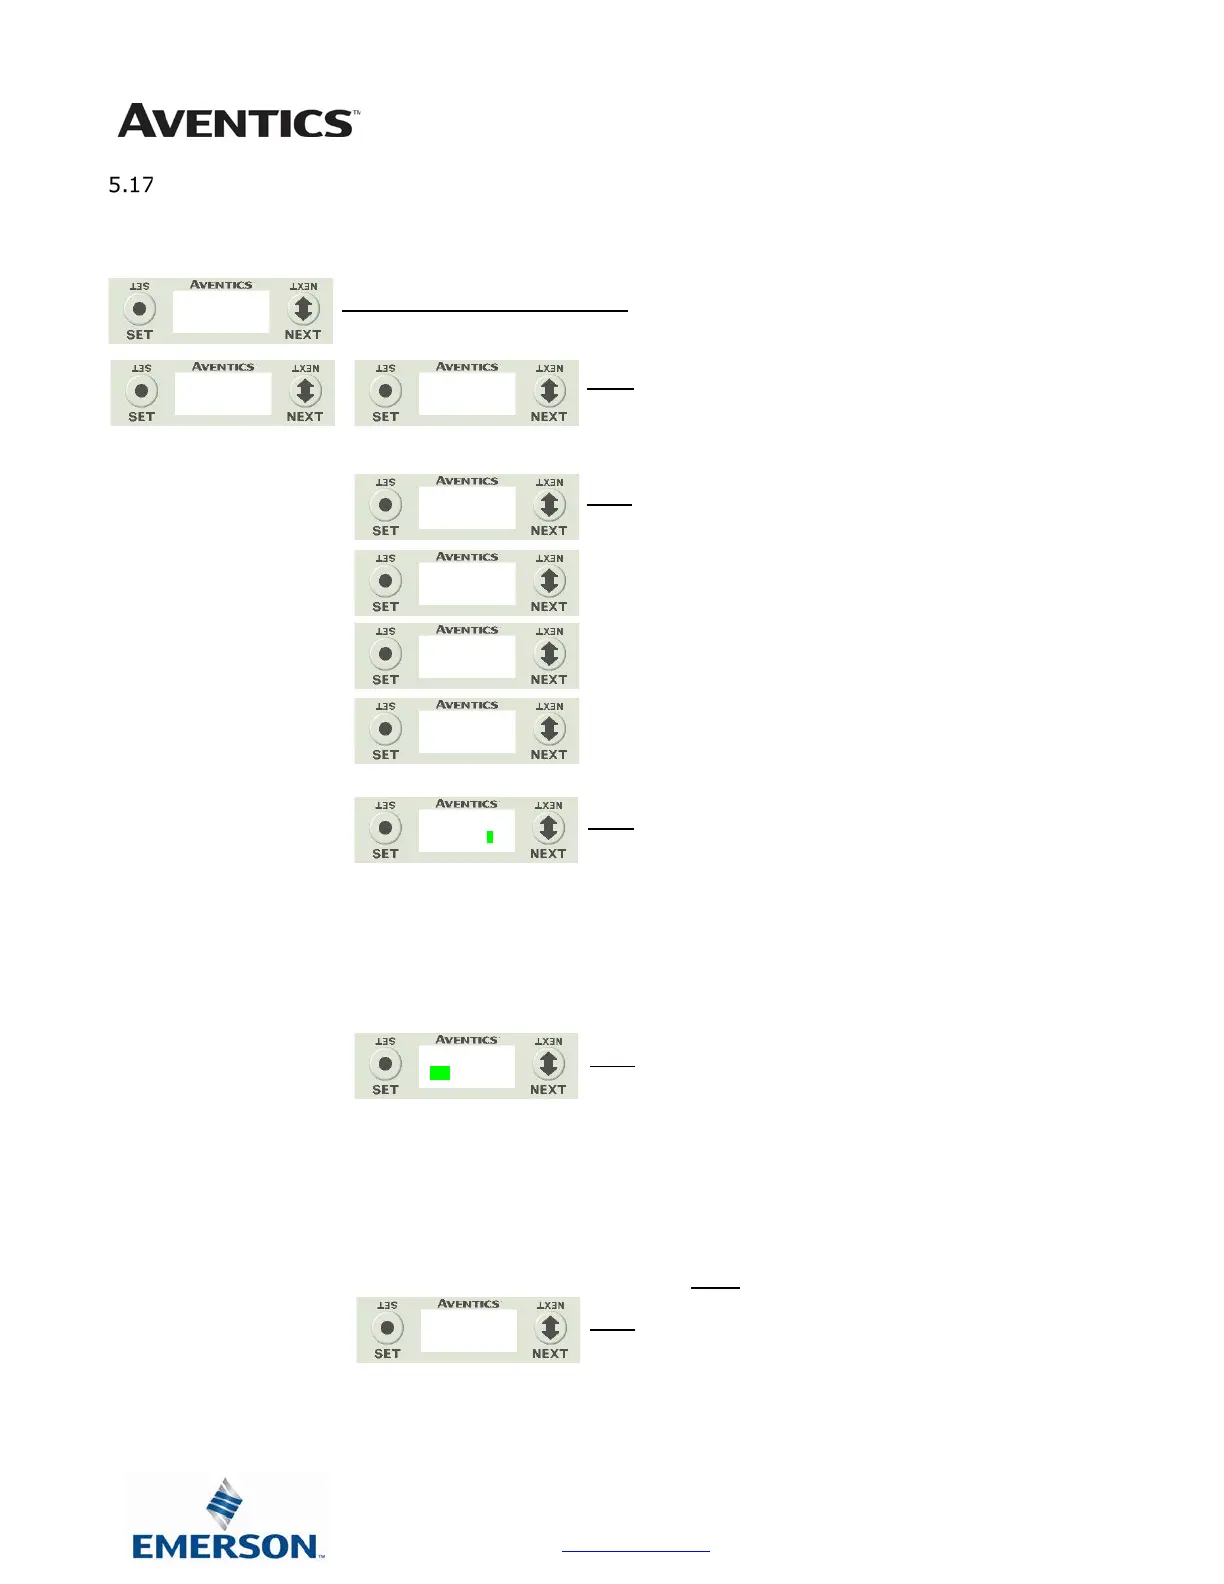
Advanced Settings – Configuration Lock
Configuration Lock Settings
1. Press the SET button to enter the ADVANCED SETTINGS
menu.
2. Press the NEXT button to scroll to the CONFIG MENU /
CONFIG. LOCK.
Press the SET button to enter the CONFIG MENU /
CONFIG. LOCK.
3. The current state of the parameter is shown
4. Press the SET button to change this parameter
5. Press the NEXT button to scroll through the choices to
enable or disable
the feature.
a. UNLOCKED (Factory Default)
b. LOCKED
c. RETURN (this will return you to the main menu)
Press the SET button to confirm your choice.
6. Press the NEXT button to select Yes or No to accept the
selection.
a. Selecting No will bring you back to the main
menu.
b. Selecting Yes will take you to the following
apply changes menu.
Press the SET button to confirm your choice.
Apply Changes Steps
7. Press the NEXT button to select either NOW or LATER.
a. Selecting NOW will cause the node to reset and
apply the new setting.
b. Selecting LATER will cause the new setting to be
saved in memory, you must accept the saved
changes before your next power cycle otherwise
they will be lost.
Press the SET button to confirm your choice.
Note:
By choosing LOCKED, the manifold configurations will be
stored in memory and the PHYSICAL manifold
configuration cannot be changed. UNLOCKED, the
manifold configurations can be changed without errors.
SETTINGS
CONFIG LOCK
CONFIG LOCK
UNLOCKED
UNLOCKED
MODULE 1
LOCKED Y N
NOW LATER
LOCKED
RETURN
 Loading...