6.3 Remote controls
6.3.1 Optional remote control functions
Programming and setting mode
Check that the unit is stopped, if not switch it off.
Press the OK and RESET buttons on the remote control at the same time for more
than 3 seconds.
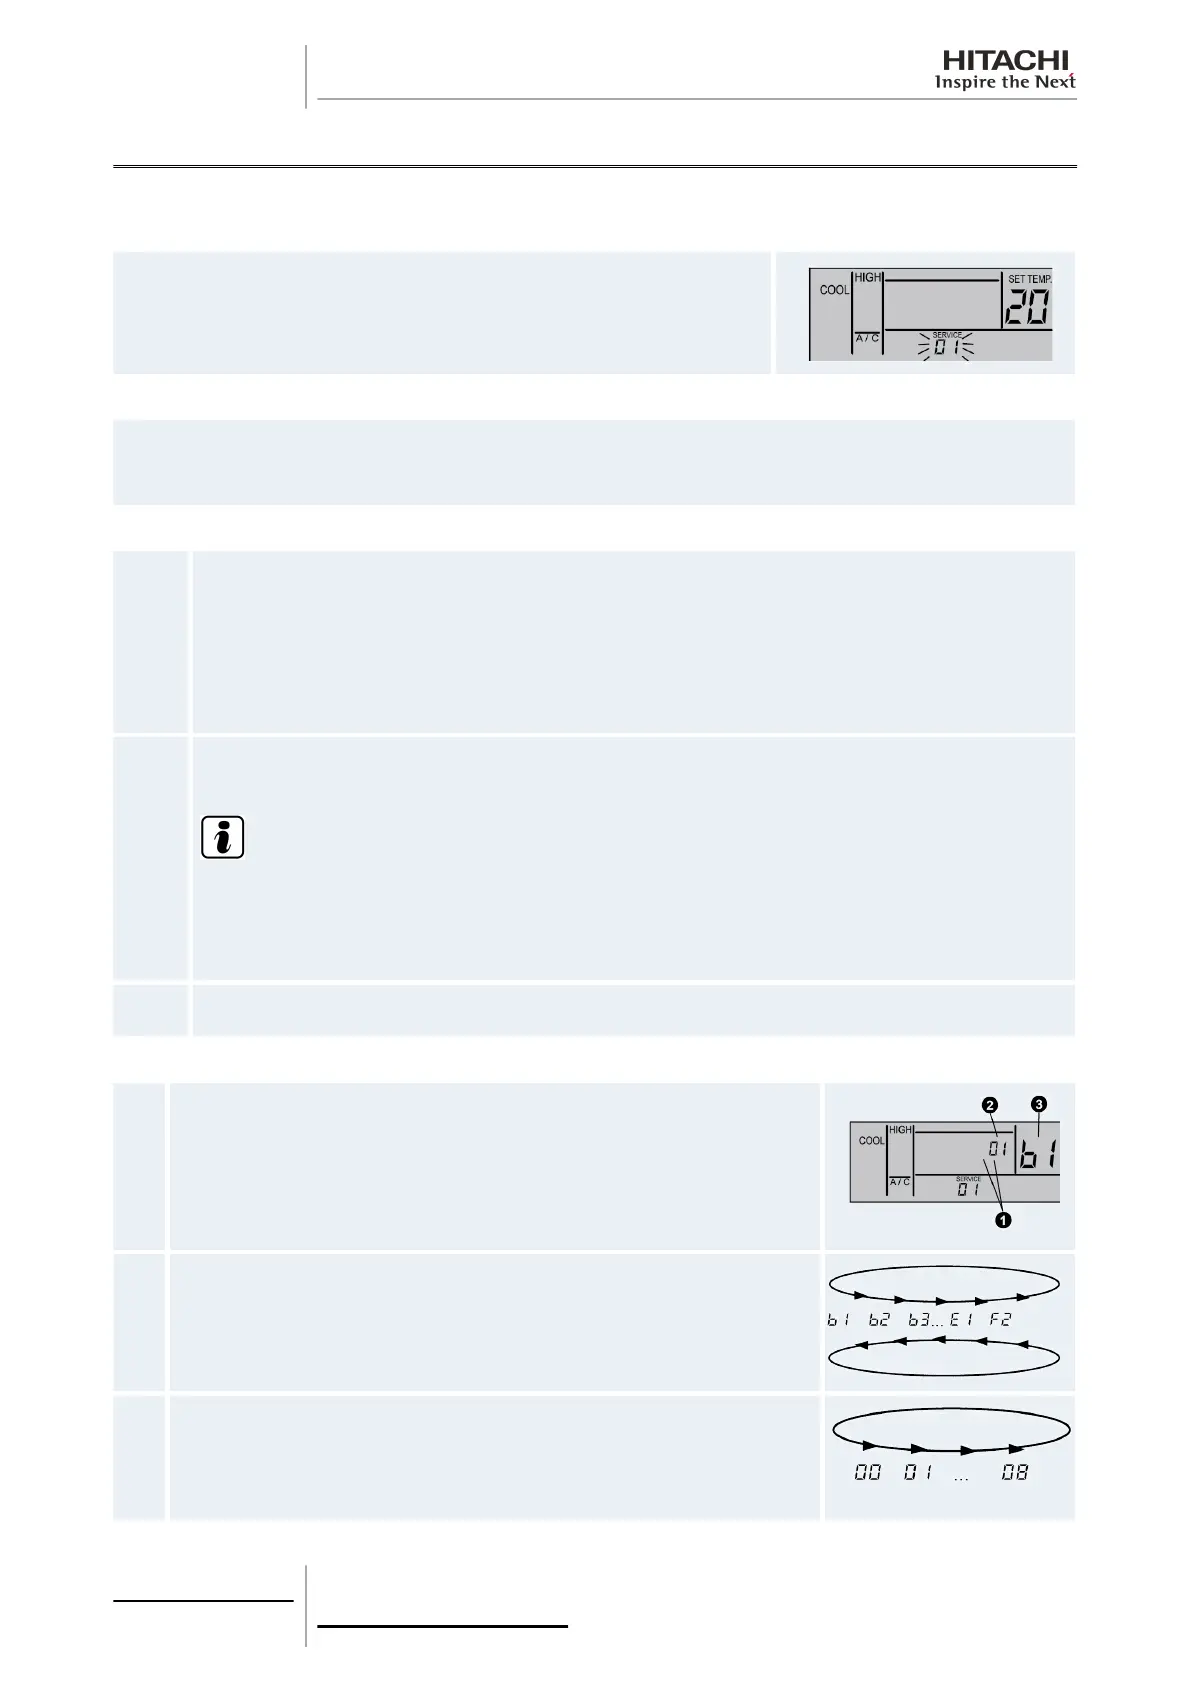
The screen will display SERVICE and the following indication will flicker: 01.
Selection of SERVICE 01
Press TEMP▲ or TEMP▼ to change the value of the number flickering below the SERVICE display.
Select 01 and press the OK button, or maintain the indication for 7 seconds for the remote control to change to the optional
setting mode.
Indoor unit selection
a.
In SERVICE 01 mode, the indication changes as shown in the figure.
1 Indication 01 enabled.
2 Indication of the indoor unit on which the optional function is to be set (displayed in the time indication
segments for the timer setting and the ADDS indication is displayed below).
3 Indication of the refrigerant cycle number of the outdoor unit on which the optional function is to be set
(displayed in the time indication segments for the timer setting and the RN indication is displayed below).
4 The temperature setting display disappears.
b.
In the previous step (a), press TEMP ▲ or TEMP ▼ on the remote control to select the indoor unit on which
the optional function is to be set.
N O T E
• The indoor unit can be selected from the indoor units connected to the remote control.
• If the direction and refrigerant cycle number indication is AA, the settings of all the indoor units are
the same.
c.
After selecting the indoor unit, press the OK button, or maintain the indication for 7 seconds for the remote
control to change to the optional setting mode.
Changing the optional signals and setting conditions
a.
In optional setting mode, the remote control indication changes as shown below:
1 The ADDS and RN indications are off.
2 The optional function setting condition is displayed in the time indication
segments for the timer setting.
3 The optional function number is indicated in the temperature setting segments.
b.
Press the DAY▲ or SCHEDULE▼ button on the remote control to select the port
to which the input and output signals are to be assigned.
c.
Press the OK button. The port indication in the temperature indication segments
change as shown in the figure below.
6 Optional functions
196
SMGB0063 rev. 1 - 10/2010
 Loading...