8.1 Self-check of the indoor unit PCB (for RPK only)
• Self-check procedure using indoor PCB relays.
– To check faults on the indoor unit PCB due to malfunctioning.
– To check faults on the indoor unit PCB according to the results of the self-check using the CHECK button on the
remote control and the auto-control function.
Enable switch 1 and disable switch 2
• Procedure
1 Turn off the main power supply switch.
2 Disconnect connectors CN7 and CN8.
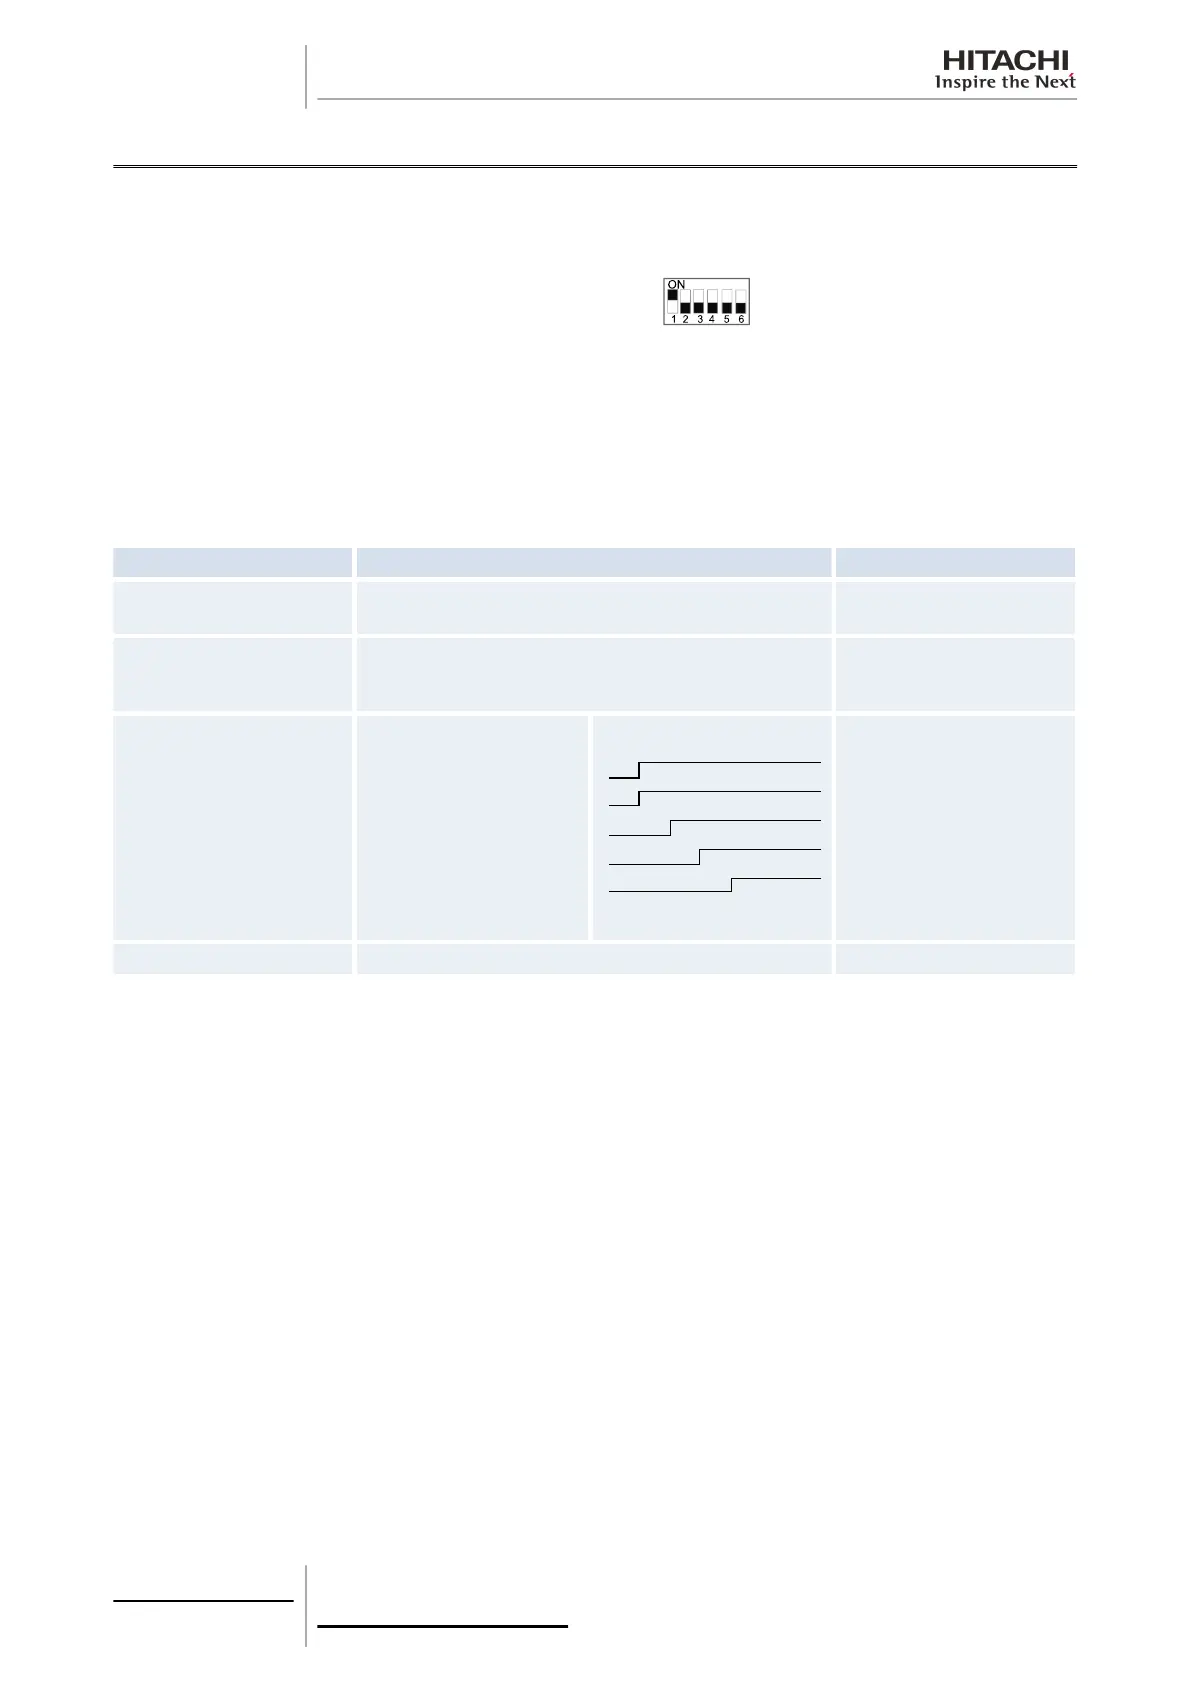
3 Adjust the DIP DSWN switch as shown below.
4 Turn on the main power supply switch. Select the operating mode (see below).
– Analogue test.
– Relay test.
5 On completion of the self-check, switch off the power supply and restart the DIP switch.
Self-check procedures RPK-FN(H)2M
Check point
Mode status Confirmation method
Start the expansion valve
and the automatic louver
The expansion valve fully open → fully closed. Louver
stopped horizontally.
Analogue test
If the air inlet temperature thermistors, the air discharge
temperature thermistors and the antifreeze protection are
normal, go to the next step of the procedure.
Test on each relay
Fan 52H1, 2, 3
Low: Part of the wireless
receiver.
Red: Part of the wireless
receiver.
Green: Part of the wireless
receiver.
Yellow
Check the ON/OFF sound of
the relays and that the LED
is on.
Conclusion Switch all DIP switches off and on as shown above.
8 Troubleshooting
232
SMGB0063 rev. 1 - 10/2010
 Loading...